Basics of Rendering Lard
For those new to traditional cooking, understanding the basics of rendering lard is essential. This classic ingredient, used for generations in sautéing and frying, adds incredible flavor and texture to dishes, making it a prized component in many kitchens.
What is Lard?
Lard is rendered fat obtained from various parts of the pig, including the back, around the kidneys (known as leaf lard), and the belly.
The basics of rendering lard involve selecting the right type of fat and following the proper process, which significantly impacts the quality and flavor.
In Mexico, lard is a key ingredient in making some of the best refried beans, sopes, enchiladas, carnitas, and tamales. Additionally, you can use the browned cracklings left behind in dishes or as toppings to add extra flavor and texture.
Cooking Staple
Buying carnicería-rendered lard in Mexico is an experience in itself. The lard packs incredible flavor and transforms dishes into something truly unique that can only be replicated with its distinct taste.
Now, you can make your own, and to be honest, homemade lard will always taste better, no matter where you are in the world. It all starts with one main ingredient: pork fat.
Basics of Pork Fat Types
The quality of lard is influenced by the type of fat used in its preparation. Understanding the basics of rendering lard and choosing the right fat sources can significantly affect the flavor, texture, and overall quality of the final product.
Here are three top choices for producing exceptional lard:
- Leaf lard is regarded as the highest quality pork fat, perfect for both cooking and baking. Sourced from the fat around the kidneys, it boasts a mild flavor and a delicate, smooth texture, without a strong pork taste.
However, leaf lard can be challenging to find and may require a visit to specialty butcher shops, or farmers’ markets. Additionally, it may come at a higher cost.
- Fatback is a thick layer of fat from the pig’s back is known for its firmness and slightly more pronounced flavor.
However, in my experience, its flavor remains relatively mild and can be used without overpowering dishes. It offers a great balance of flavor and texture, making it a versatile choice.
- Pork belly is also a great choice for making lard, but aim for a cut that’s high in fat and low in meat. This will render a lard with a more pronounced pork flavor, making it ideal for dishes that benefit from a distinctive taste, such as refried beans.

If you can get fat from pasture-raised or organic pork, it will make a significant difference in flavor and quality.
What Pot to Use for Rendering Lard?
Use a non-reactive, heavy-bottomed pot, such as a Dutch oven. This type of pot ensures even heat distribution and helps prevent burning or scorching. Suitable options include:
- Dutch oven
- Stainless steel
- Enameled cast iron
How Do I Render Lard at Home?
Prep The Pork Fat
Chill the lard slightly in the freezer to make cutting easier, but do not let it freeze completely. Trim away as much meat as possible from the fat, though a small amount of meat is fine.
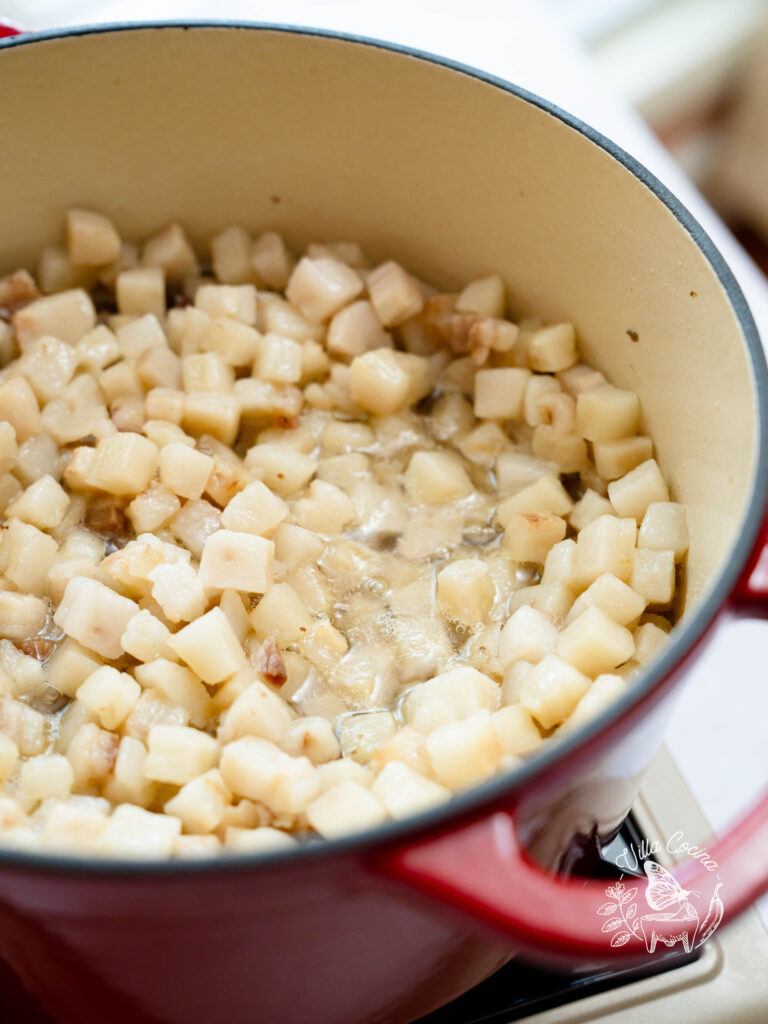
Then, cut the fat into small cubes for easier rendering. Place the cubed fat into a medium to large non-reactive, heavy-bottomed pot.
Render Lard
Cover the pot and slowly render the fat over low heat, making sure there’s no major sizzling. Stir every 30 minutes, or as needed, to prevent sticking or burning.
After about 1.5 hours, the rendering process should begin. If needed, stir more frequently to prevent sticking.
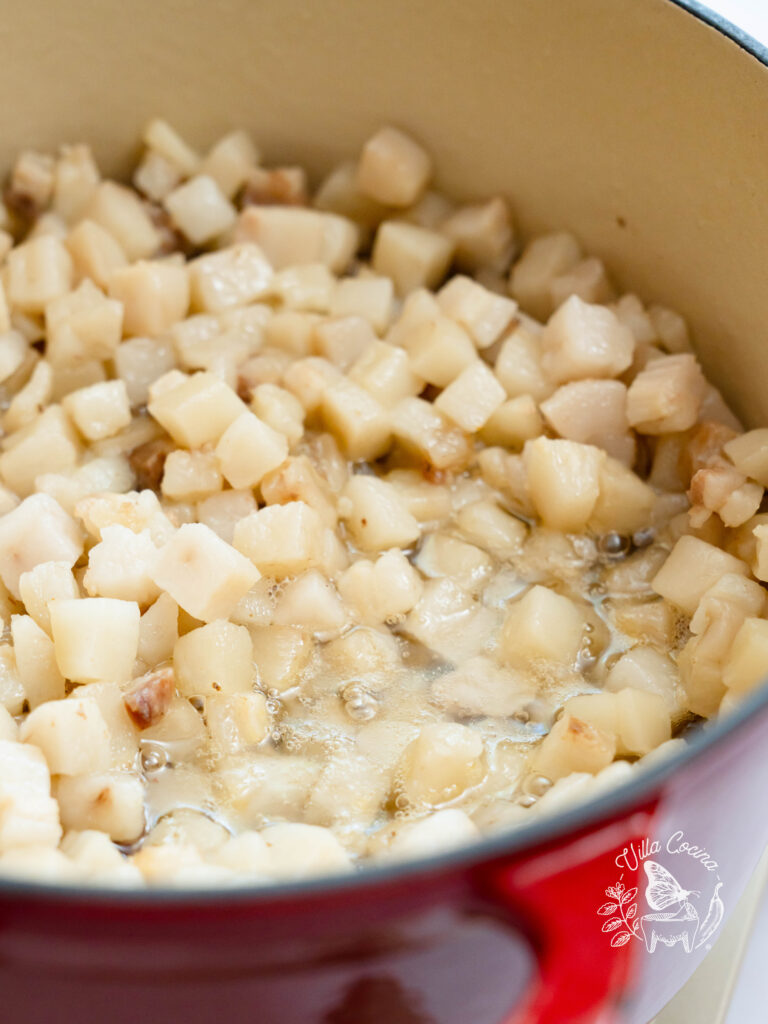
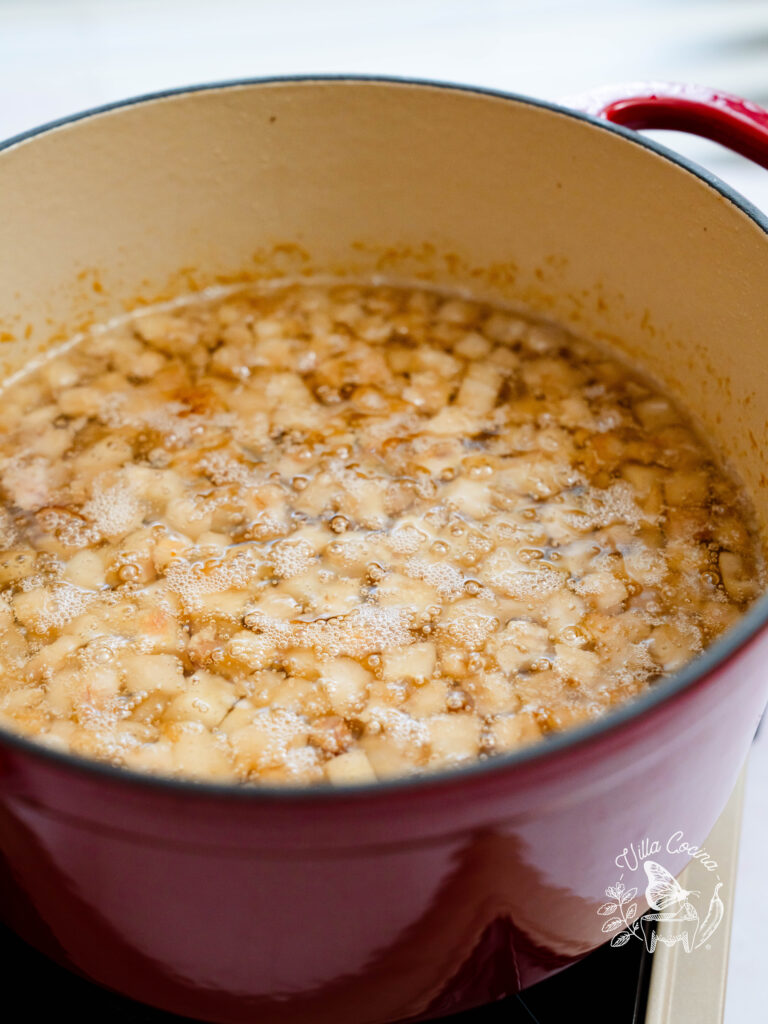
After about 4 hours, you will have rendered most of the lard, accompanied by a light sizzle. Strain it through a fine-mesh strainer lined with cheesecloth into a heatproof container, leaving enough fat in the pot to cover the pork cubes.
Continue rendering the remaining fat at the same temperature until the leftover pork bits turn brown. This will create your second batch of lard and should take about 30 minutes to 1 hour.
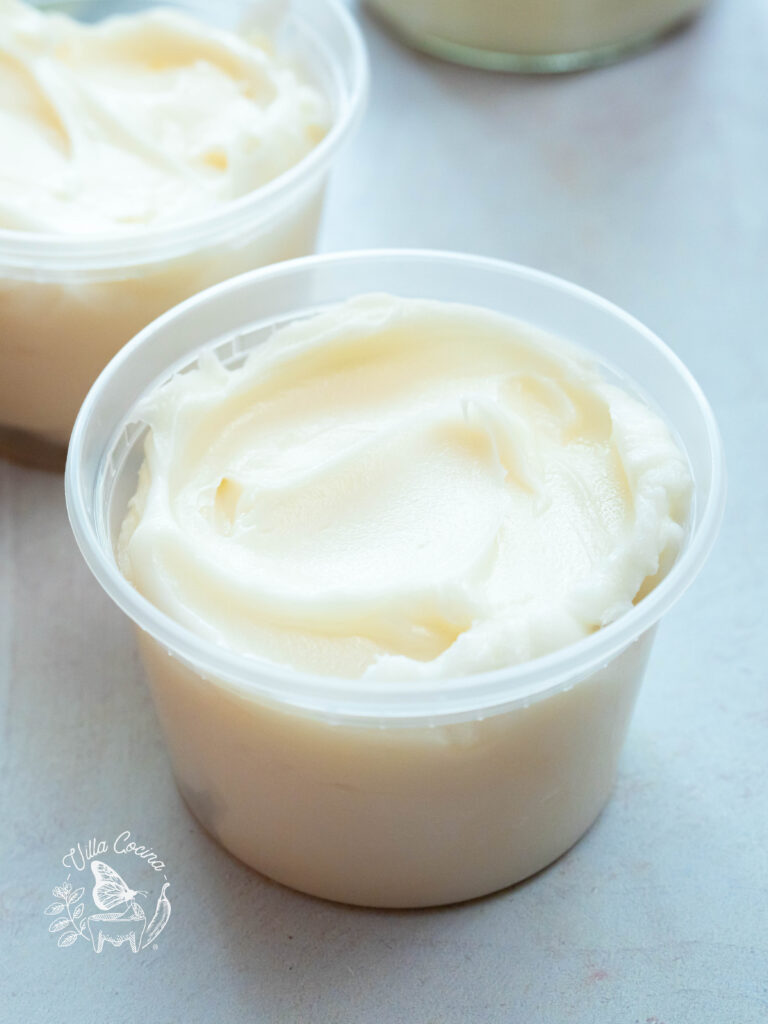
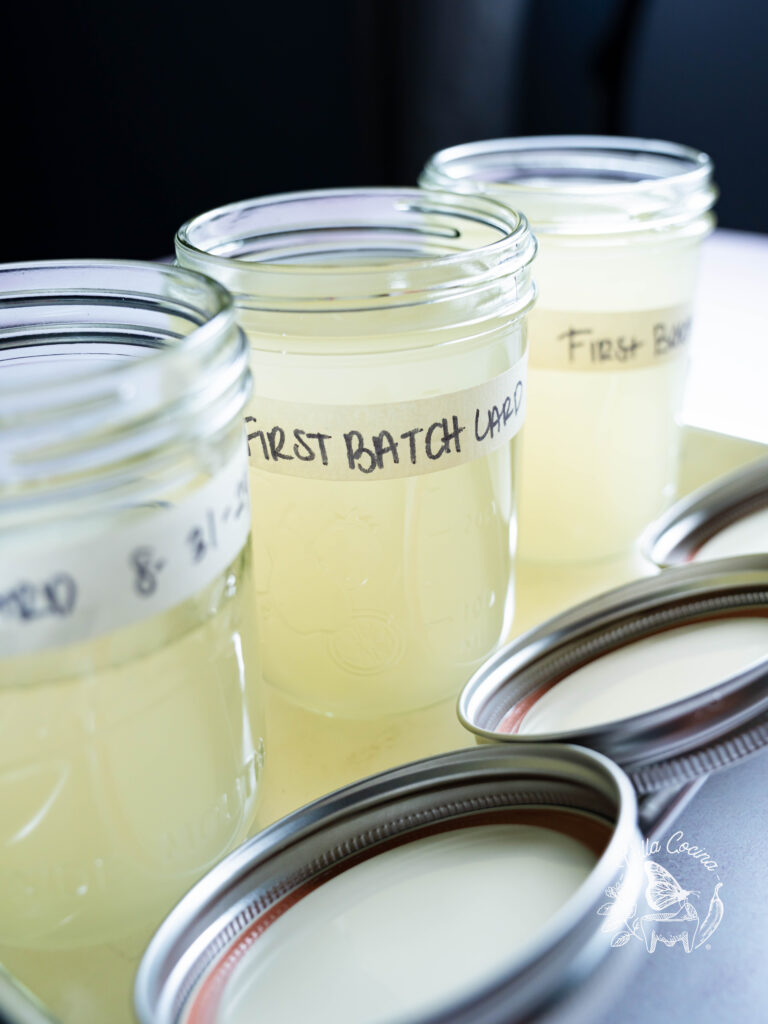
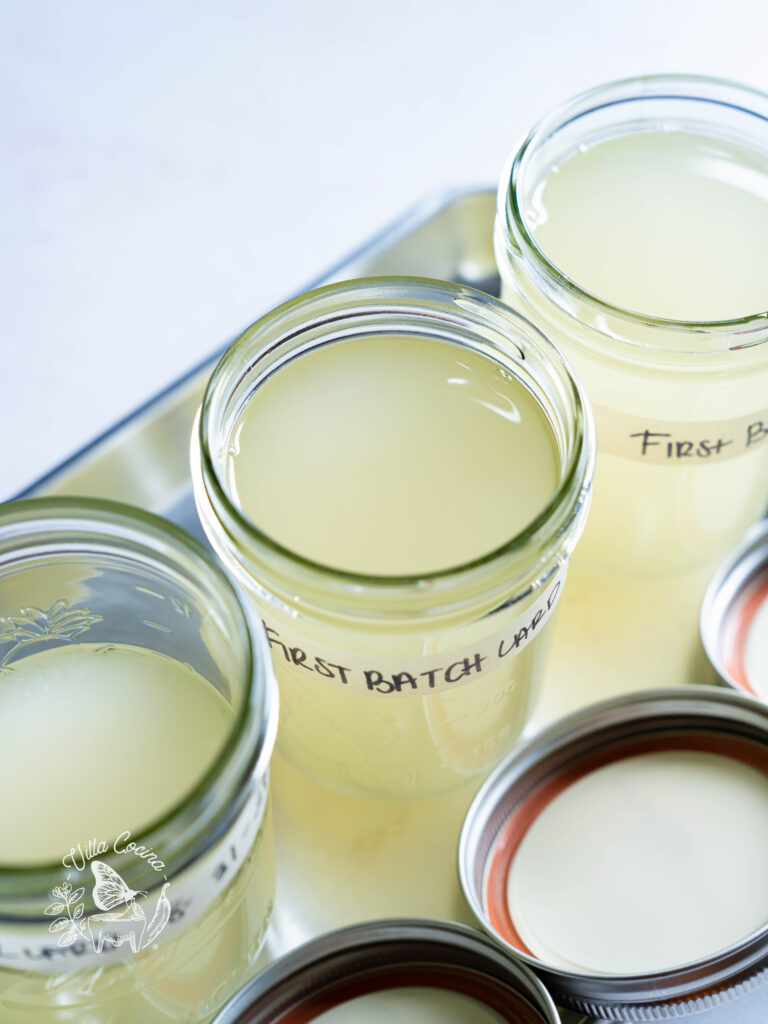
Allow the strained lard to cool slightly. Pour it into airtight, non-reactive, heatproof containers, such as straight-sided mason jars (without shoulders), leaving some headspace at the top. Let the lard cool completely before covering with the lids. Label the containers with “Batch #1” and the date.
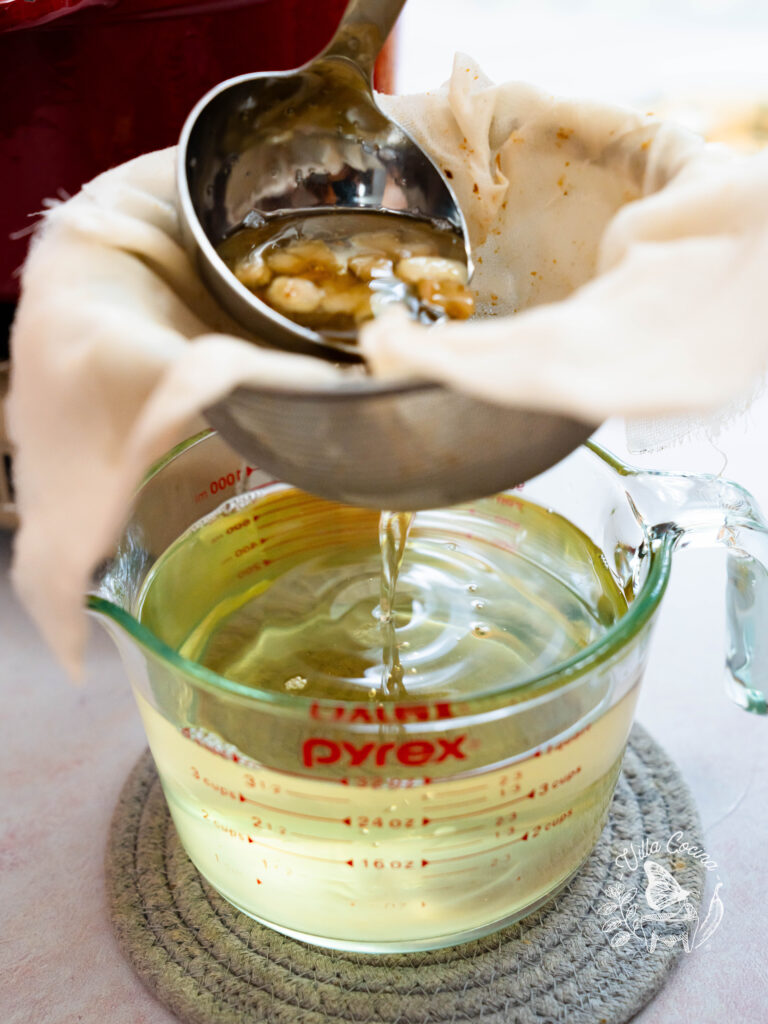
When the second batch is ready, carefully strain it as you did with the first batch, taking precautions with the hot liquid. Press down on the pork cubes while straining to extract as much lard as possible.
Allow the second batch to cool slightly, then pour it into jars labeled “2nd Batch” with the date, leaving some headspace at the top. Let the lard cool completely before covering and storing.
Strain and drain the cracklings. Use in other dishes, such as refried beans, sopes, or stews.
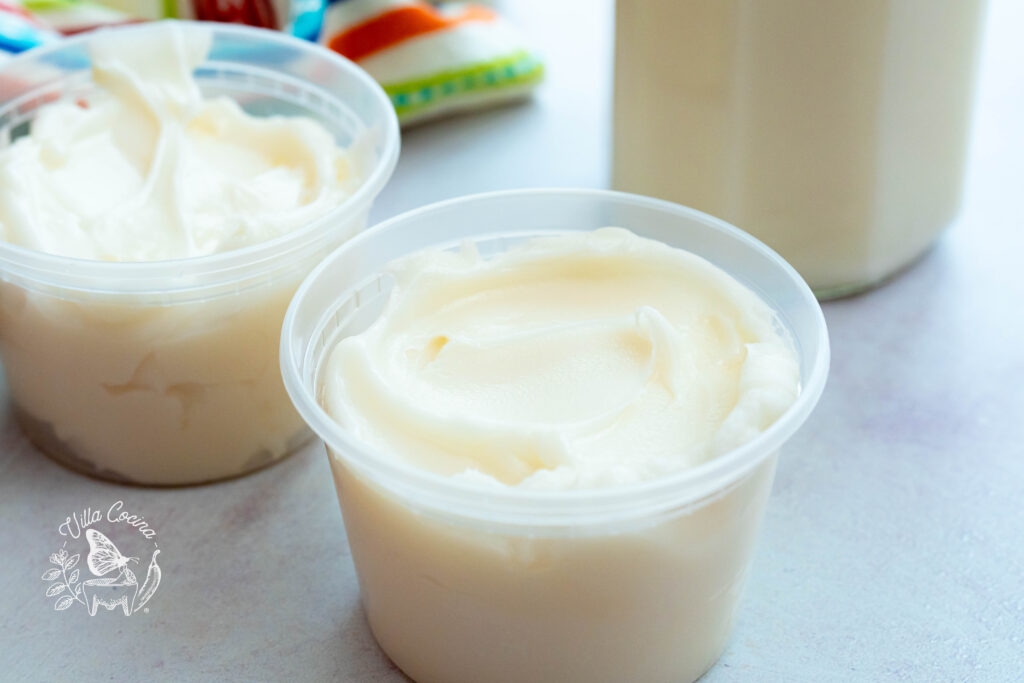
Store lard in the refrigerator for daily use. To extend its shelf life, freeze some of it in freezer-friendly containers specifically labeled as such, and avoid using jars with shoulders.
Recipe Video Tutorial
Below is my easy to follow video tutorial on the Basics of Rendering Lard.
Enjoyed the video? Subscribe and tap the bell for updates on new recipes. Thank you for your support!
One Recipe, Two Lard Variations
This recipe for rendering lard produces two distinct products. Both Batch Number One and Batch Number Two originate from the same process but differ slightly in color, aroma, and flavor.
Batch #1: The first batch yields the highest amount of lard and is the purest, with fewer residuals. It has a lighter color, usually white, and a cleaner taste.
Batch #2: This batch has a stronger, more pronounced flavor due to the browning of the pork fat, resulting in a slightly darker color. Use it for dishes where you want a robust pork flavor, such as refried beans.
With these basics of rendering lard, you can end up with two delicious products that have slight differences in flavor.
Helpful Tips:
- Chill the fat in the freezer until it is firm, but avoid freezing it completely. Alternatively, you can refrigerate it. The goal is to make the fat firm enough for easier cutting.
- Dice the fat into small, even pieces to ensure it renders evenly.
Storing Tips
- Store the lard in airtight, non-reactive, heatproof containers, such as straight-sided mason jars (without shoulders), leaving enough headspace at the top to allow for expansion.
- If freezing, use freezer-friendly containers specifically labeled as such.
- Let the lard cool completely before covering with the lids. Label the containers with “Batch number ” and the date.
- Refrigerate for 3 to 6 months.
- Freeze for up to 1 year.
FAQs : Your Questions Answered
Q: Can I use lard for baking?
A: Absolutely! Lard creates the flakiest, softest desserts and excels at making flour tortillas.
Q: Can I reuse the cracklings left after rendering lard?
A: Yes, you can use the cracklings in other dishes to add flavor and texture, such as refried beans or tacos.

Basics of Rendering Lard
Ingredients
- 4 lbs pork fatback
Instructions
- Chill the lard slightly in the freezer to make cutting easier, but do not let it freeze completely. Trim away as much meat as possible from the fat, though a small amount of meat is fine.
- Then, cut the fat into small cubes for easier rendering. Place the cubed fat into a medium to large non-reactive, heavy-bottomed pot.
- Cover the pot and slowly render the fat over low heat, making sure there’s no major sizzling. Stir every 30 minutes, or as needed, to prevent sticking or burning.
- After about 1.5 hours, the rendering process should begin. If needed, stir more frequently to prevent sticking.
- After about 4 hours, most of the lard will be rendered, with a light sizzle. Strain it through a fine-mesh strainer lined with cheesecloth into a heatproof container, leaving enough fat in the pot to cover the pork cubes.
- Continue rendering the remaining fat at the same temperature until the leftover pork bits turn brown. This will create your second batch of lard and should take about 30 minutes to 1 hour.
- Allow the strained lard to cool slightly. Pour it into airtight, non-reactive, heatproof containers, such as straight-sided mason jars (without shoulders), leaving some headspace at the top. Let the lard cool completely before covering with the lids. Label the containers with "Batch #1" and the date.
- When the second batch is ready, carefully strain it as you did with the first batch, taking precautions with the hot liquid. Press down on the pork cubes while straining to extract as much lard as possible.
- Allow the second batch to cool slightly, then pour it into jars labeled "2nd Batch" with the date, leaving some headspace at the top. Let the lard cool completely before covering and storing.
- Strain and drain the cracklings. Use in other dishes, such as refried beans, sopes, or stews.
- Store lard in the refrigerator for daily use. To extend its shelf life, freeze some of it in freezer-friendly containers specifically labeled as such, and avoid using jars with shoulders.
Notes
- Chill the fat in the freezer until it is firm, but avoid freezing it completely. Alternatively, you can refrigerate it. The goal is to make the fat firm enough for easier cutting.
- Dice the fat into small, even pieces to ensure it renders evenly.
Nutrition
Did you make this recipe?
Show some love! Tag @villacocinaofficial on Instagram and drop a 5-star review. Your support means everything—thanks!
Joy
Came out great
Villa Cocina
Great! Thanks for the review!