Stuffed Chilaquiles Verdes
Cheesy Stuffed Chilaquiles Verdes: A Tasty Twist on a Mexican Classic!
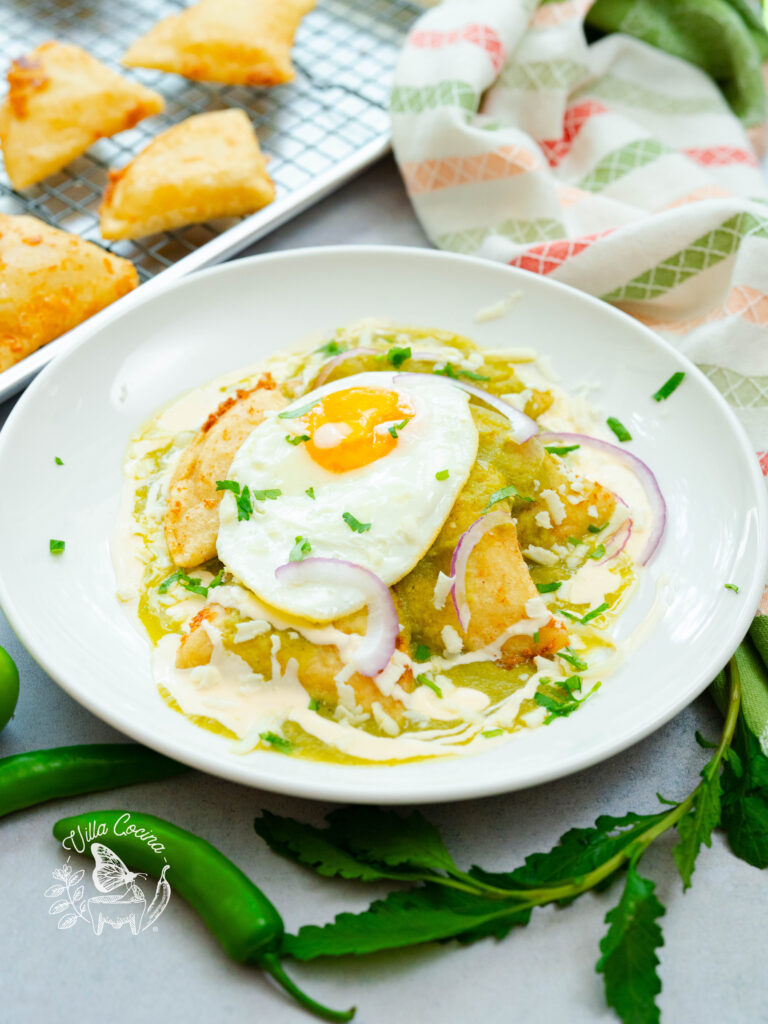
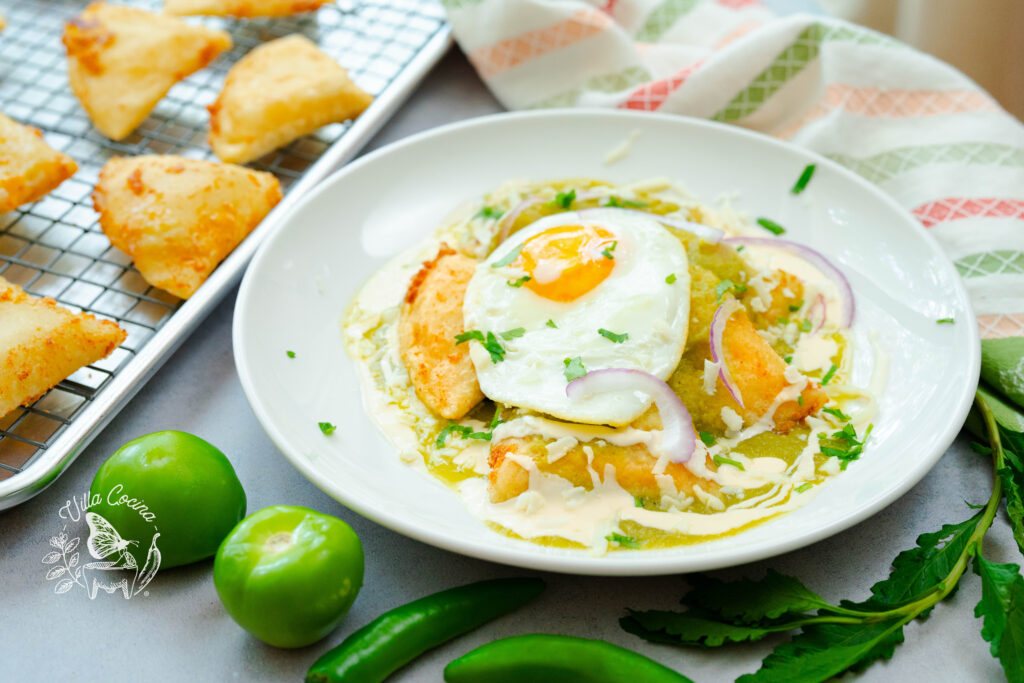
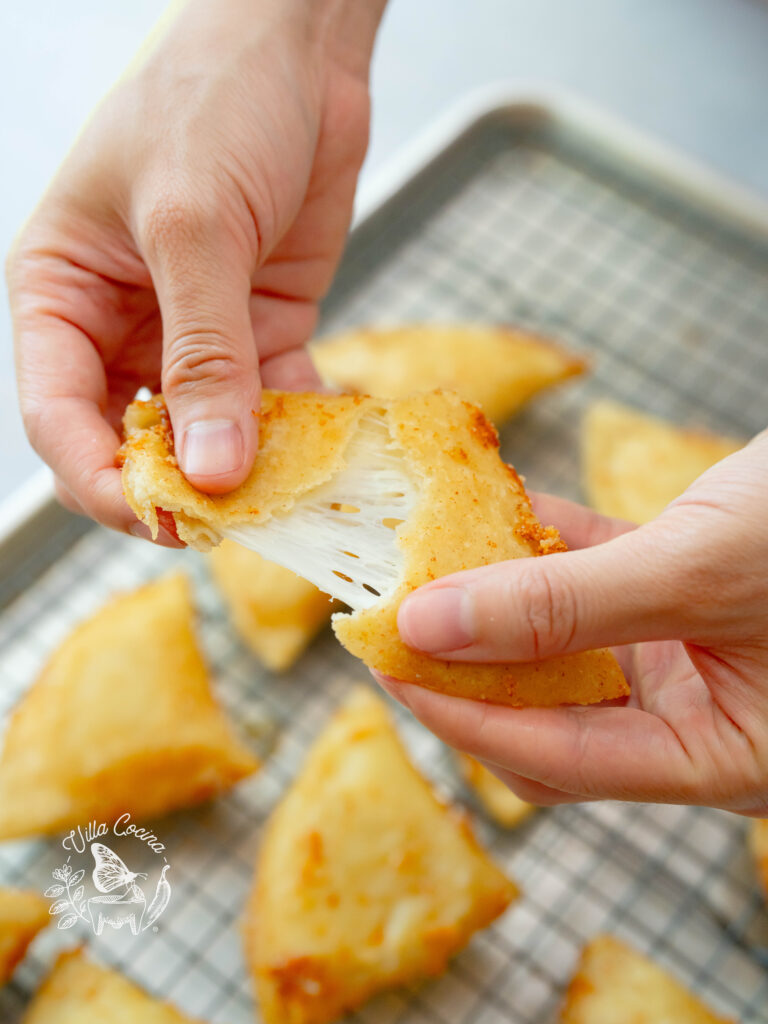
We’ve taken Chilaquiles verdes to the next level by stuffing them with melted cheese, like a Mexican ravioli. These stuffed Chilaquiles Verdes are drenched in a rich salsa verde and topped with a variety of traditional toppings, creating a complete and family favorite meal.
Stuffed Chilaquiles is one dish that disappears fast because it’s so good! Do yourself a favor and give this recipe a try – you’ll fall in love with the flavors, textures, and convenience. Plus, it’s easy on the wallet! A win-win situation.
Chilaquiles: A Traditional Mexican Dish
Chilaquiles, meaning “herbs or greens in a chile sauce,” are crispy fried corn tortillas smothered in a flavorful salsa. This combination along with regional toppings became a sensation. Here are the two most popular salsa options:
- Salsa Roja (Red): Made with Mexican dried chilis and a few spices.
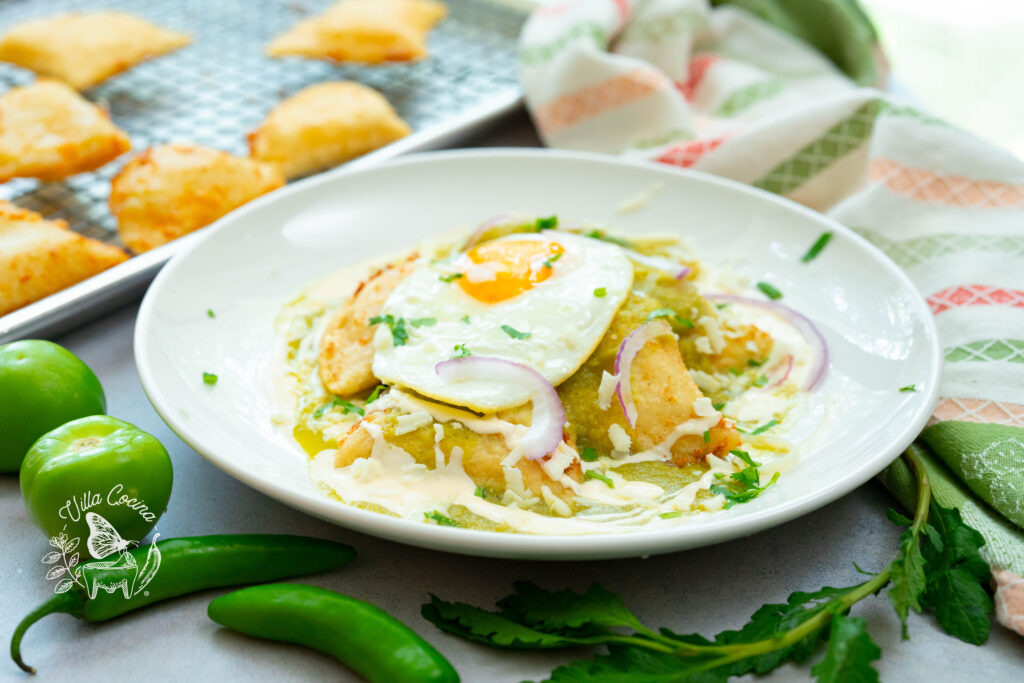
- Salsa Verde (Green): Made with tomatillos, green peppers, and cilantro.
As I get older, I appreciate family recipes like chilaquiles. This dish has been a favorite, and I love that it was created to avoid wasting food. Someone turned stale tortillas into a delicious meal, and it’s been a tradition ever since.
Chilaquiles verdes just got a whole lot better – stuffed!
Ingredients
- Tomatillos are a small, green fruit with a tart flavors, encased in a papery husk. A key ingredient in salsa verde, distinct from green tomatoes.
- White onions (cebolla blanca) are sweet and mild, adding depth to dishes without overpowering them.
- Serrano peppers are green, preserving the color of green salsa, and pack a spicy punch, making them a great addition for an extra kick of heat.
- Garlic has a complex flavor profile that is both aromatic and pungent, with sweet and nutty notes.
- Cilantro has a fresh, bright, citrusy flavor and a pronounced aroma.
- Chicken broth adds a rich, savory flavor, and enhances the overall taste.
- Epazote has an earthy flavor similar to oregano, but with a more robust and distinctive taste.
- Corn Masa Harina is a type of flour made from dried corn kernels that have been soaked in a lime solution until soft, then ground into a fine powder.
- Oaxaca Cheese is a semi-soft, mild, and buttery flavor with a stringy texture. The perfect Mexican melting cheese.
- Crema Mexicana is Mexico’s sweeter, creamier version of sour cream. It’s rich, tangy, and perfectly balanced, with a heavy cream consistency, and made from cow’s milk.
How to Make Stuffed Chilaquiles Verdes
Roast the Ingredients
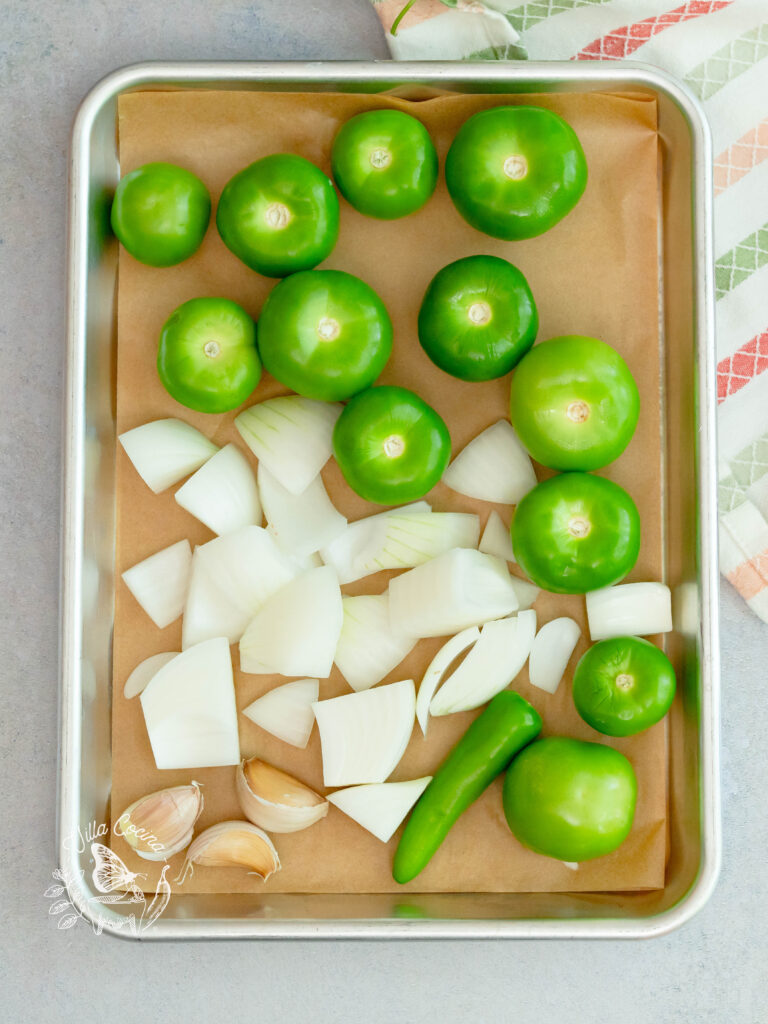
Place the salsa verde ingredients on a lined sheet pan and drizzle with a small amount of oil.
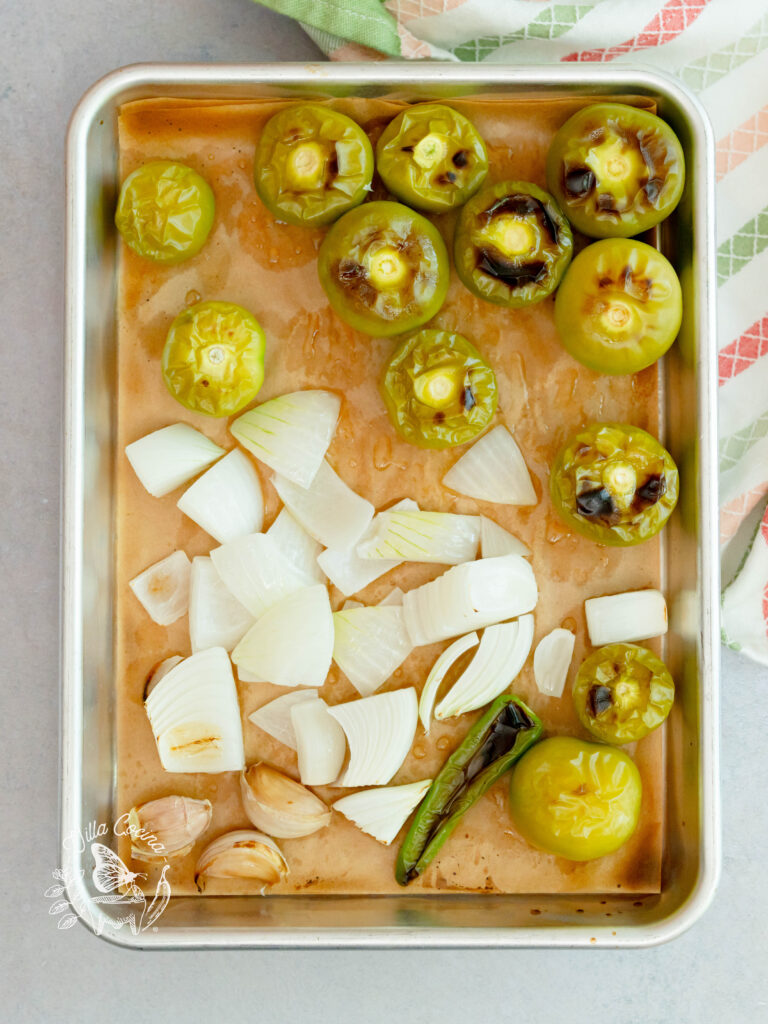
Broil on high for 8-10 minutes, with the sheet pan positioned on the top third oven rack, until the ingredients are lightly charred and cooked through.
Remove from the oven when ready and let them cool slightly.
Make the Masa
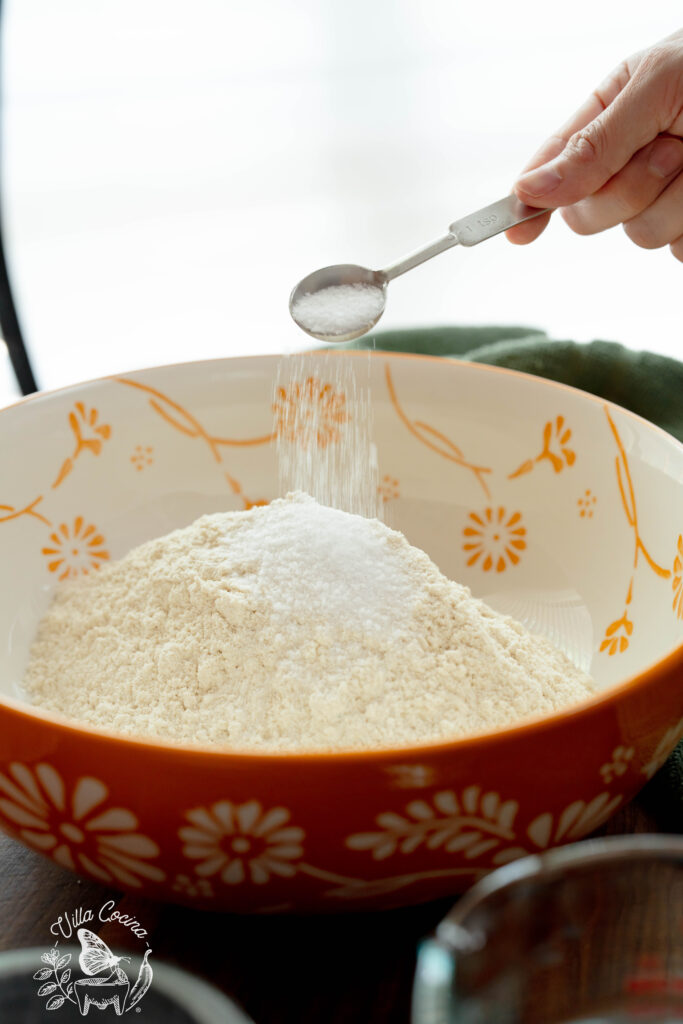
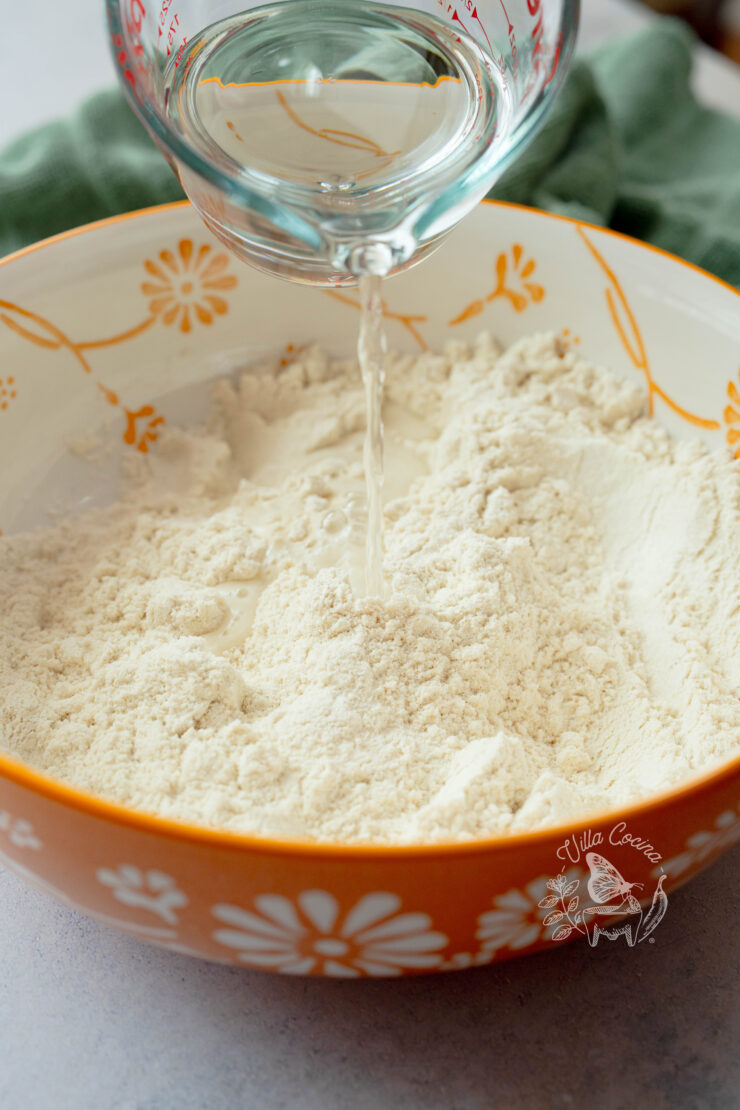
Combine the masa harina and salt in a large bowl, mixing until well distributed, then gradually pour in the warm water, mixing by hand between each addition, until the dough forms.
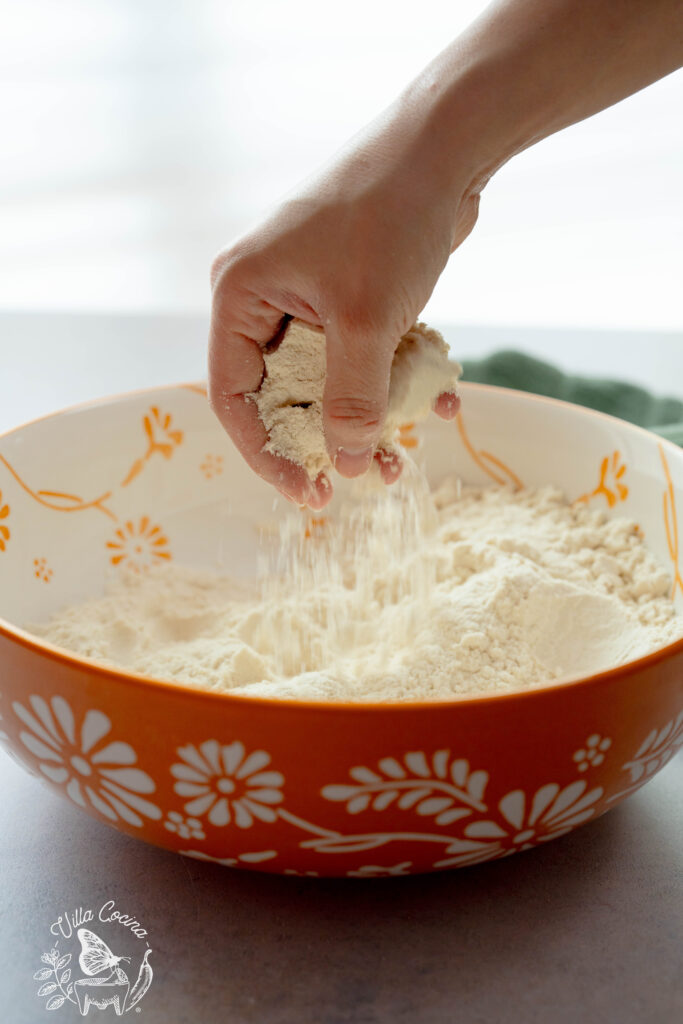
Stop adding water when the dough has reached a smooth and supple consistency, holding its shape without any dry patches or cracks. Knead the dough for 3-5 minutes until smooth.
If the dough feels too dry and cracks, add a small amount of water to restore its pliability. On the other hand, if it’s too wet and sticky, mix in a bit more masa harina to absorb the excess moisture.

Cover the dough with a clean kitchen towel or a damp paper towel to prevent it from drying out.
Finish the Salsa Verde
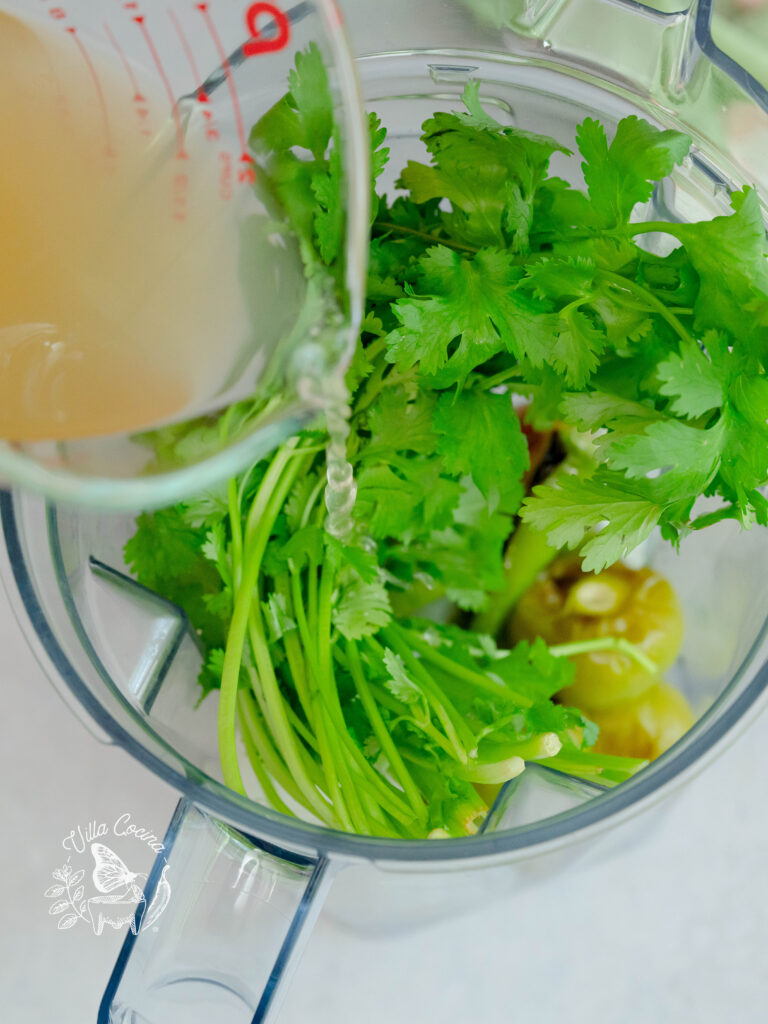
Transfer the roasted ingredients, including the peeled garlic, to a blender, add the cilantro and broth, and blend until the mixture is smooth.
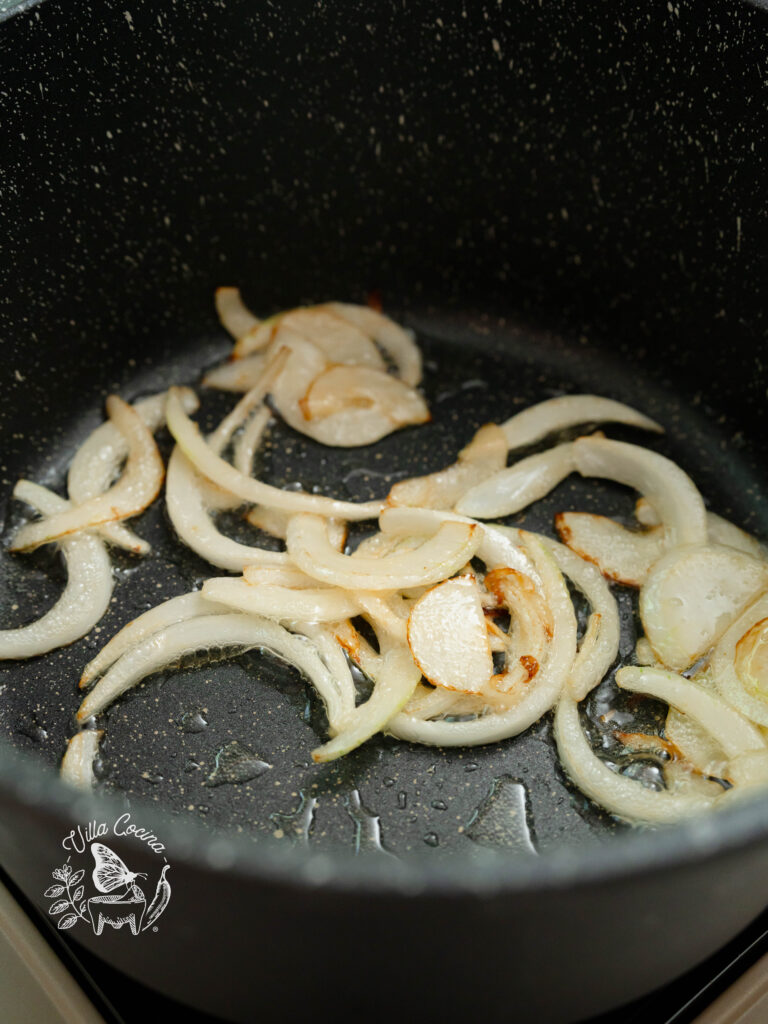
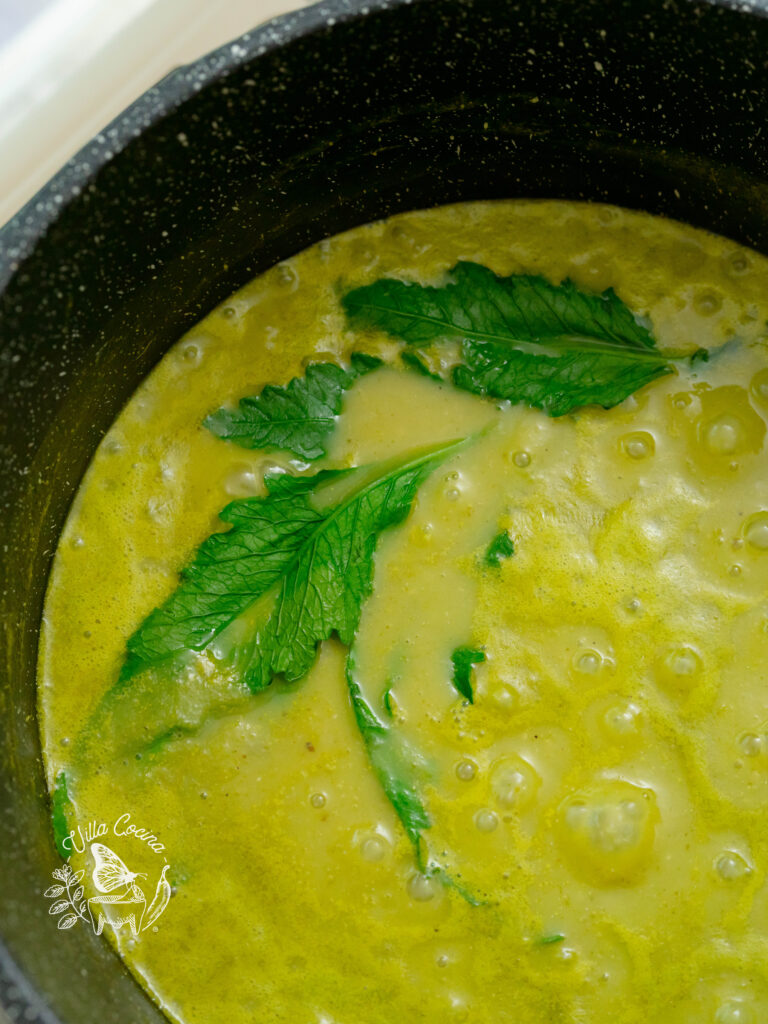
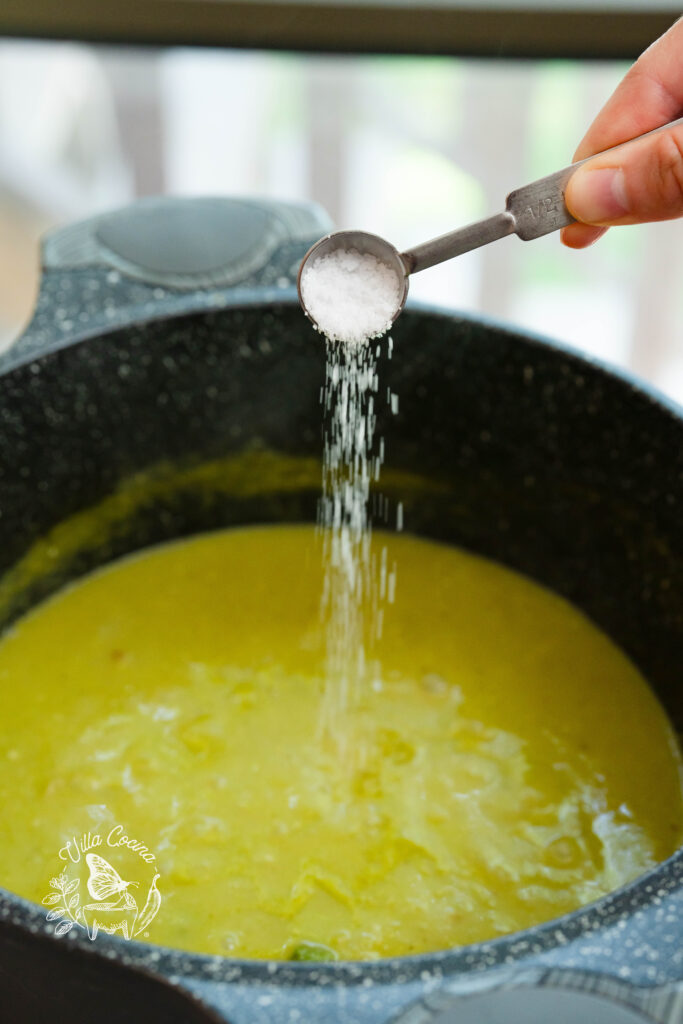
Place a medium pan or pot over medium heat, add oil, and sauté the onion until it’s lightly browned, then carefully pour in the salsa and add epazote leaves.

Bring the mixture to a boil, then reduce the heat to a gentle simmer and cook for 5 minutes, or until it slightly thickens. Season with salt, then remove from heat and set aside momentarily.
Mold the Chilaquiles
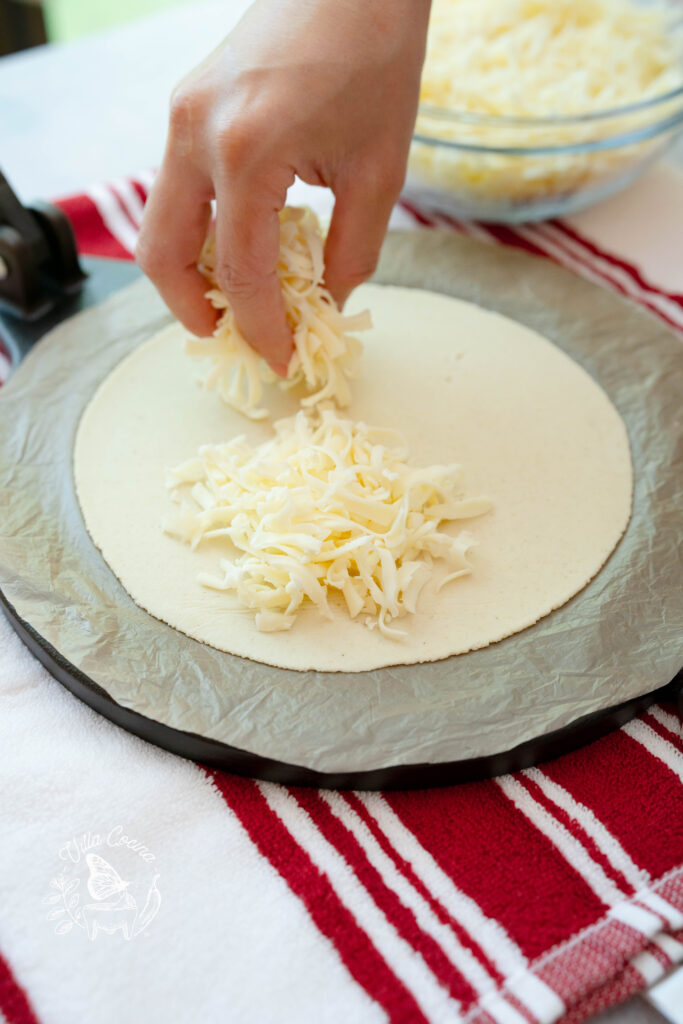
Using a tortilla press, take a ball of dough and shape it into a thick tortilla using the two plastic liners, making it slightly thicker than a regular tortilla to hold the cheese.
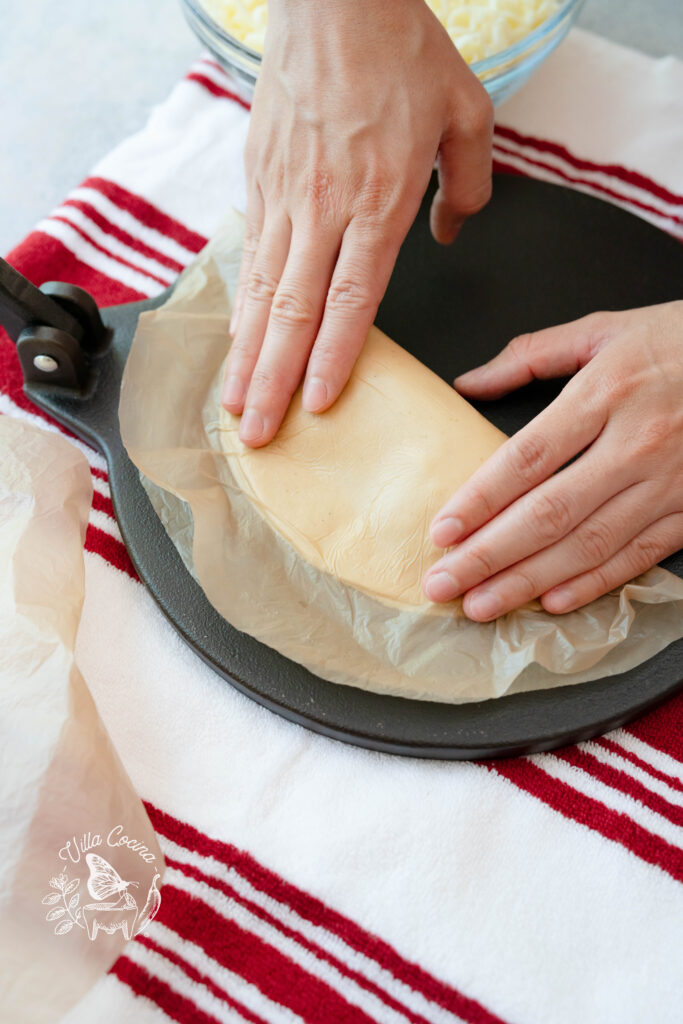
Place the cheese on half of the tortilla in two separate sections, leaving a small gap between them. Fold the tortilla in half like an empanada, pressing the edges firmly to seal the cheese inside and removing most of the air from the interior.
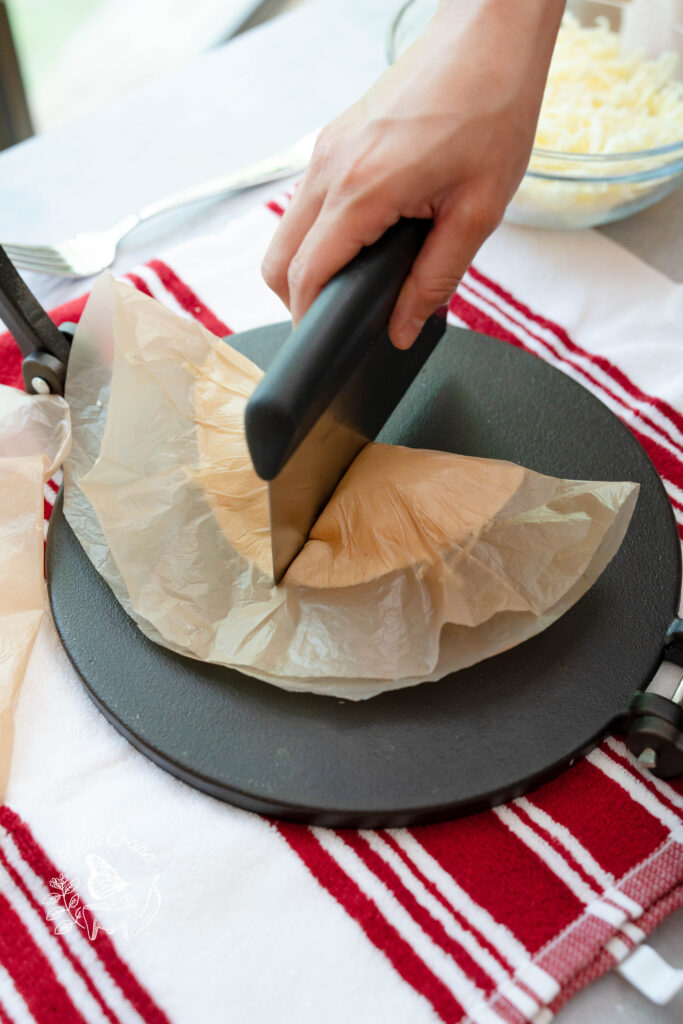
Use a bench scraper, or the handle of a spoon or fork, to cut the empanada in half. Open one half of the liner and carefully remove each half, then pinch the edges to ensure they are sealed and the filling is securely enclosed.
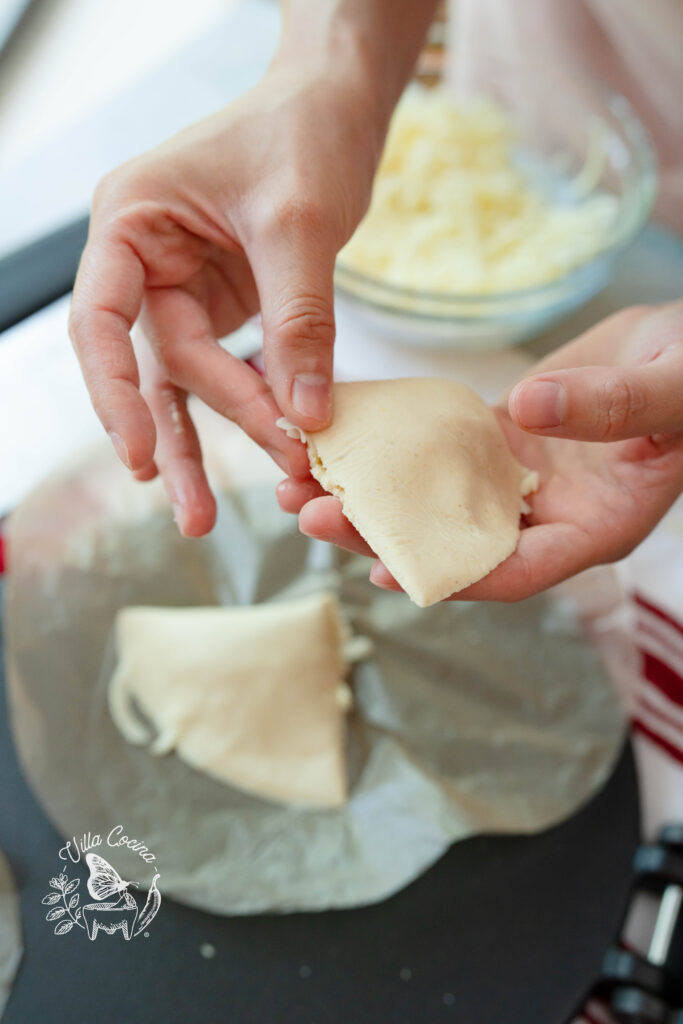
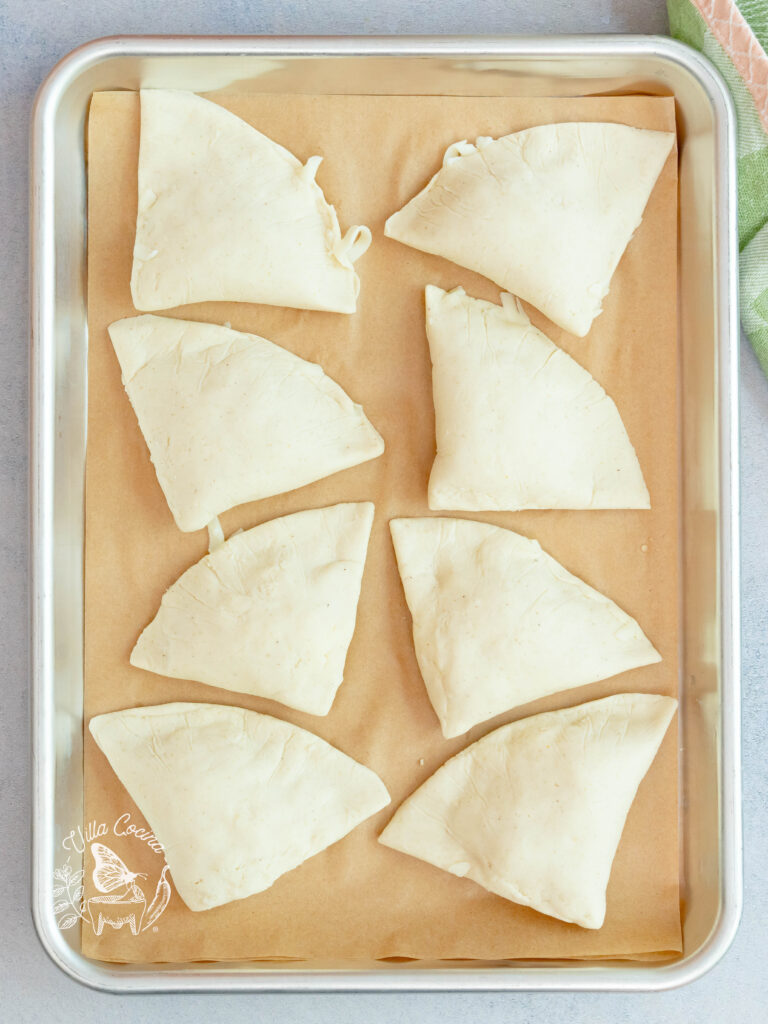
Place the filled triangles on a parchment-lined sheet pan, cover with plastic wrap, and continue making the rest.
Fry the Chilaquiles
Heat a sufficient amount of oil for frying to a temperature of 325F, and maintain a steady temperature throughout the frying process.
Fry the triangles in batches to prevent overcrowding, carefully spooning some of the hot oil over the tops.
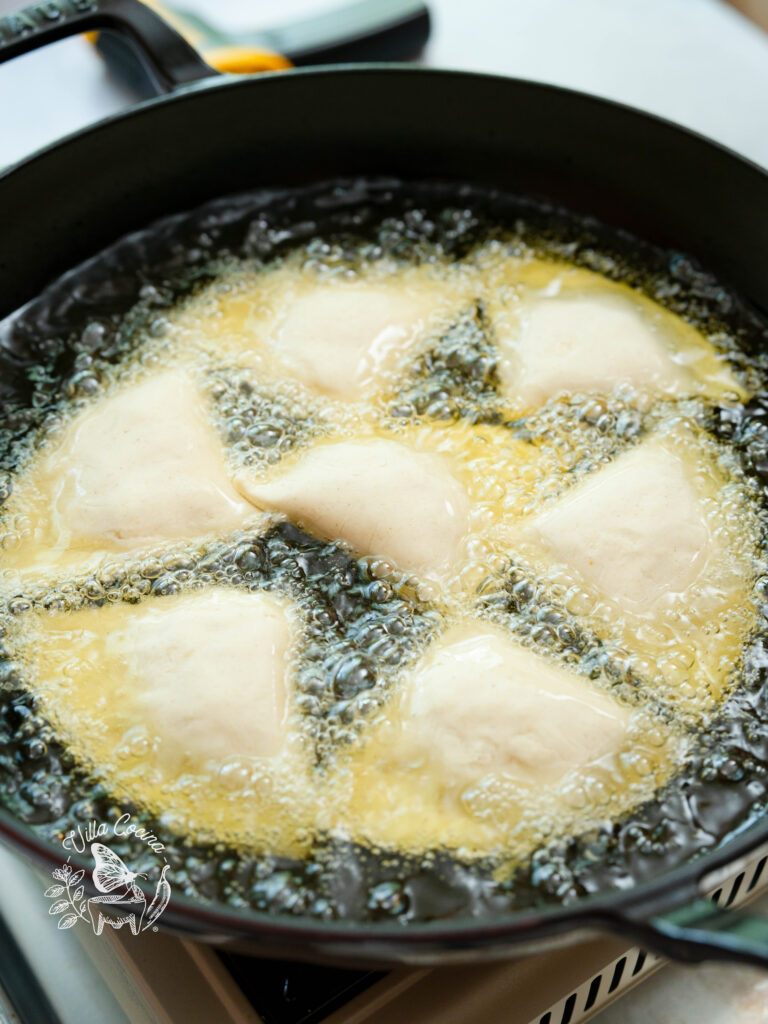
Continue frying until both sides are golden brown and cooked through. Some of the cheese may start to escape from the triangles, but by this time they should be ready to be removed from the oil. If there is any remaining cheese in the oil, use a slotted stainless steel spoon or skimmer to remove it.
Once the chilaquiles are done, remove them from the oil and place them on a rack or paper towels to drain excess oil.
Serve
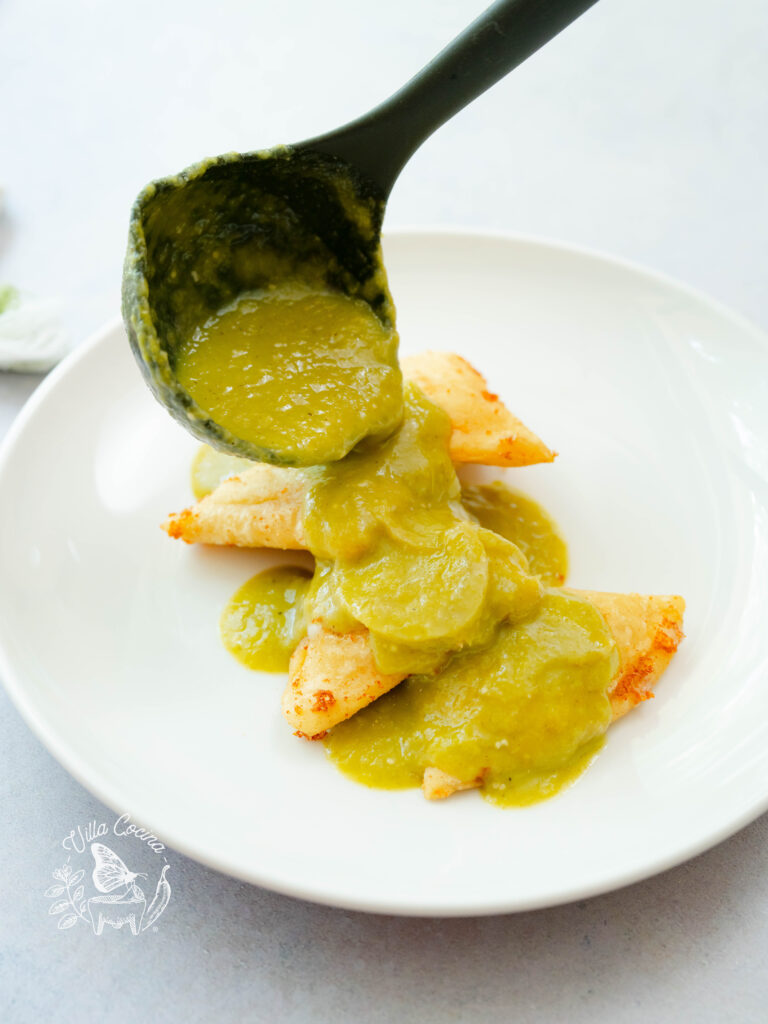
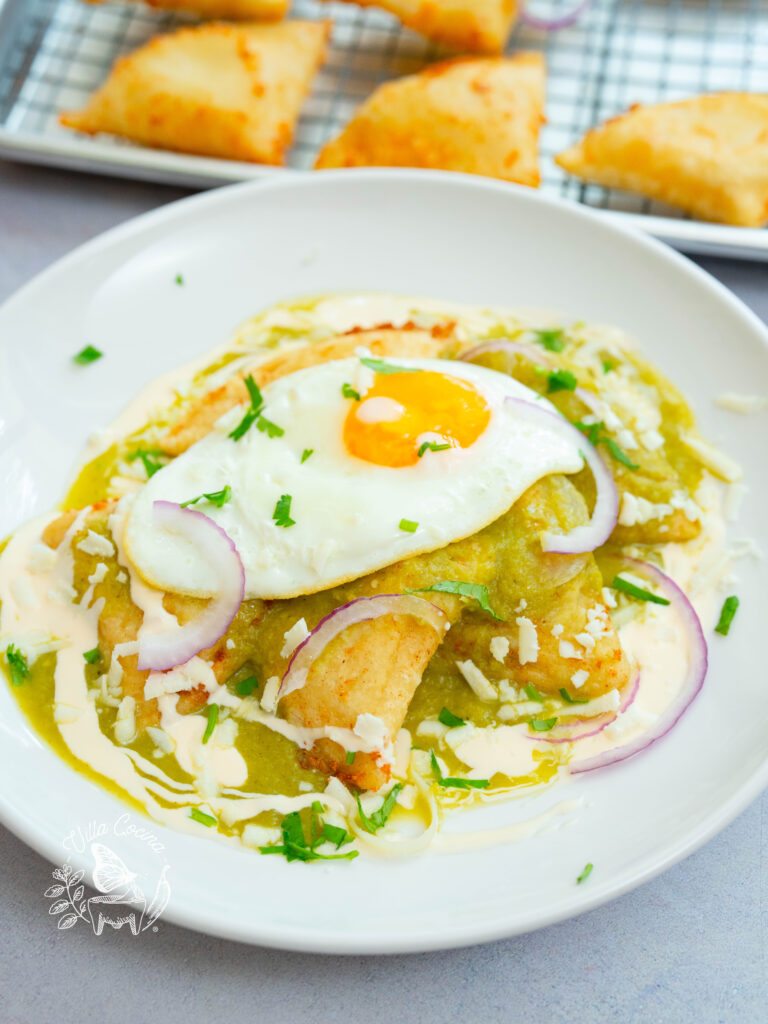
Plate the desired amount of chilaquiles, pour the reheated salsa verde over the top, add a couple of fried egg, and finish with the toppings.
Customization
This recipe offers flexibility with certain ingredients. While essential ingredients like tomatillos remain constant, others can be substituted or adjusted to taste. Feel free to experiment with:
- Serrano peppers can be substituted with jalapeños for a milder flavor, green chiles de arbol for similar heat.
- I often opt for chile de arbol myself, but in its dry red form, which slightly changes the color of the salsa, yet pairs perfectly with the tomatillos.
- Don’t have Chicken Broth? Vegetable, beef, turkey, or water are all great alternatives, depending on your personal preference.
- Using a different broth or water can change the flavor profile slightly, so feel free to experiment and adjust seasonings as needed.
- Epazote is a unique herb, and while it adds a special flavor, it’s not essential. If you don’t have it, you can simply omit it and the recipe will still turn out delicious.
- Cheeses like mozzarella, asadero, or manchego are a great Alternative to Oaxaca cheese. Adding cheddar to the mix can also enhance the flavor and create a delightful blend of tangy and sharp notes.
- Crema Mexicana and sour cream share a similar rich, creamy texture. While Crema Mexicana is sweeter and delicate, sour cream can be used in its place. Just keep in mind that sour cream has a more pronounced tanginess.
- Eggs are a great protein choice, but shredded chicken, beef, or chorizo are extraordinary choices as well.
A Dish for All Hours!
Let’s be honest, these stuffed chilaquiles verdes are perfect for any time of day – breakfast, lunch, or dinner!
I’m a fan of enjoying them at lunchtime, when I need a boost to tackle the rest of my busy day. And let’s not forget about dinner, when I’m wrapping up a chaotic day and need a delicious reward. And of course, adding an egg makes it a breakfast dream come true!
Eggs really do make everything better. But I’m coming clean on this one, I’m an egg lover so I’ll eat them at any hour! Anyone else with me on this one? I can’t be the only one!
Recipe Video Tutorial
Below is my easy to follow video tutorial on how to make these Stuffed Chilaquiles Verdes.
Enjoyed the video? Subscribe and tap the bell for updates on new recipes. Thank you for your support!
Pairings For Stuffed Chilaquiles Verdes
Chilaquiles are already a dream come true, and stuffing them with cheese takes them to the next level. But, believe it or not, they can get even better!
The key is to add some delicious sides to complement their flavor. Try pairing them with Refried Beans, creamy Guacamole, a rich Cafe de Olla (Mexican coffee), or a refreshing glass of Agua de Horchata.
If you happen to have Carnitas, Barbacoa, or Carne asada on hand? Well, you’ve hit the jackpot! And if you go out of your way to make them just to enjoy the pairing? You’re a rockstar! At least in my book.
Adaptations
As a Type 1 diabetic, I have to be mindful of my carb intake. While my husband can enjoy the full chilaquiles experience, I’ve had to get creative to make it work for me.
My personal adaptation is to use a generous amount of shredded purple cabbage as the base of my chilaquiles. This not only adds flavor and texture but also helps me reduce the amount of chilaquiles I need to eat to feel full.
I love that I can still enjoy this delicious dish while managing my carb count and being mindful of my dietary needs.
Storing
Stuffed chilaquiles are not ideal for freezing, as the masa can dry out, crack, and absorb excess moisture during the thawing process, making the frying process problematic.
Additionally, reheating the already cooked chilaquiles can alter the texture. However, I like to prepare some components ahead of time to make the process easier:
- Make the salsa verde ahead of time and store it in the fridge or freezer. Reheat before serving. If frozen, thaw it in the fridge before reheating.
- Prep the cheese and store it in the fridge until ready to assemble the chilaquiles.
FAQ: Your Questions Answered
What are some other ingredients I can add to my stuffed chilaquiles?
Some ideas include cooked meats (like carnitas or carne asada), beans, or roasted poblanos.
How should I serve stuffed chilaquiles?
Serve stuffed chilaquiles hot, and immediately after pouring the salsa over them.
Stuffed Chilaquiles Verdes
Ingredients
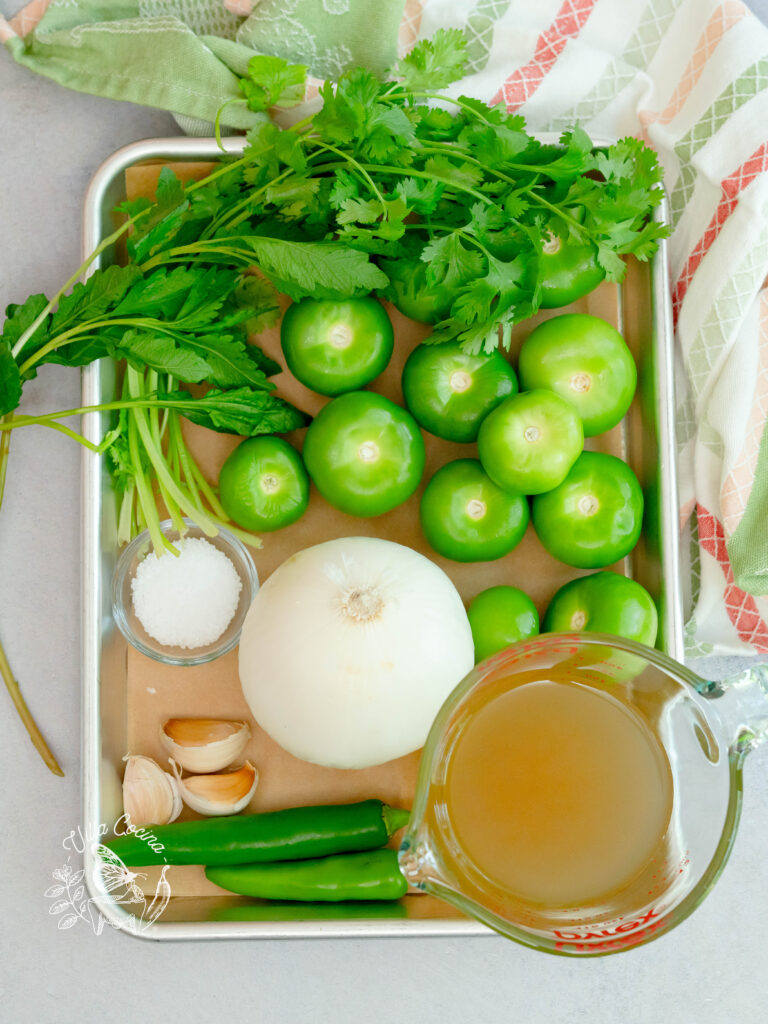
Salsa Verde
- 1 lb tomatillos, peeled, rinsed
- 1/4 white onion, roughly cut
- 1 serrano, stemmed
- 3 garlic cloves, unpeeled
- Drizzle of oil
Cook the Salsa
- 1/2 bunch cilantro
- 1 1/2 cup chicken broth, low sodium
- 2 tbsp oil
- 1/4 white onion, sliced
- 2 sprigs epazote leaves
- Salt to taste
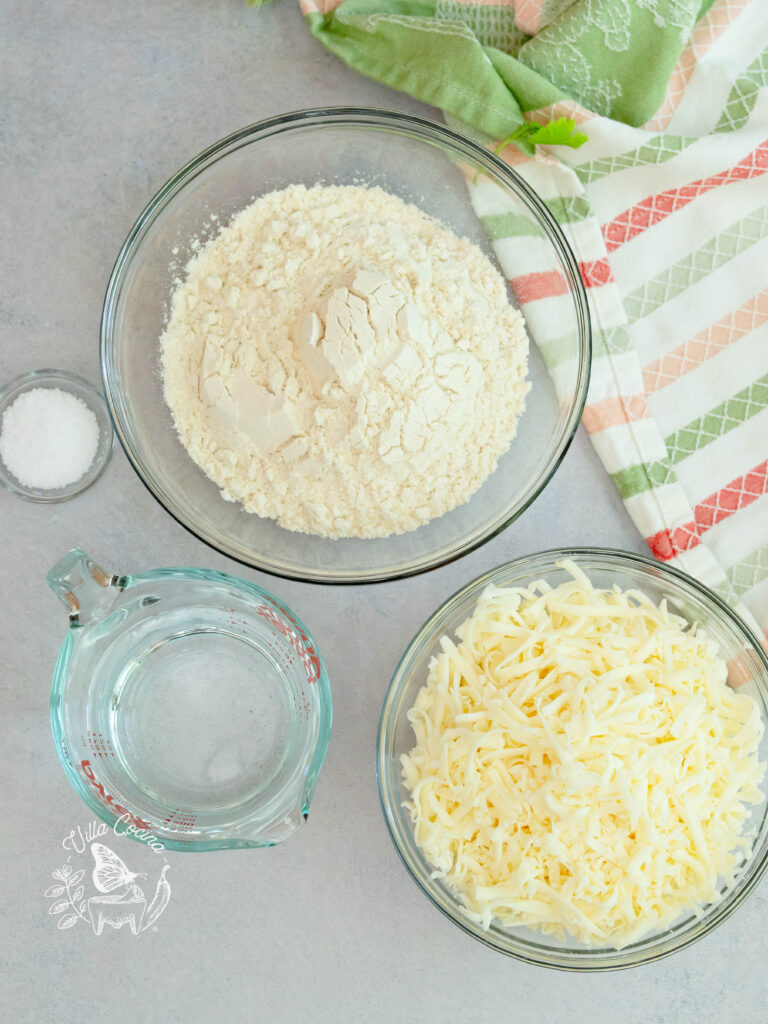
Masa
- 2 cups instant corn masa harina
- 1/4 tsp kosher salt
- 1 1/4 cups warm water – plus more if needed
Additional
- 18 oz Oaxaca cheese, grated
- 2 fried eggs, per person
- Oil for frying
Toppings
- Red onion, sliced
- Panela or queso fresco, crumbled
- Crema Mexicana, drizzle
- Cilantro, chopped
Instructions
Roast the Ingredients
- Place the salsa verde ingredients on a lined sheet pan and drizzle with a small amount of oil. Broil on high for 8-10 minutes, with the sheet pan positioned on the top third oven rack, until the ingredients are lightly charred and cooked through. Remove from the oven when ready and let them cool slightly.
Masa
- Combine the masa harina and salt in a large bowl, mixing until well distributed, then gradually pour in the warm water, mixing by hand between each addition, until the dough forms.
- Stop adding water when the dough has reached a smooth and supple consistency, holding its shape without any dry patches or cracks. Knead the dough for 3-5 minutes until smooth.
- If the dough feels too dry and cracks, add a small amount of water to restore its pliability. On the other hand, if it’s too wet and sticky, mix in a bit more masa harina to absorb the excess moisture.
- Cover the dough with a clean kitchen towel or a damp paper towel to prevent it from drying out.
Cook the Salsa Verde
- Transfer the roasted ingredients, including the peeled garlic, to a blender, add the cilantro and broth, and blend until the mixture is smooth.
- Place a medium pan or pot over medium heat, add oil, and sauté the onion until it’s lightly browned, then carefully pour in the salsa and add epazote leaves. Bring the mixture to a boil, then reduce the heat to a gentle simmer and cook for 5 minutes, or until it slightly thickens. Season with salt, then remove from heat and set aside momentarily.
Mold the Chilaquiles
- Using a tortilla press, take a ball of dough and shape it into a thick tortilla using the two plastic liners, making it slightly thicker than a regular tortilla to hold the cheese.
- Place the cheese on half of the tortilla in two separate sections, leaving a small gap between them. Fold the tortilla in half like an empanada, pressing the edges firmly to seal the cheese inside and removing most of the air from the interior.
- Use a bench scraper, or the handle of a spoon or fork, to cut the empanada in half. Open one half of the liner and carefully remove each half, then pinch the edges to ensure they are sealed and the filling is securely enclosed.
- Place the filled triangles on a parchment-lined sheet pan, cover with plastic wrap, and continue making the rest.
Fry the Chilaquiles
- Heat a sufficient amount of oil for frying to a temperature of 325F, and maintain a steady temperature throughout the frying process.
- Fry the triangles in batches to prevent overcrowding, carefully spooning some of the hot oil over the tops.
- Continue frying until both sides are golden brown and cooked through. Some of the cheese may start to escape from the triangles, but by this time they should be ready to be removed from the oil. If there is any remaining cheese in the oil, use a slotted stainless steel spoon or skimmer to remove it.
- Once the chilaquiles are done, remove them from the oil and place them on a rack or paper towels to drain excess oil.
Serve
- Plate the desired amount of chilaquiles, pour the reheated salsa verde over the top, add a couple of fried egg, and finish with the toppings.
Did you make this recipe?
Show some love! Tag @villacocinaofficial on Instagram and drop a 5-star review. Your support means everything—thanks!


Barbie
Hey Rosanna! Sorry to bother you sweetie, but I lost the link you posted for me. I thought I had it was from here but it’s gone. I’m ready to purchase my comal (yay) so when you have time, can you repost the link? You can send it to my email address if you prefer. Again, my apologies for the extra work! Happy 4th of July to you and Nelson.
Villa Cocina
Hi Barbie, here is the affiliate link: https://shareasale.com/r.cfm?b=1811776&u=3243149&m=95722&urllink=&afftrack=
Barbie
Hi Rosanna! Thanks so much, my friend! Just ordered my comal! I can hardly wait. Don’t know what to make first but it will be your recipe so it’s going to be awesome! I hope you get a nice commission because you do such great work. I am so grateful to you for all you share. Your content is the best. Hello to Nelson. You make an amazing team. 😊😍♥️🌹
Villa Cocina
Thanks for all the LOVE, always happy to read your kind comments!