Almond Flour Tortillas
Almond flour tortillas offer a delicious alternative to the classics. With just almond flour, a few simple ingredients, and thickener, you can make a soft, pliable dough that cooks beautifully.
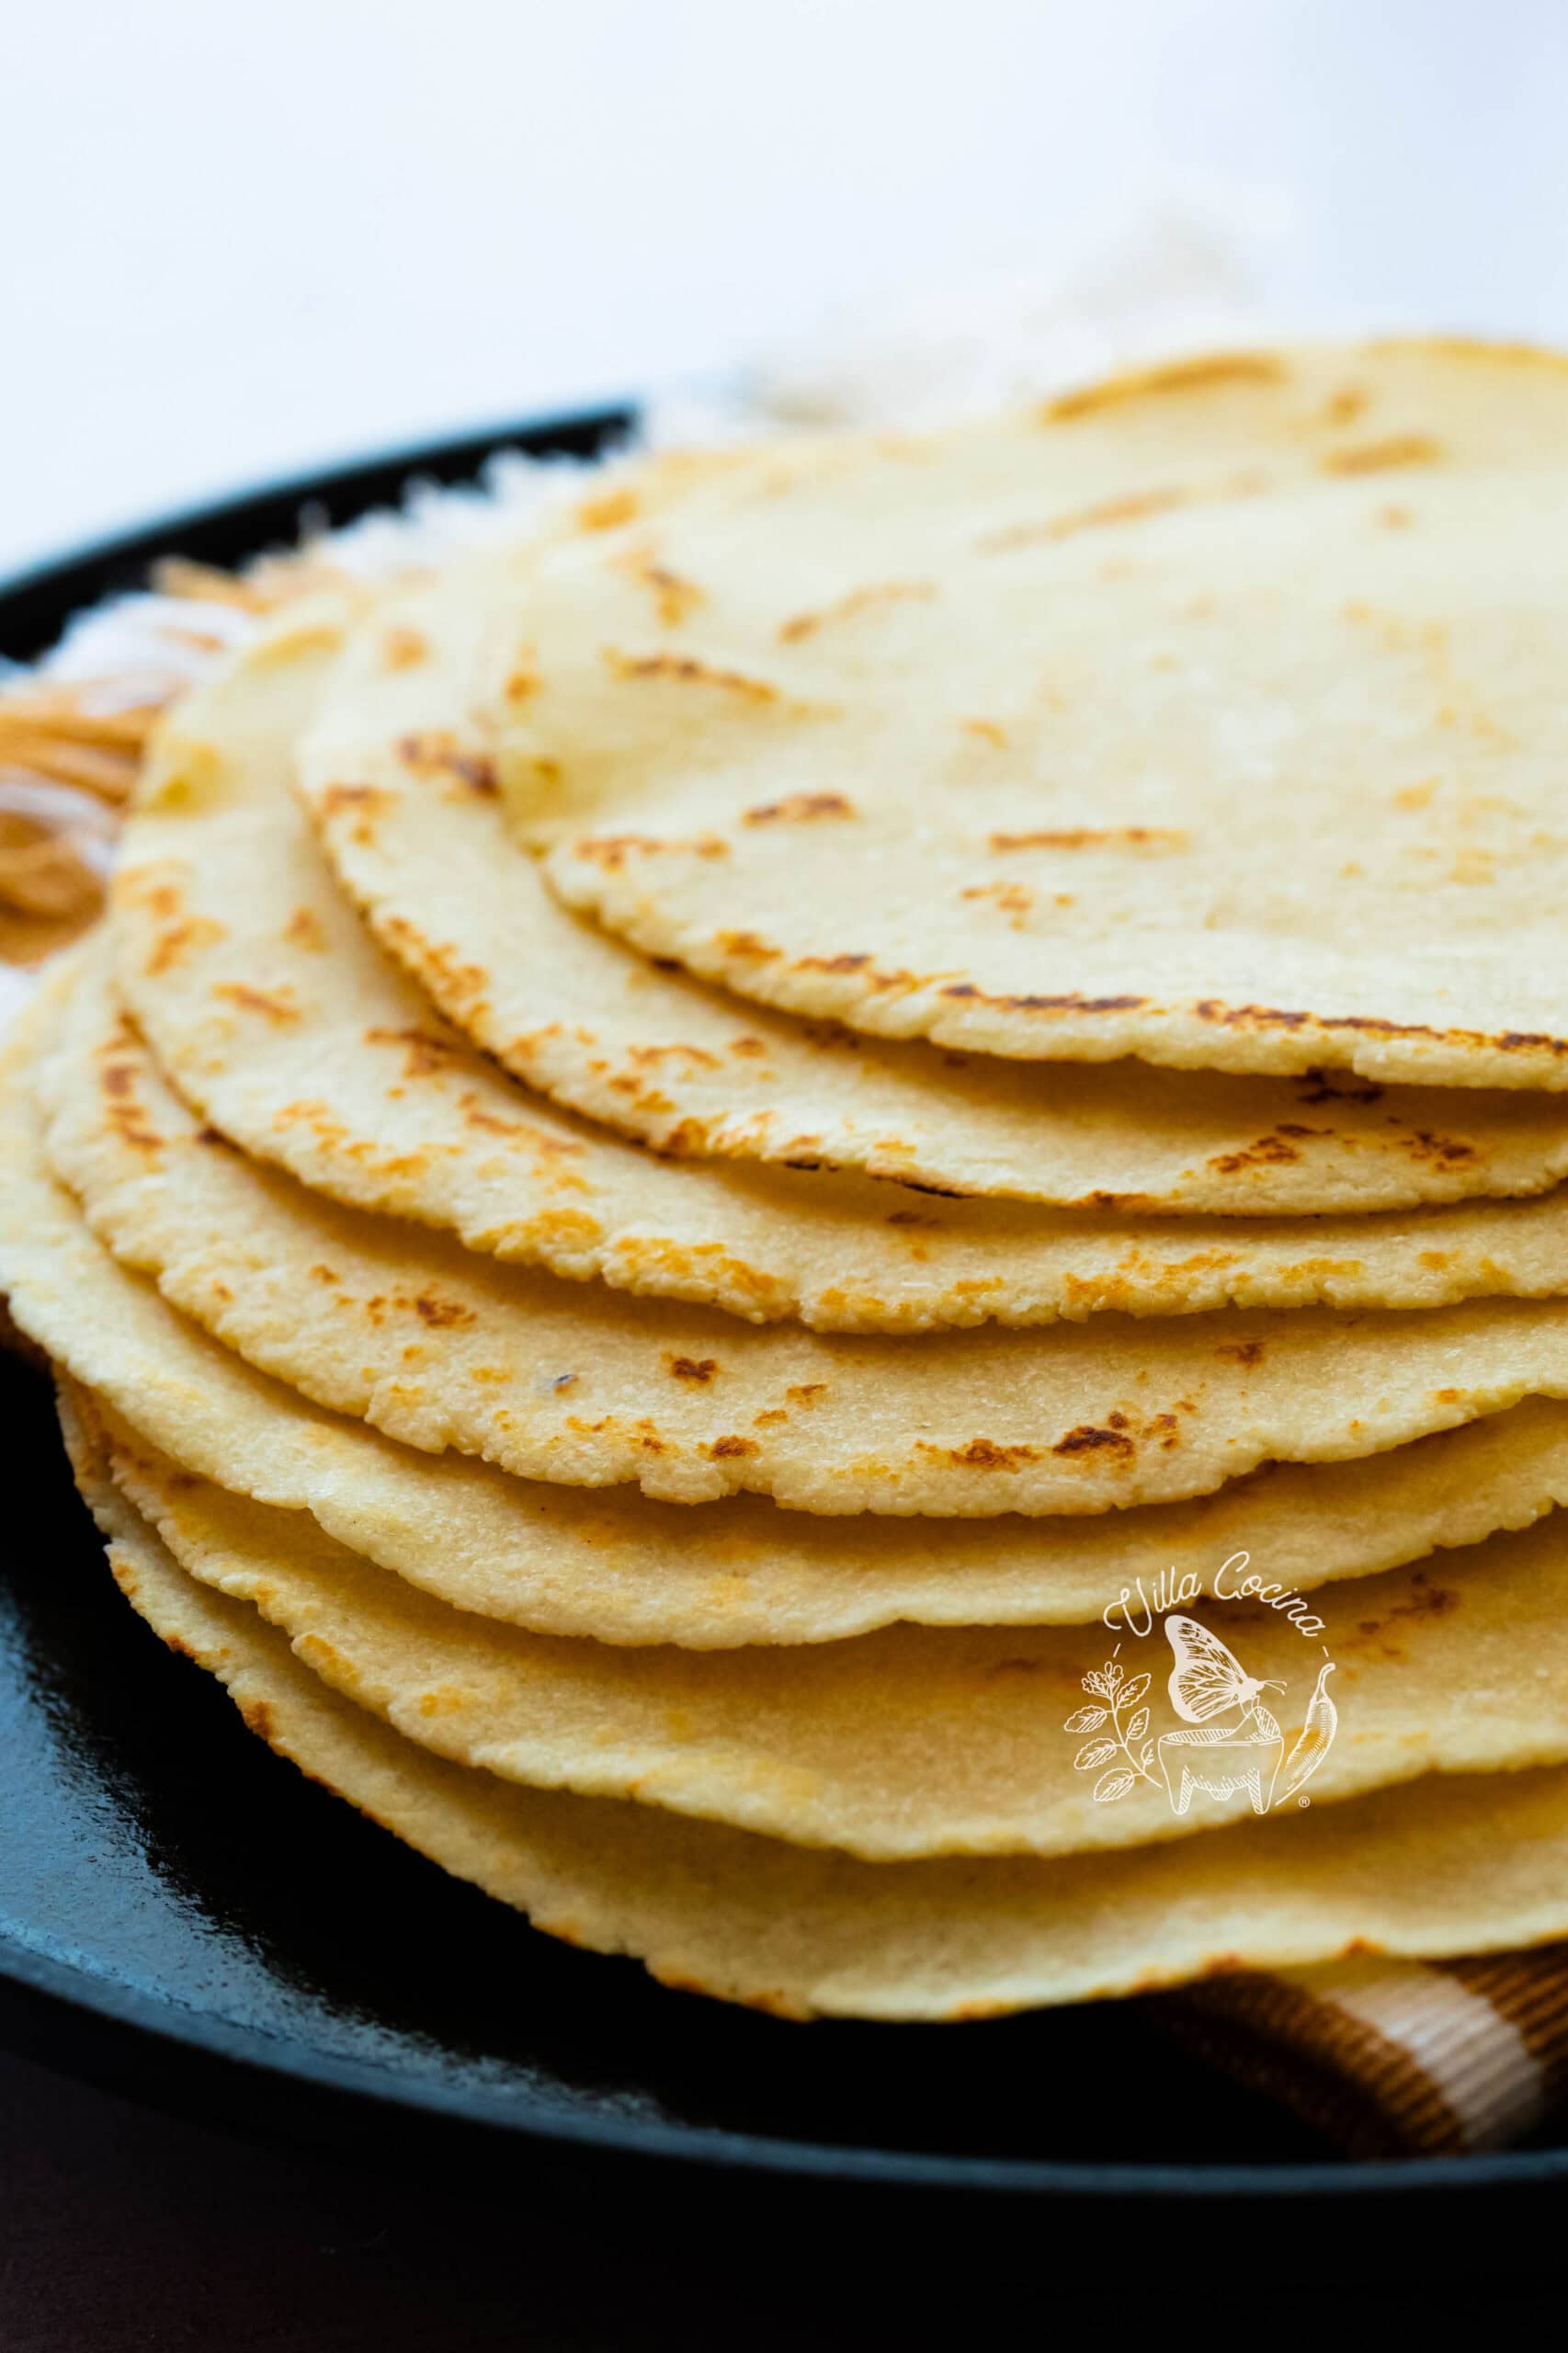
They’re versatile enough for taquitos dorados, tacos, enchiladas, or even crisped into tortilla chips with homemade salsa. For me, they bring tradition to the table in a way that fits perfectly into my lifestyle today.
Growing up, tortillas were always at the heart of family meals—warm, comforting, and meant to be shared. Corn tortillas remain a staple in my kitchen, but almond flour tortillas give me a lighter, lower-carb option without losing flavor. Health Disclaimer
Almond vs. Corn Tortillas
While almond flour tortillas don’t have the same texture as traditional ones due to the lack of gluten, xanthan gum helps give them structure, flexibility, and better bite.
By contrast, corn tortillas are naturally gluten-free and achieve their pliability through nixtamalization, which breaks down the corn’s cell walls. Their high moisture content and cooking on a comal also play a key role in their soft, tender texture.
What is almond Flour?
Almond flour comes from blanched almonds, but have you ever wondered how it’s made?
The process starts with almonds taking a quick dip in boiling water, followed by an ice bath to loosen and remove their skins. This reveals the creamy white interior, which is then finely ground into a soft, powdery flour. Voilà—you’ve got almond flour!
Ingredients
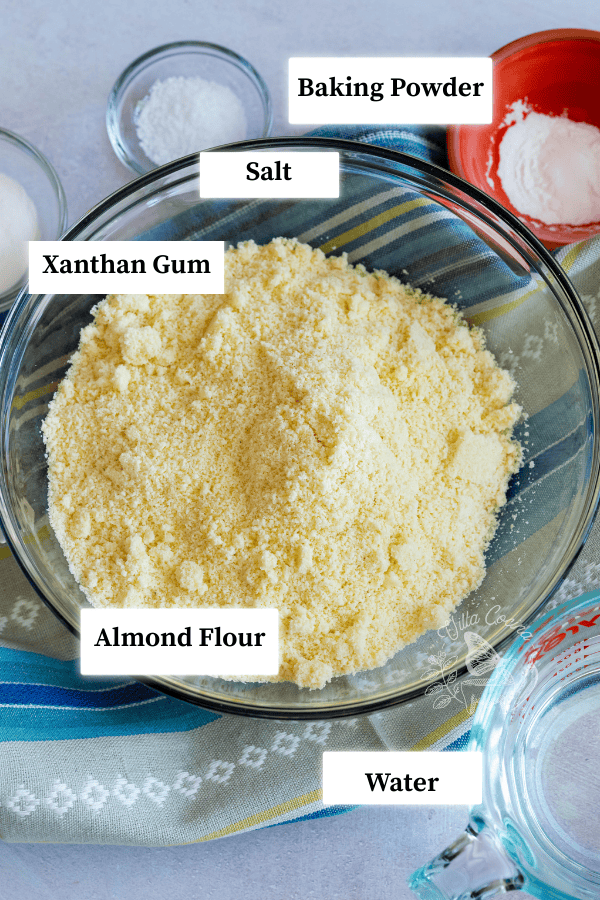
- Almond flour – Almond flour – Gluten-free, low-carb, high in healthy fats, with a mild flavor and fine texture that’s easy to work with.
- Xanthan gum – This food additive helps bind and emulsify almond flour dough, creating a smooth, cohesive texture.
- Salt – Enhances the flavor.
- Baking powder – Helps create a light, tender texture and aids in browning.
- Water – Hydrates the flour and activates xanthan gum.
How to make almond flour tortillas ?
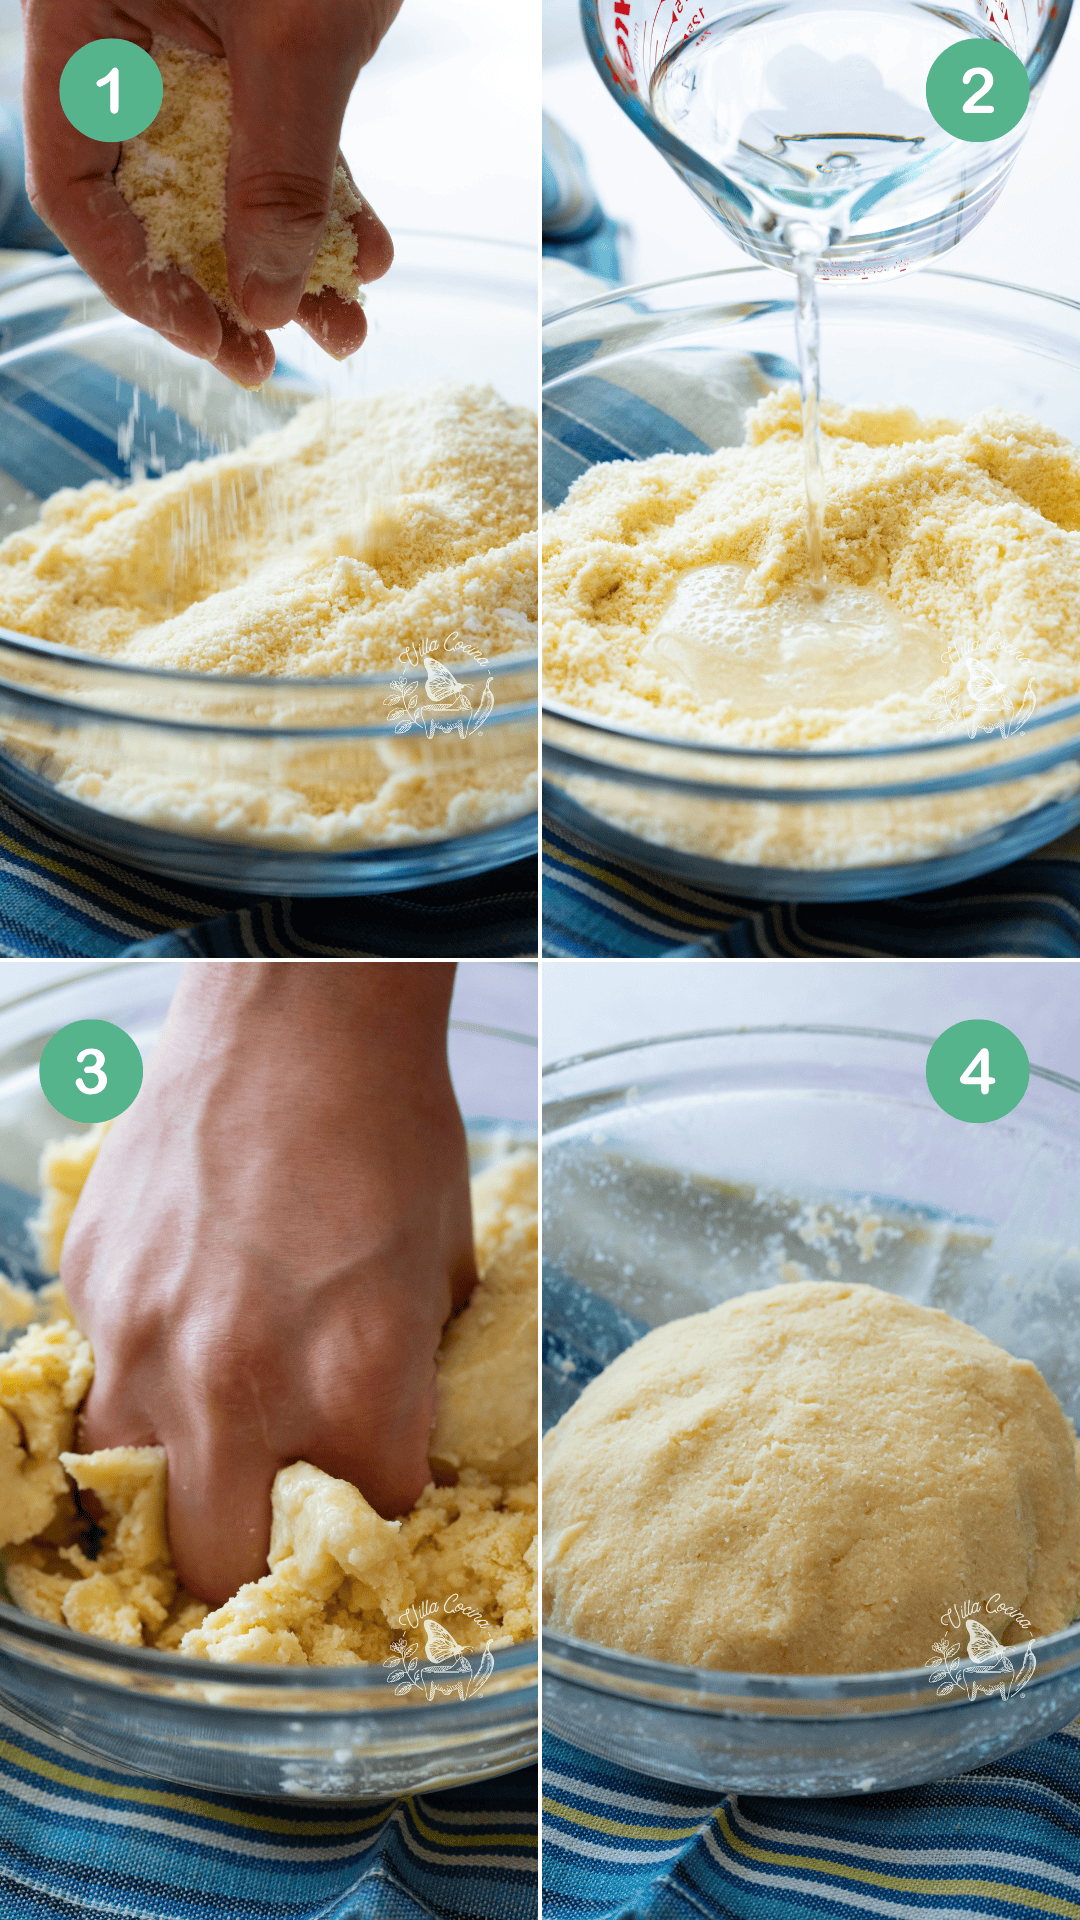
In a large bowl, combine the flour, xanthan gum, salt, and baking powder, mixing well until evenly distributed.
Gradually add the water while kneading the mixture until it forms a cohesive mass. Continue kneading the dough for about 5 minutes, either in the bowl or on a flat surface, until it reaches a soft, moist consistency that doesn’t stick to your clean hands.
If the dough feels too dry, add water in small increments and continue kneading until it reaches the right consistency. Once the dough is ready, return it to the bowl, cover with a damped paper towel, and let it rest for 15 minutes.
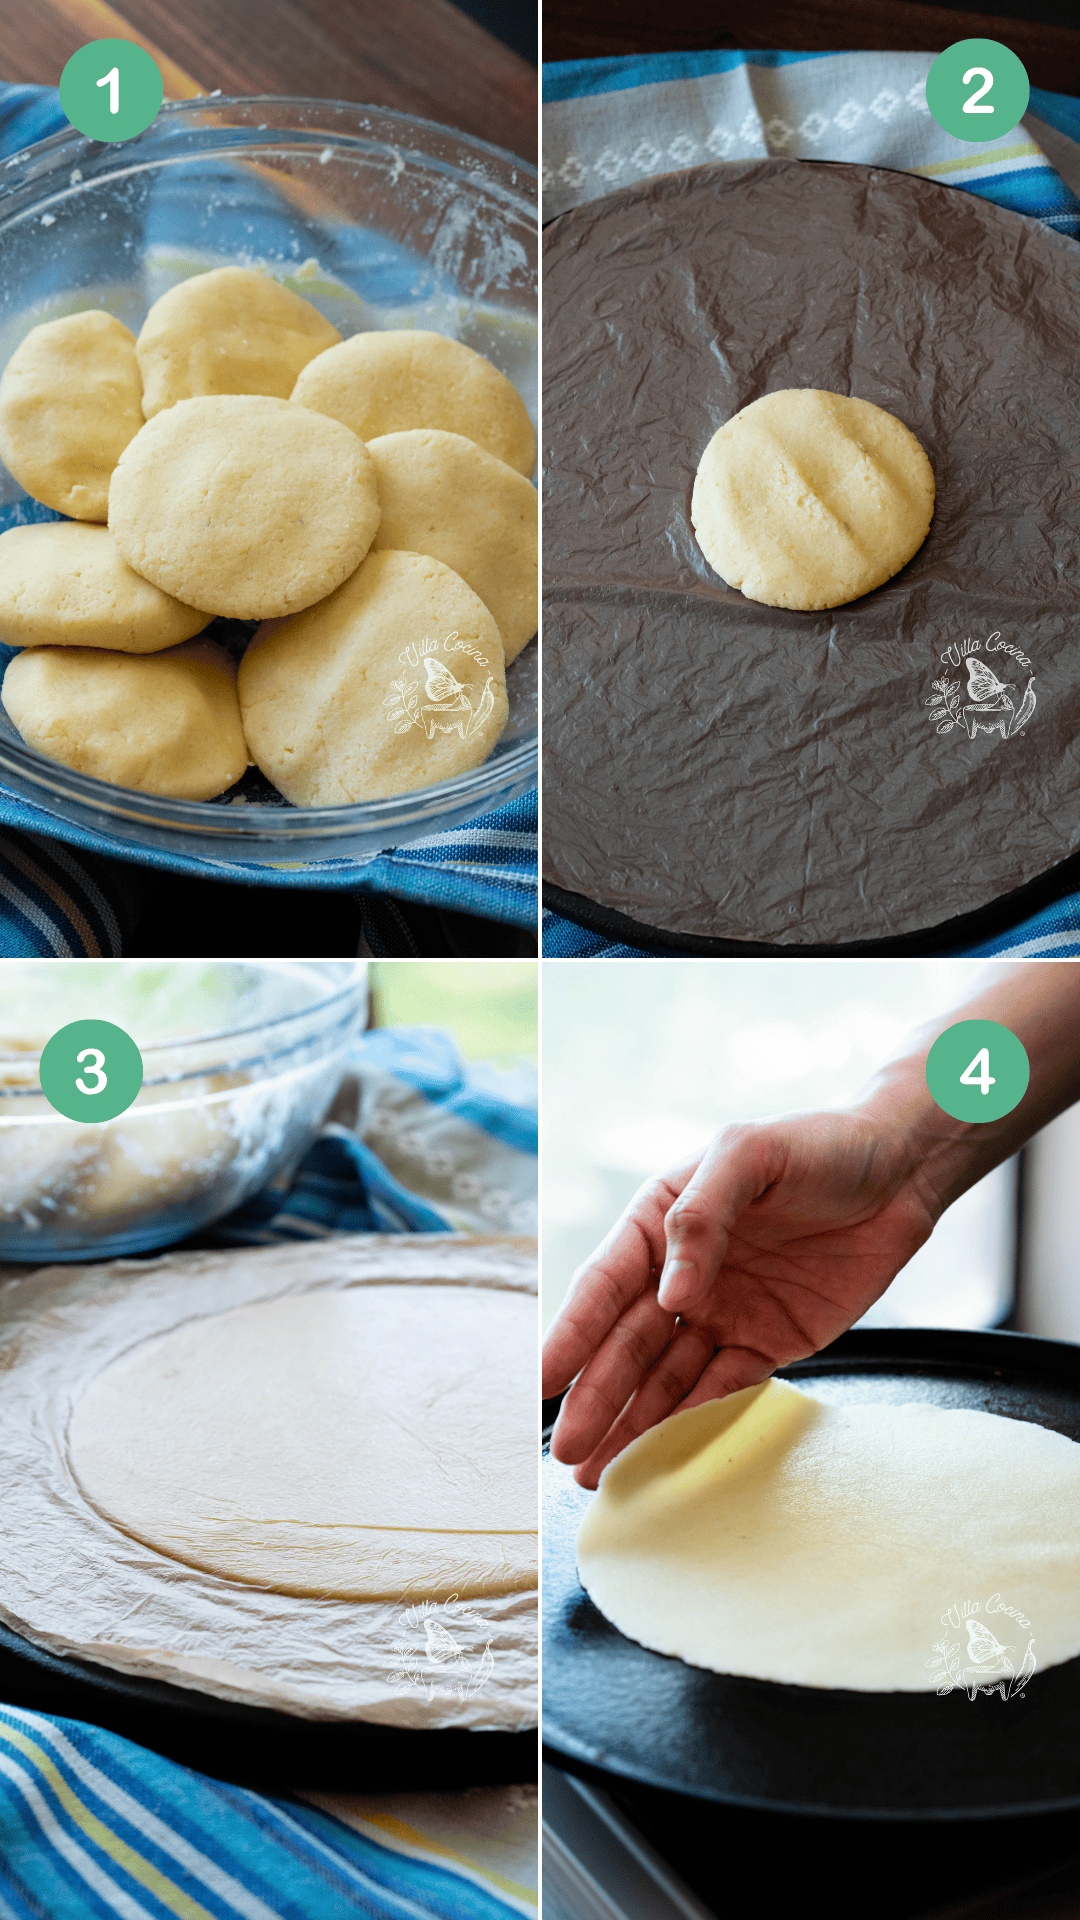
Preheat a griddle or comal over medium heat. Divide the rested dough into 8 equal portions. Flatten each into a thin disk, keeping them covered.
Use a tortilla press to mold the disks into thin tortillas, then place disk in between plastic liners. Press down, rotate, and flip until thin, then remove the tortilla from liners.
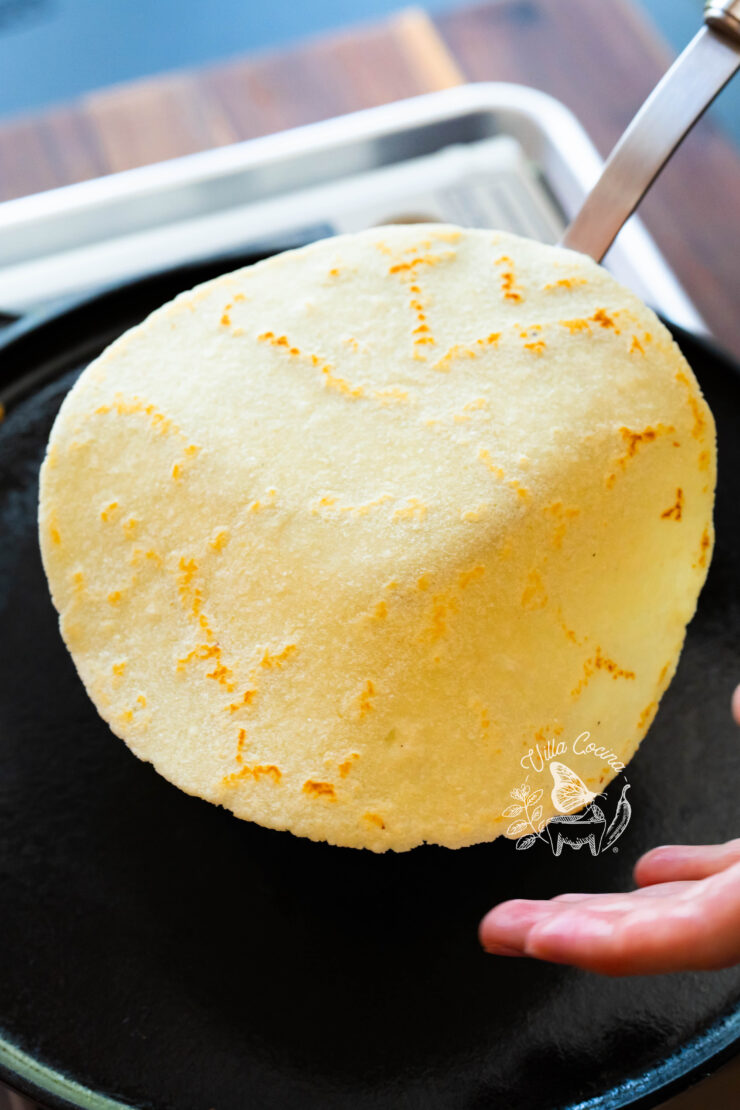
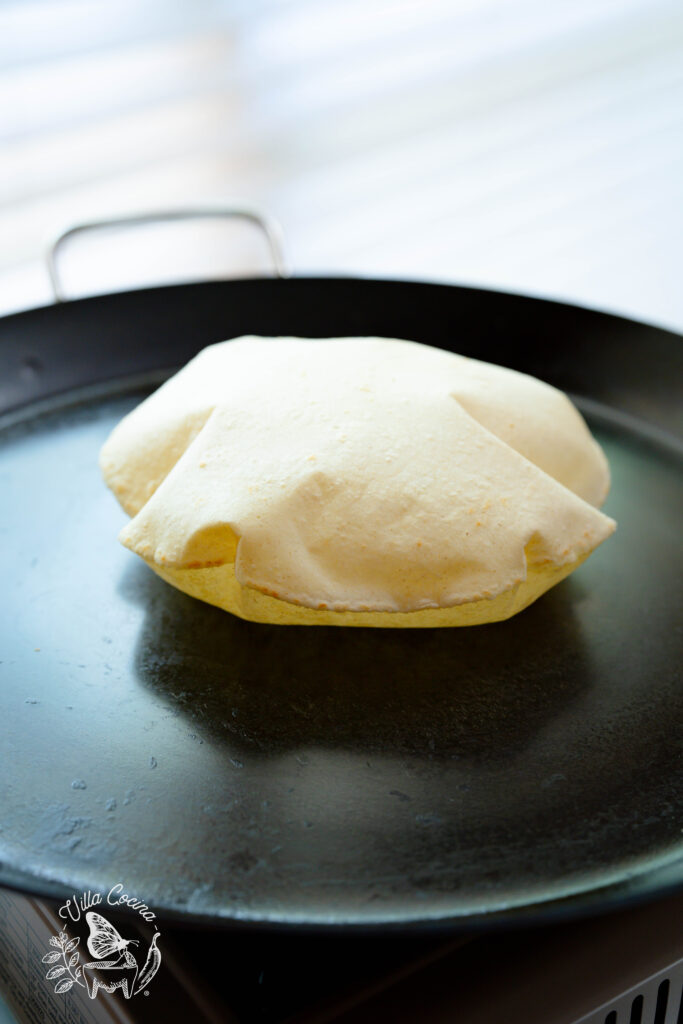
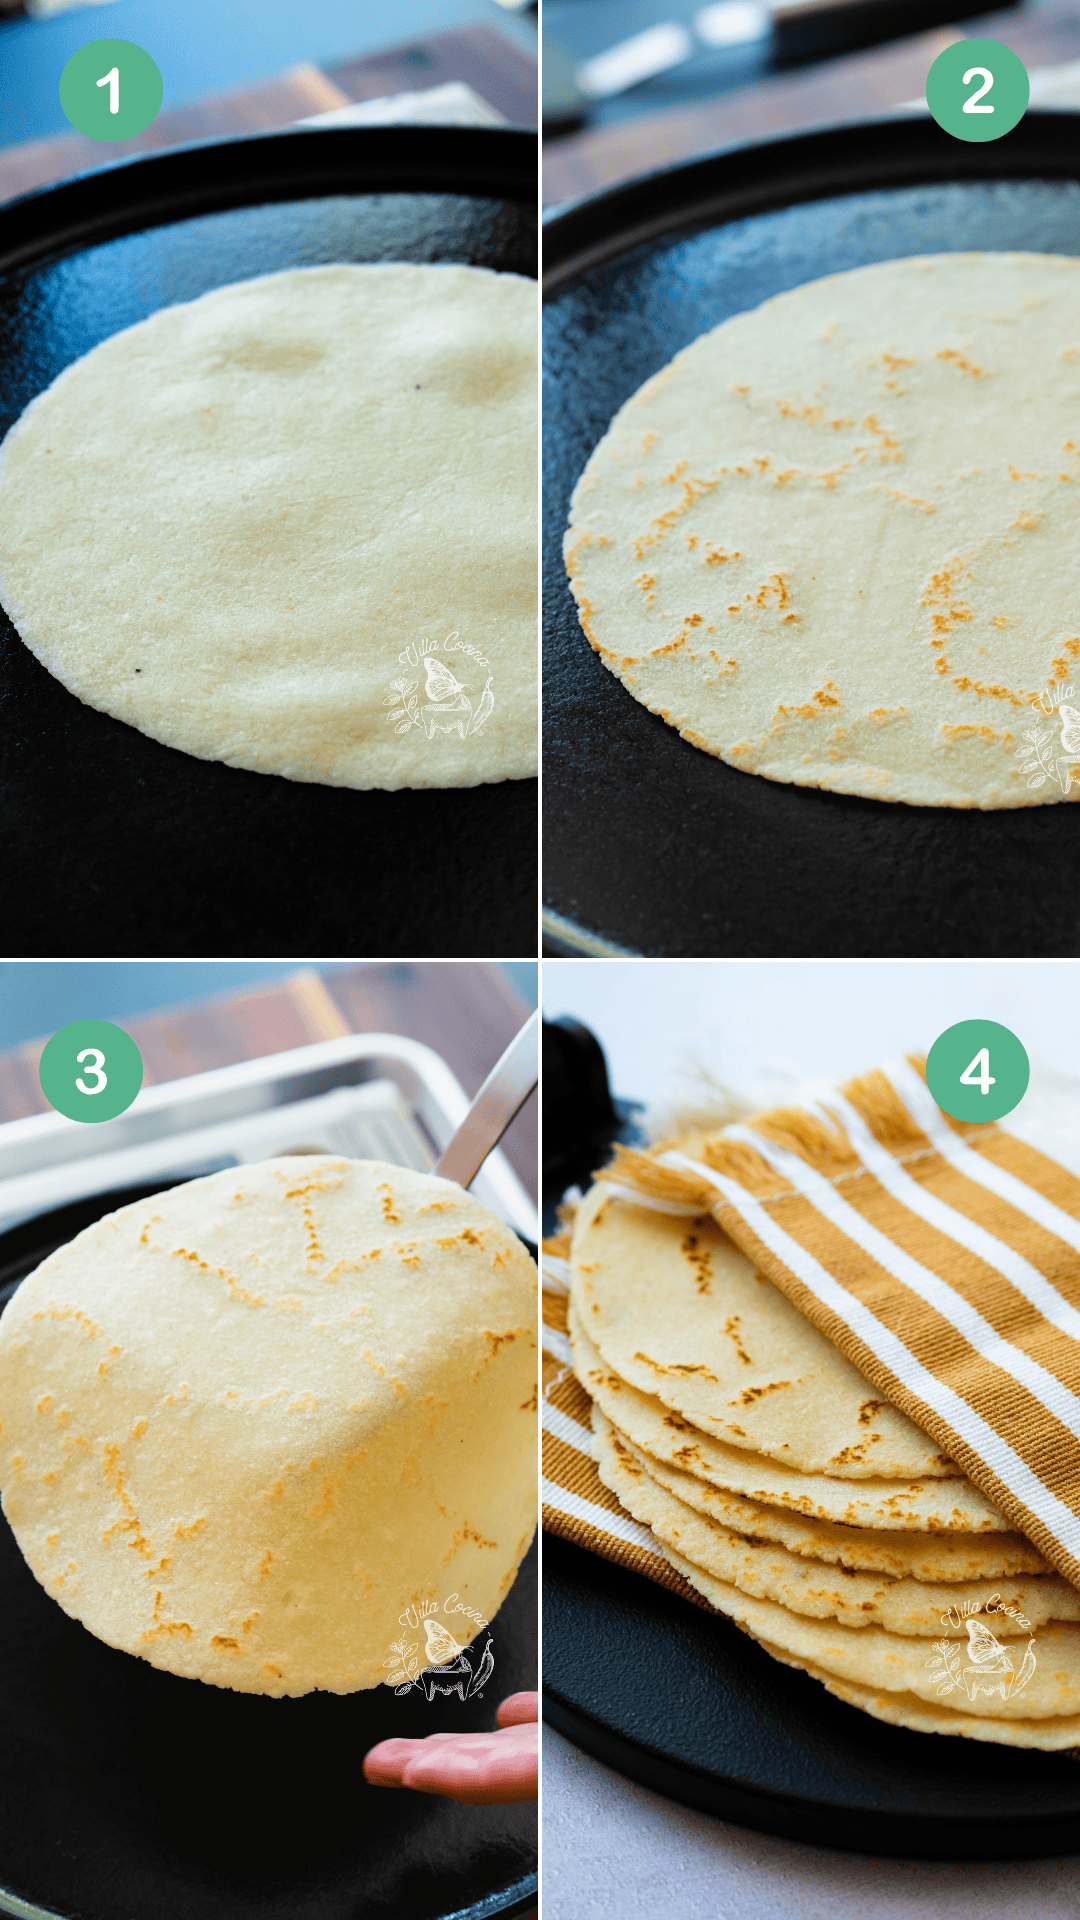
Cook the tortilla on a comal using a backhanded sweeping motion to lay it down.
Cook for 30 seconds or until the underside is cooked and has a few golden brown spots. Flip and cook the second side for another 30 seconds, until lightly browned. If needed, flip again to finish cooking, while still avoiding drying out and crisping.
Once cooked, keep tortillas covered with a kitchen towel to maintain moisture.
Short Video Tutorial
Watch my easy short video tutorial for visuals on making these Almond Flour Tortillas.
Enjoyed the video? Subscribe and tap the bell for updates on new recipes. Thank you for your support!
Store
Let the tortillas cool completely before storing. This prevents moisture buildup and keeps them fresh longer.
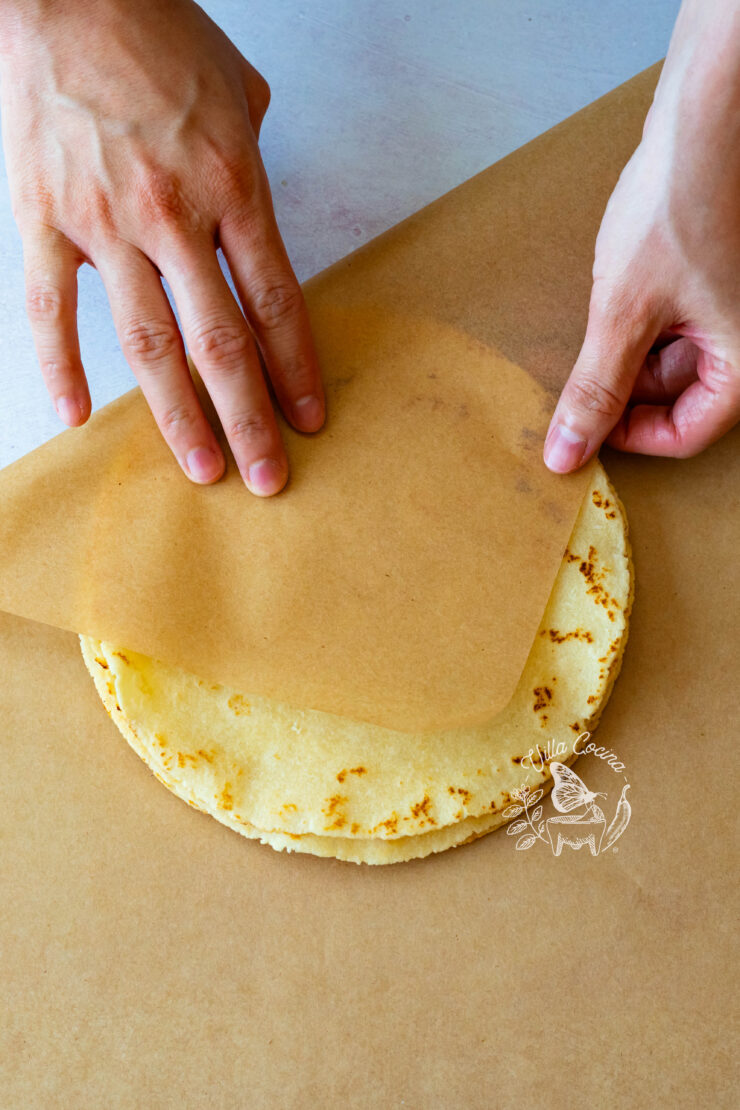
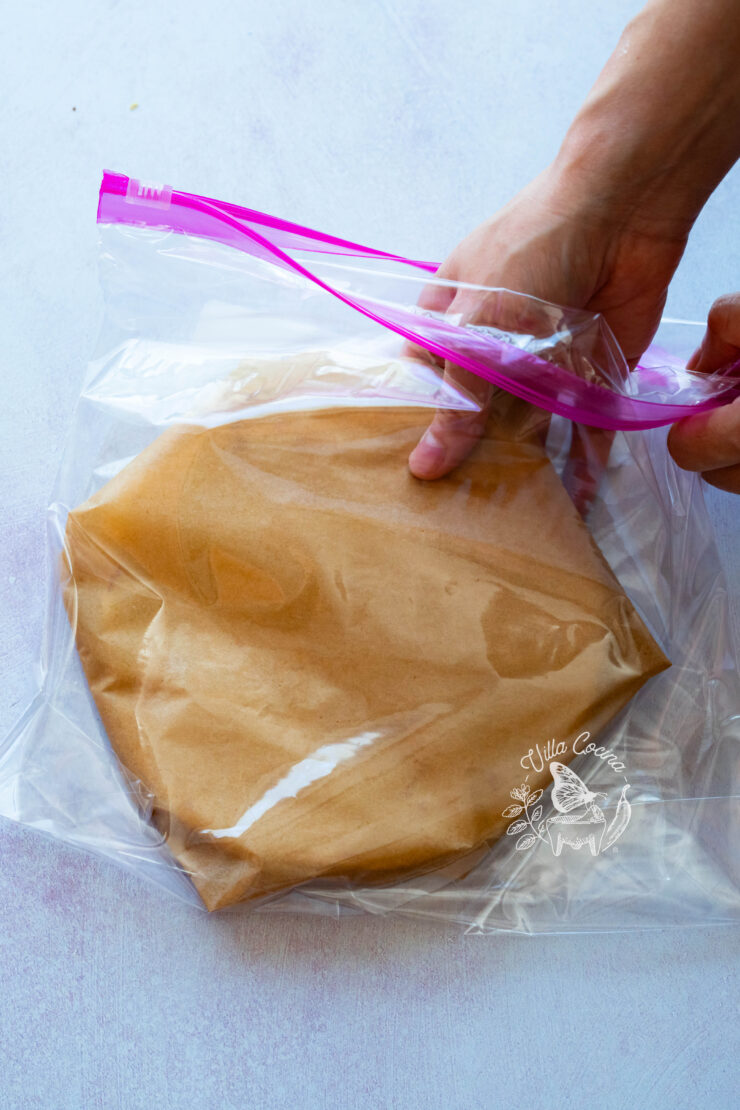
- Refrigerate: Wrap tortillas in parchment paper and place them in a zip-top bag, vacuum-sealed bag, or airtight container. Label with the date and store in the refrigerator for 3–5 days.
- Freeze: Separate each tortilla with parchment paper to prevent sticking, then wrap and place in a freezer-safe or vacuum-sealed bag, removing excess air. Freeze for up to 2 months. Thaw in the refrigerator before using and reheat as needed.
Things to Keep in Mind
Almond flour tortillas get their soft, bendable texture from xanthan gum, which helps hold the dough together and makes them easier to work with. Still, handle them gently to avoid tearing or breaking.
That said, some dishes don’t work as well—xanthan gum, while essential for structure, can sometimes change the texture and alter the flavors. It’s all about finding the recipes where almond flour tortillas truly shine. Personally, I love using them in tacos or taquitos dorados.


Recommended Tools
- Mixing bowls – the perfect mixing vessel for a smooth mixing experience.
- Measuring cups – Precise measurement for liquid ingredients, which is crucial to following a recipe and achieving the exact end result.
- Tortilla press – Efficient, easy, and mess-free tortillas making traditional tool. Check out Masienda’s tortilla press and liners! Or the one I own, Victoria 10” cast iron.
- Cast iron griddle – sturdy, retains, and distributes heat evenly, preventing the tortillas from drying out. Comal – comal is a more traditional tool used in Mexico to make corn tortillas.
- Cast iron griddle – Sturdy and heats evenly, helping tortillas cook without drying out.
- Comal – A traditional Mexican tool, ideal for making corn tortillas.
- Parchment paper– wraps the tortillas to keep them moist, separates individual pieces to prevent sticking, and ensures they stay soft and pliable until ready to use.
FAQs – Answered
Do almond flour tortillas taste like regular tortillas?
No, they don’t taste exactly like corn tortillas, but their texture and unique flavor make dishes work in their own way.
Can xanthan gum cause digestive issues?
Some people may be sensitive to xanthan gum, which can cause mild bloating or gas. It’s worth being mindful.
Can I make almond flour tortillas in advance?
Yes! You can make them ahead, store them properly, and reheat when ready to enjoy.

Almond Flour Tortillas
Ingredients
- 2 cups almond flour
- 2 tbsp xanthan gum
- 1 tsp baking powder
- 1/2 tsp kosher salt
- 1/2 cup warm water, plus more if needed
Instructions
- In a large bowl, combine the flour, xanthan gum, salt, and baking powder. Mix well until ingredients are well distributed. Gradually add the water while kneading the mixture until it forms a cohesive mass.
- Continue kneading the dough for about 5 minutes, either in the bowl or on a flat surface, until it reaches a soft, moist consistency that doesn’t stick to your clean hands. If the dough feels too dry, add water in small increments and continue kneading until it reaches the right consistency.
- Once the dough is ready, return it to the bowl, cover with a damped paper towel, and let it rest for 15 minutes.
- Divide the rested dough into 8 equal portions. Flatten each one into a thin disk, keeping them covered.
- Use a tortilla press to mold the disks into thin tortillas. Place disk in between plastic liners, press down, rotate, and flip until thin. Remove tortilla from liners.
- Cook the tortilla on a comal using a backhanded sweeping motion to lay it down. Cook for 30 seconds or until the underside is cooked and has a few golden brown spots. Flip and cook the second side for another 30 seconds, until lightly browned. If needed, flip again to finish cooking, avoiding drying out and crisping. Once cooked, keep tortillas covered with a kitchen towel to maintain moisture.
- Use tortillas immediately or let them cool to room temperature to refrigerate or freeze. Follow storage tips below.
Nutrition
Did you make this recipe?
Show some love! Tag @villacocinaofficial on Instagram and drop a 5-star review. Your support means everything—thanks!

