Traditional Flour Tortillas
Learn how to make traditional flour tortillas with just three simple ingredients, not counting water. It takes a little time and a hands-on approach, but the reward is one of the most satisfying experiences in Mexican cooking.
Why Make Flour Tortillas from Scratch?
Whether you see them as a labor of love or a skill shaped by tradition, the difference is undeniable. A tortilla made from scratch offers a flavor, texture, and aroma that store-bought versions simply cannot match.
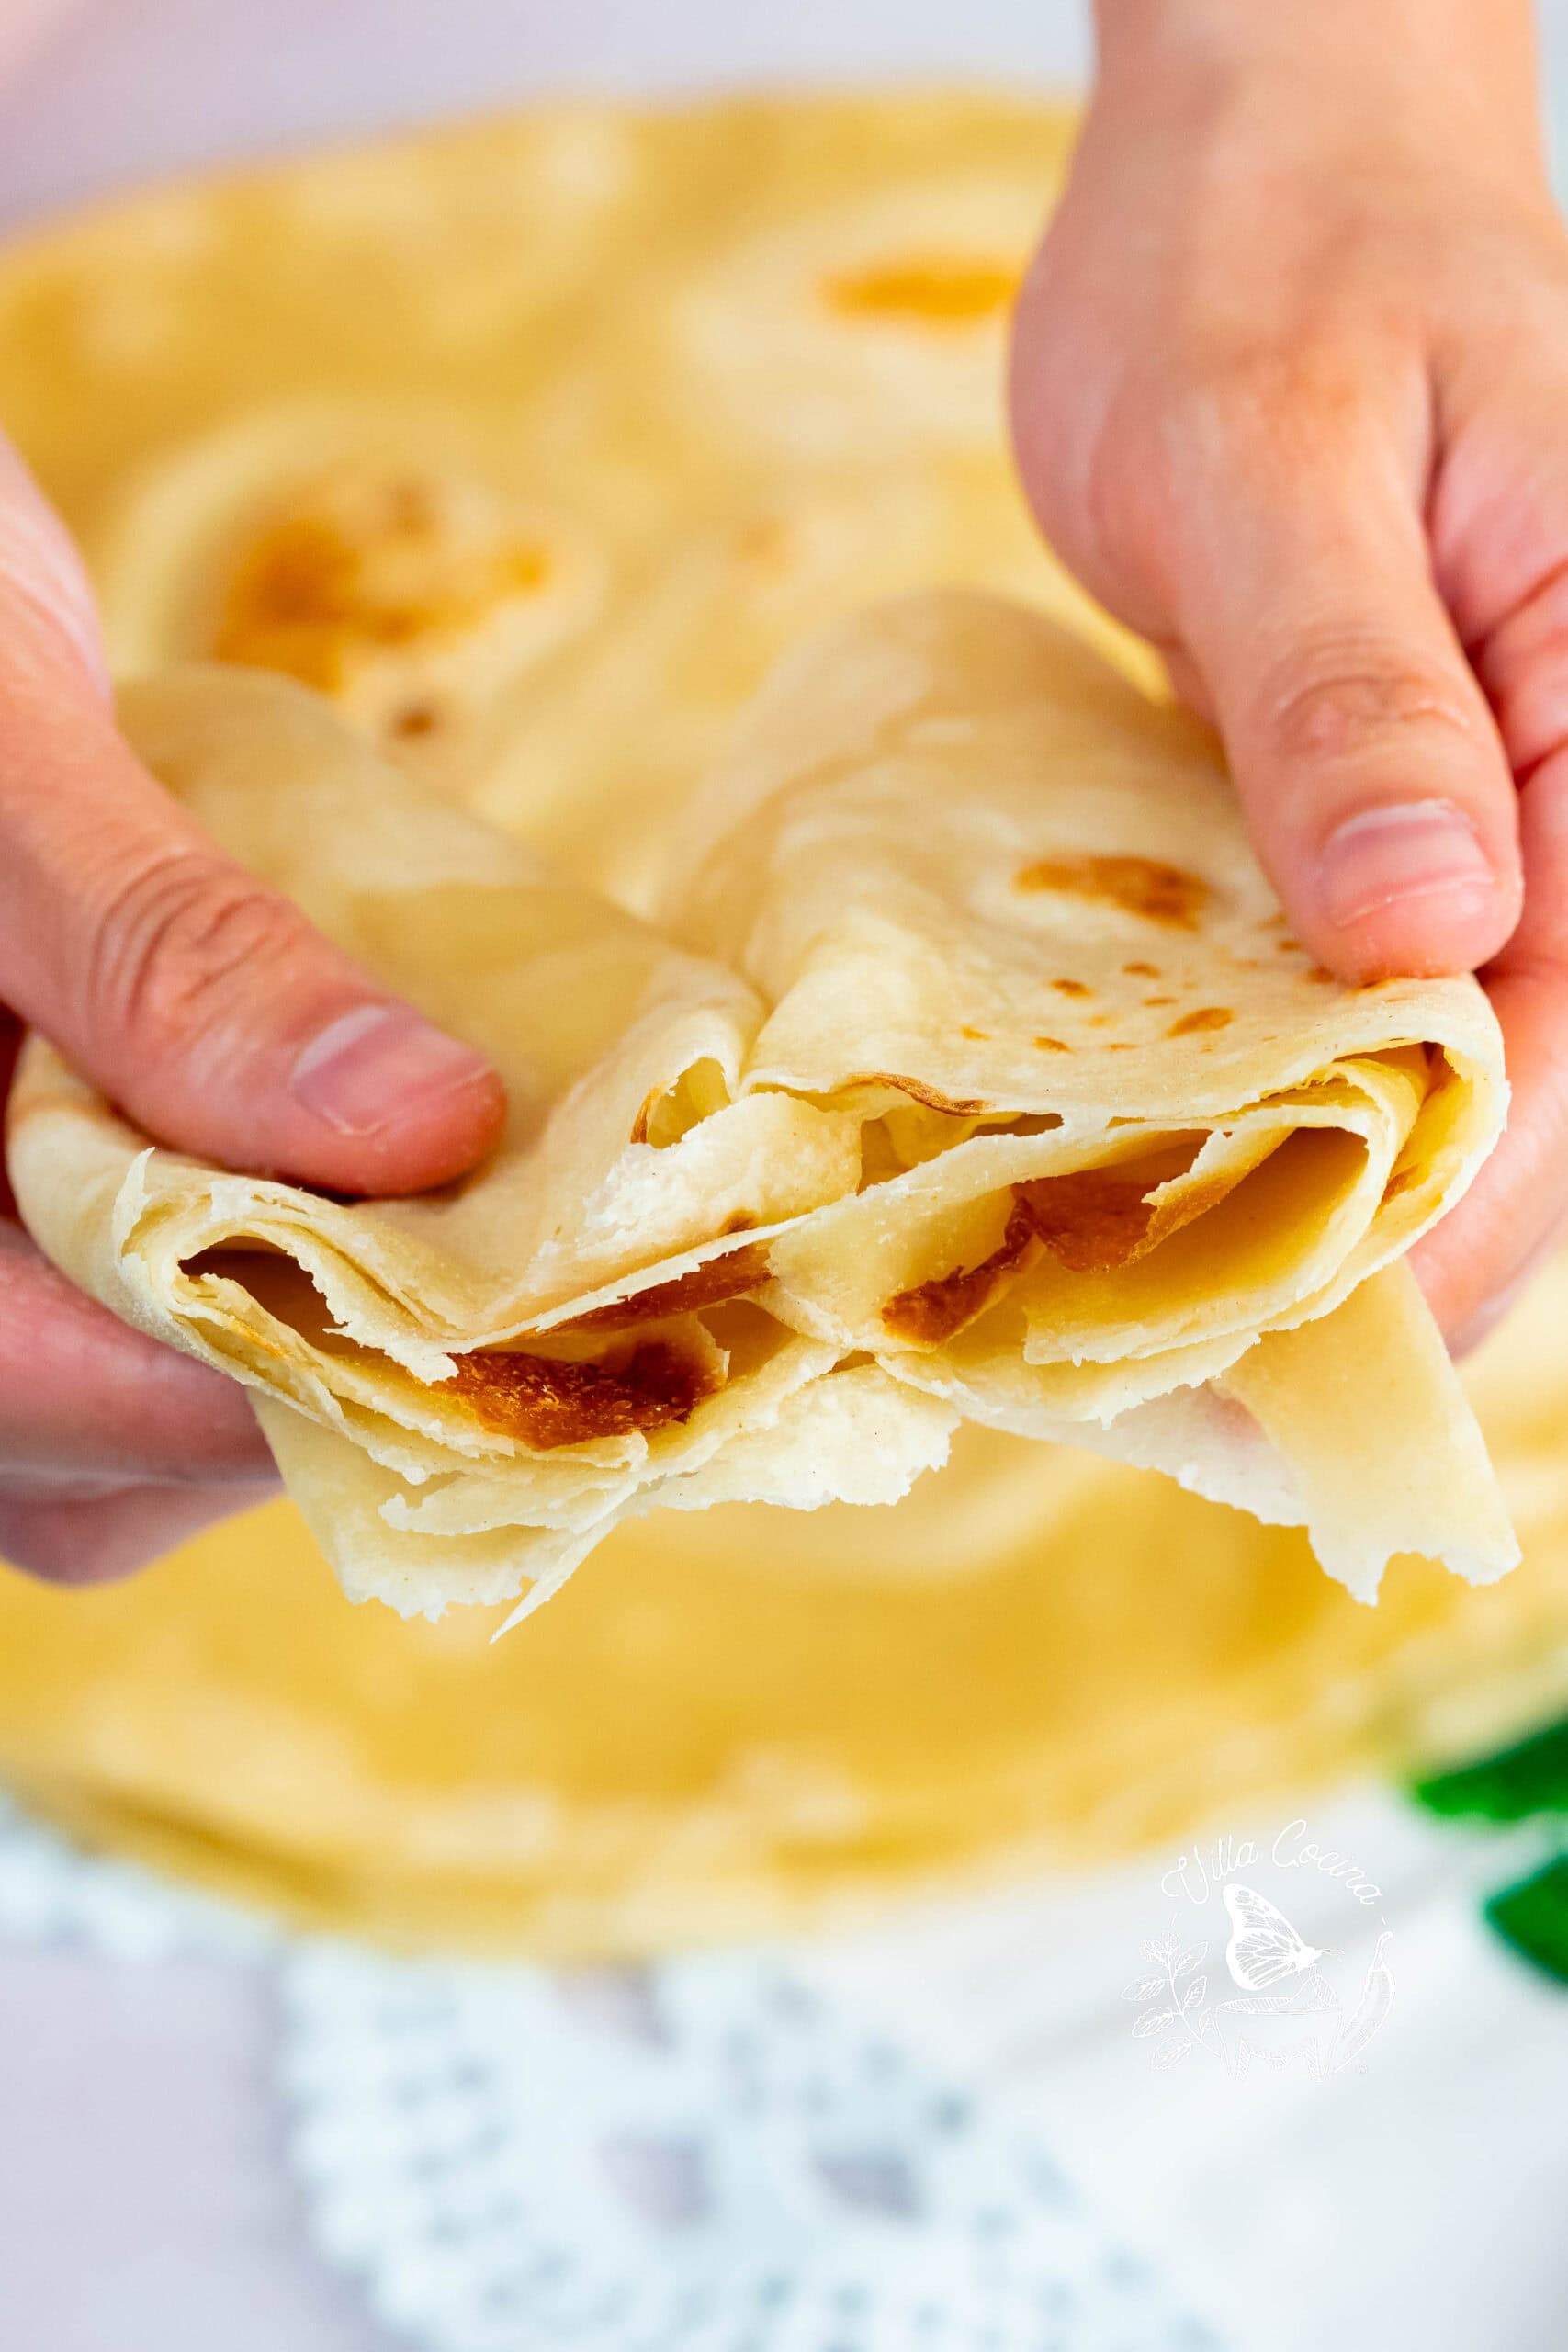
Growing up in Mexico, I enjoyed flour tortillas at their very best: fresh off the comal, still warm, tender, and flaky. As a special treat, we would roll them up and dip them into a cup of atole, a traditional Mexican sweet beverage. It was a simple pleasure, yet one of the most memorable food experiences of my childhood.
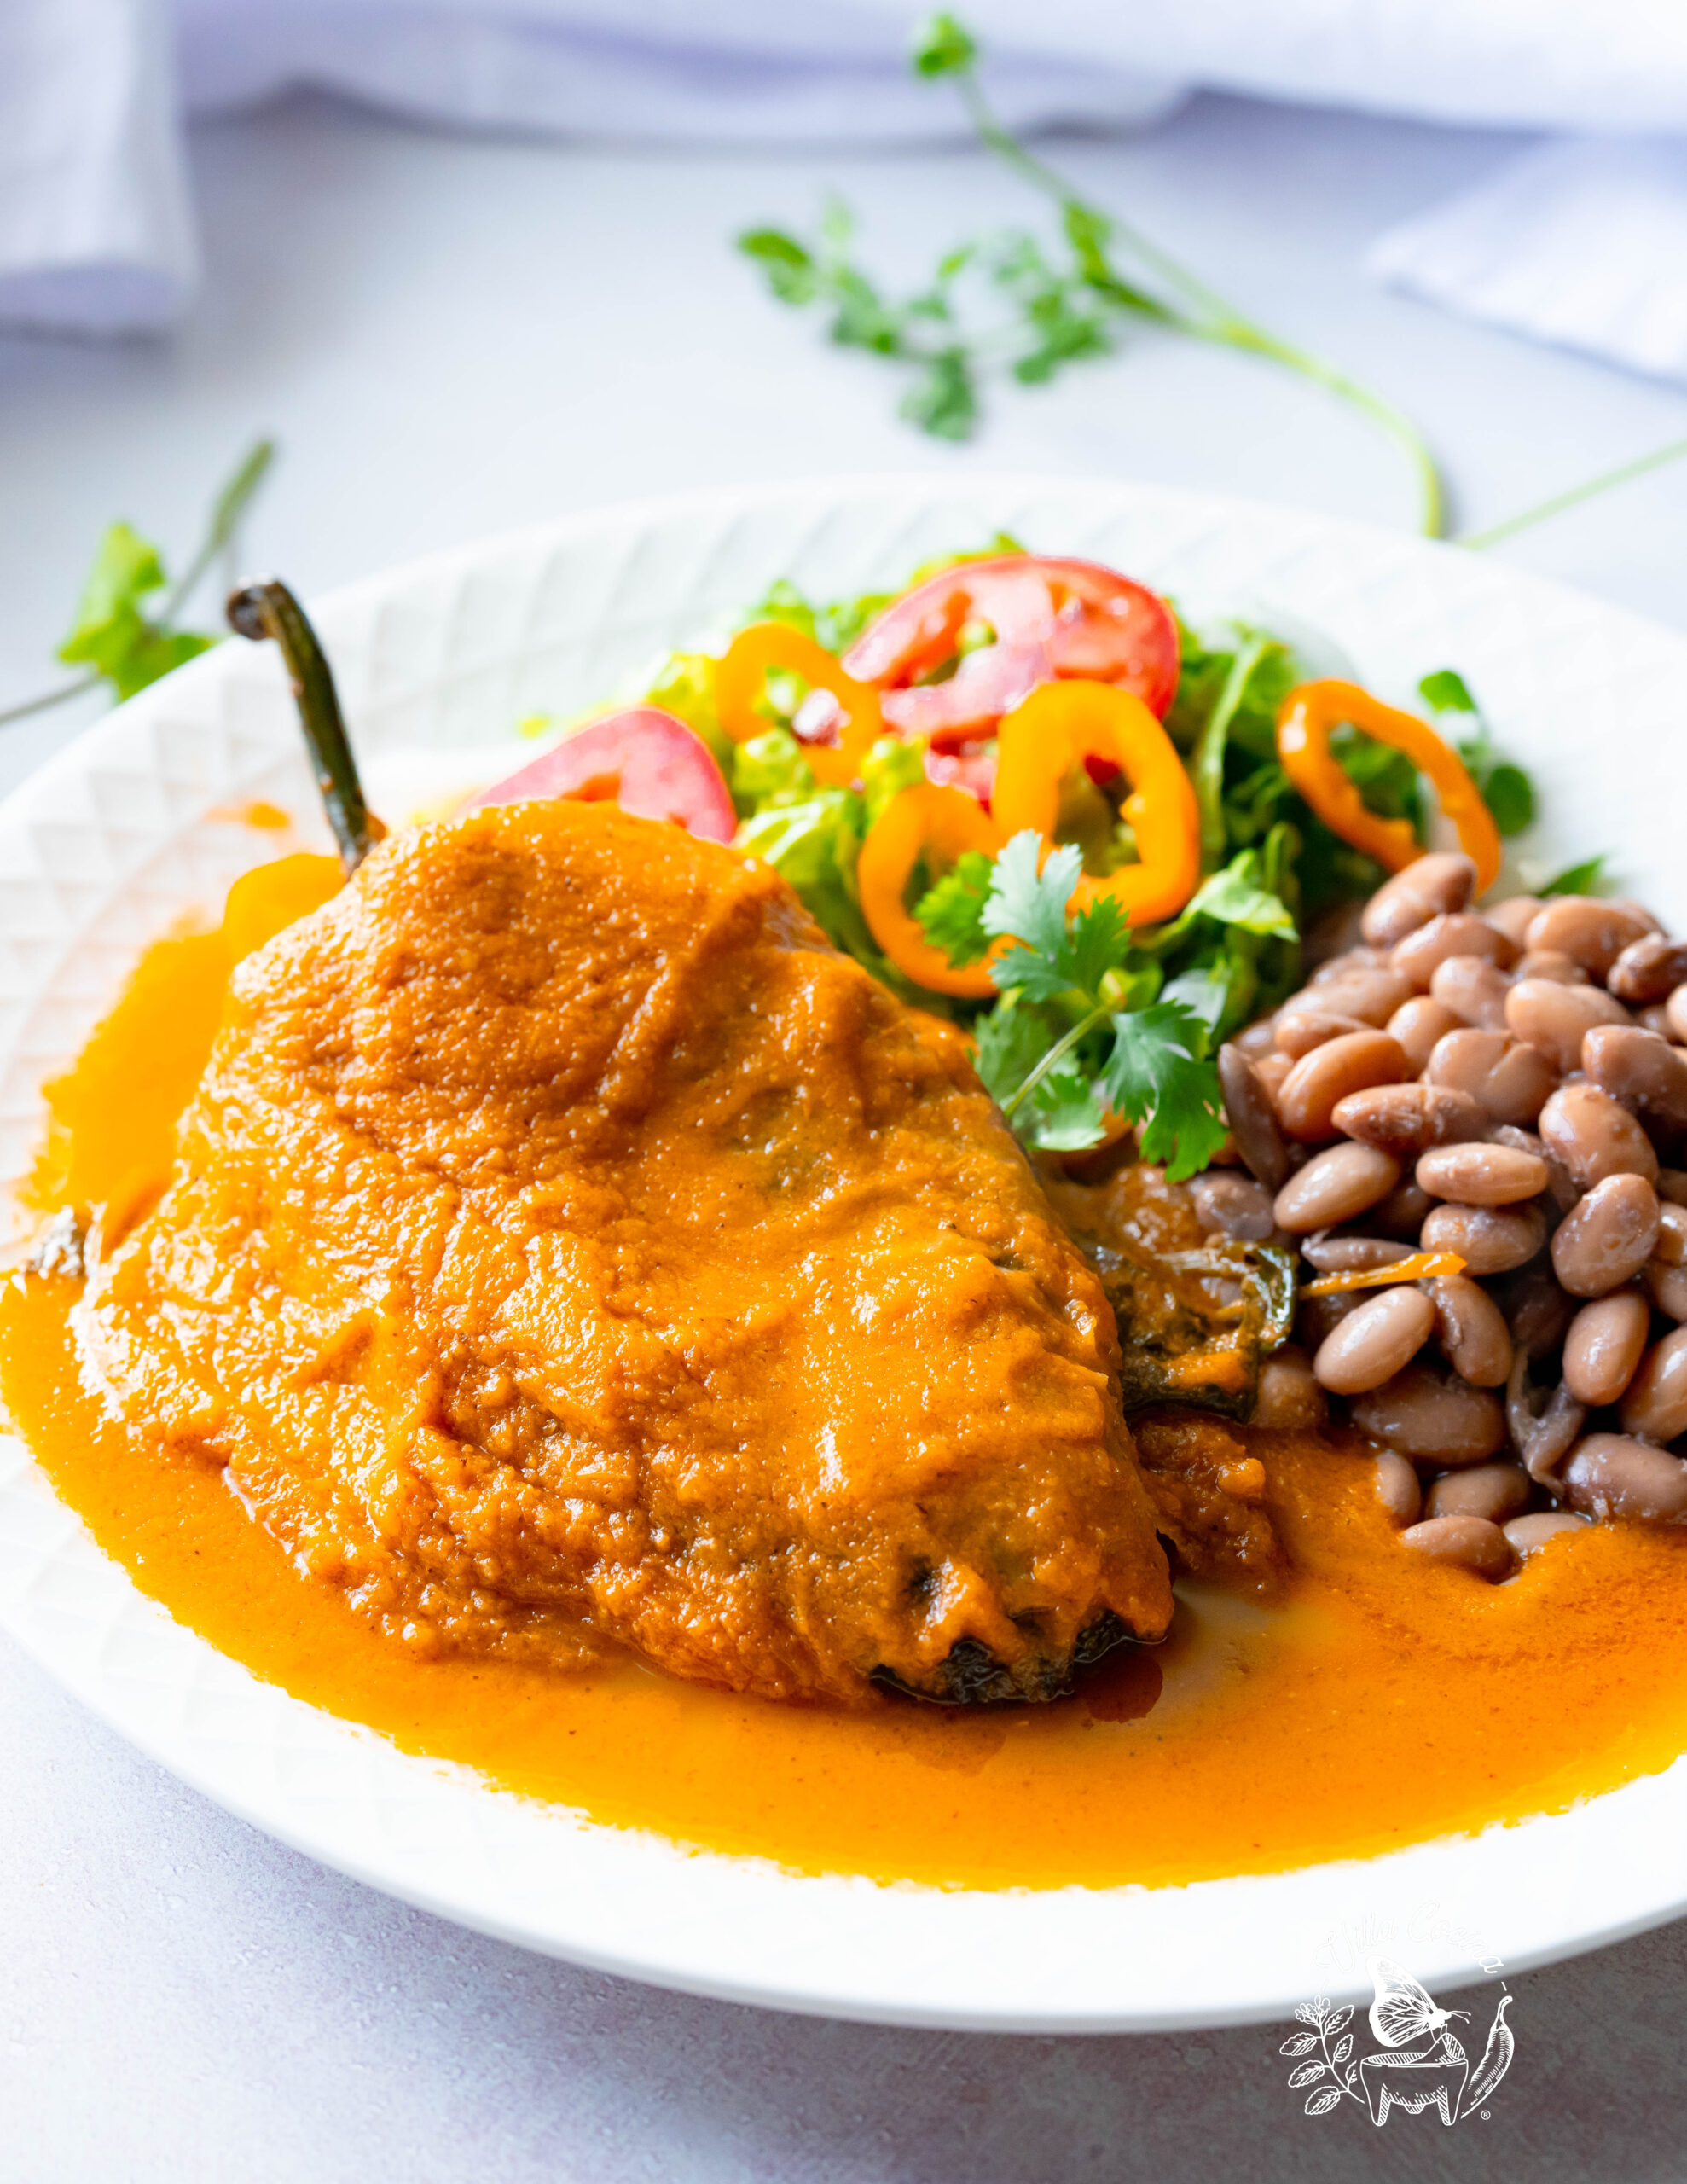
Once you learn how to make them, you’ll find endless ways to enjoy them. They pair beautifully with chicken quesadillas, chicken fajitas, tacos, burritos, and chile colorado. In fact, almost any dish wrapped, folded, or scooped with a homemade flour tortilla becomes something special.
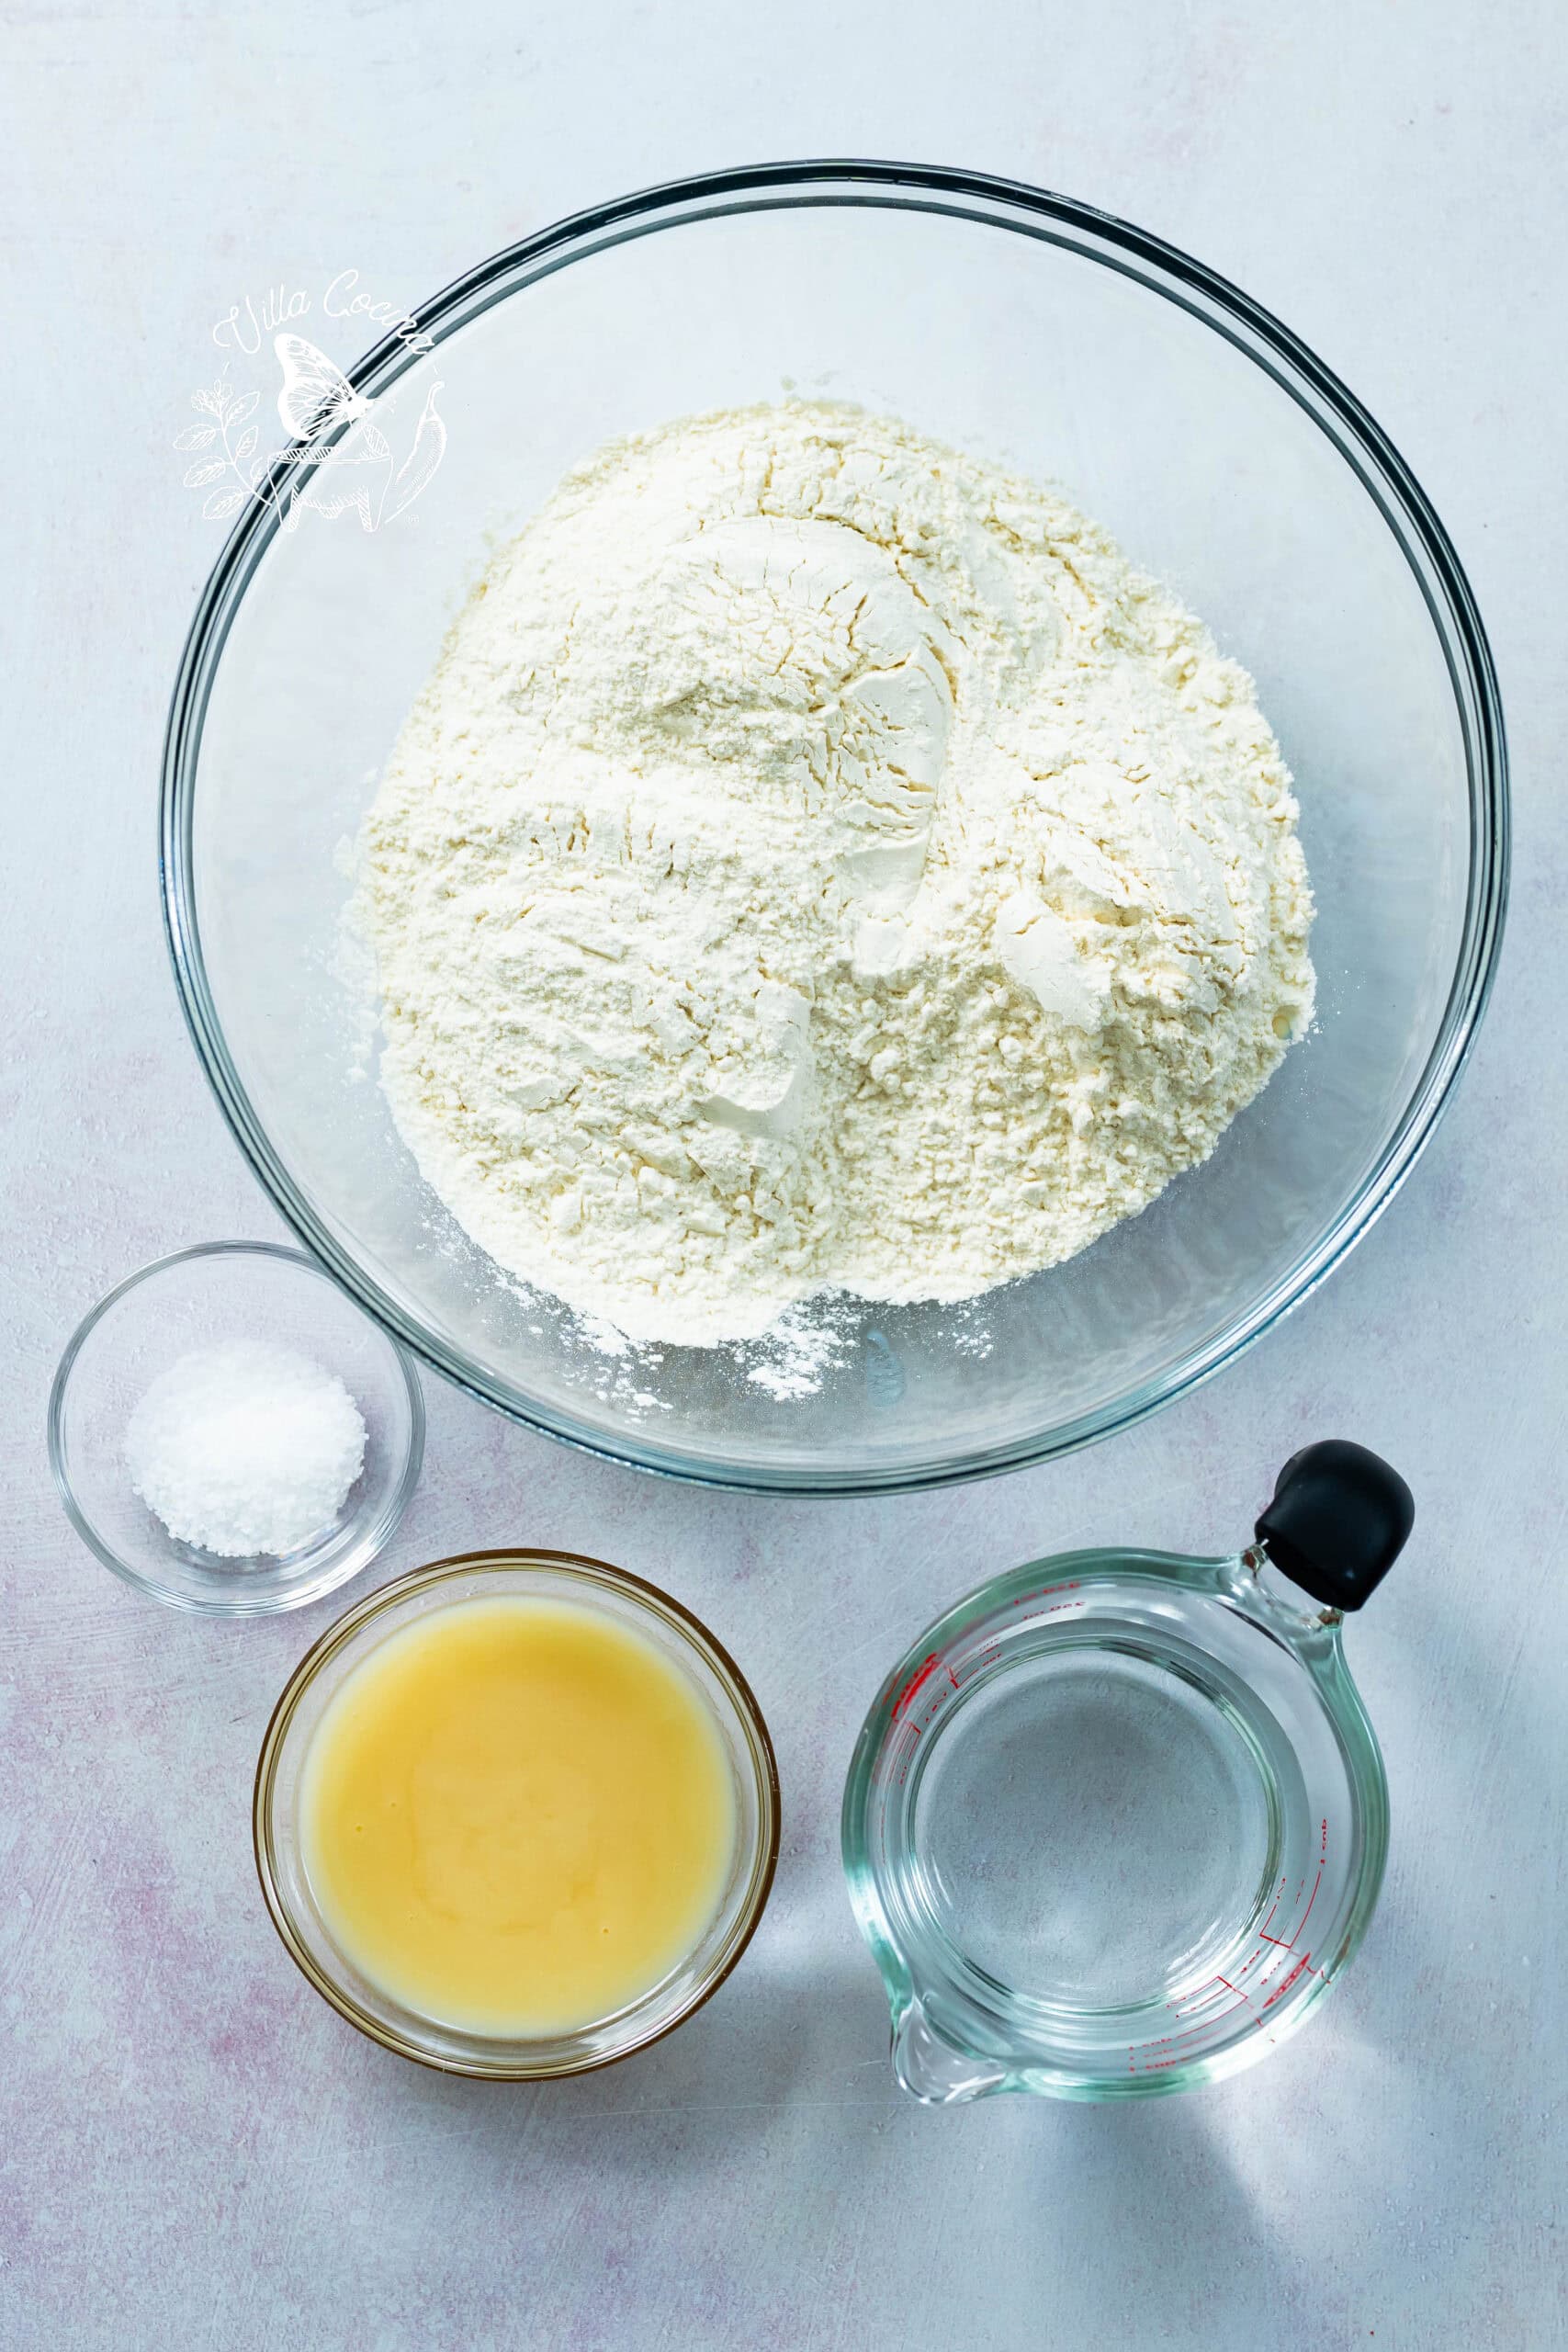
Ingredients
- All-Purpose Flour- Easy to find and the flour most of us are familiar with. It produces soft, tender tortillas.
- Kosher Salt- Seasons the tortillas and enhances their flavor. Feel free to adjust it to your taste.
- Pork Lard- Use room-temperature lard so it incorporates easily. It adds flavor, tenderness, and a traditional texture.
- Hot Water- Use water that feels hot but comfortable to handle. It helps hydrate the flour and bring the dough together. The amount needed may vary slightly depending on the water temperature, flour, and humidity.
How to Make Flour Tortillas
Here’s a quick overview of how everything comes together. For full, step-by-step instructions, be sure to check out the recipe card below.
Step 1: Make the Dough
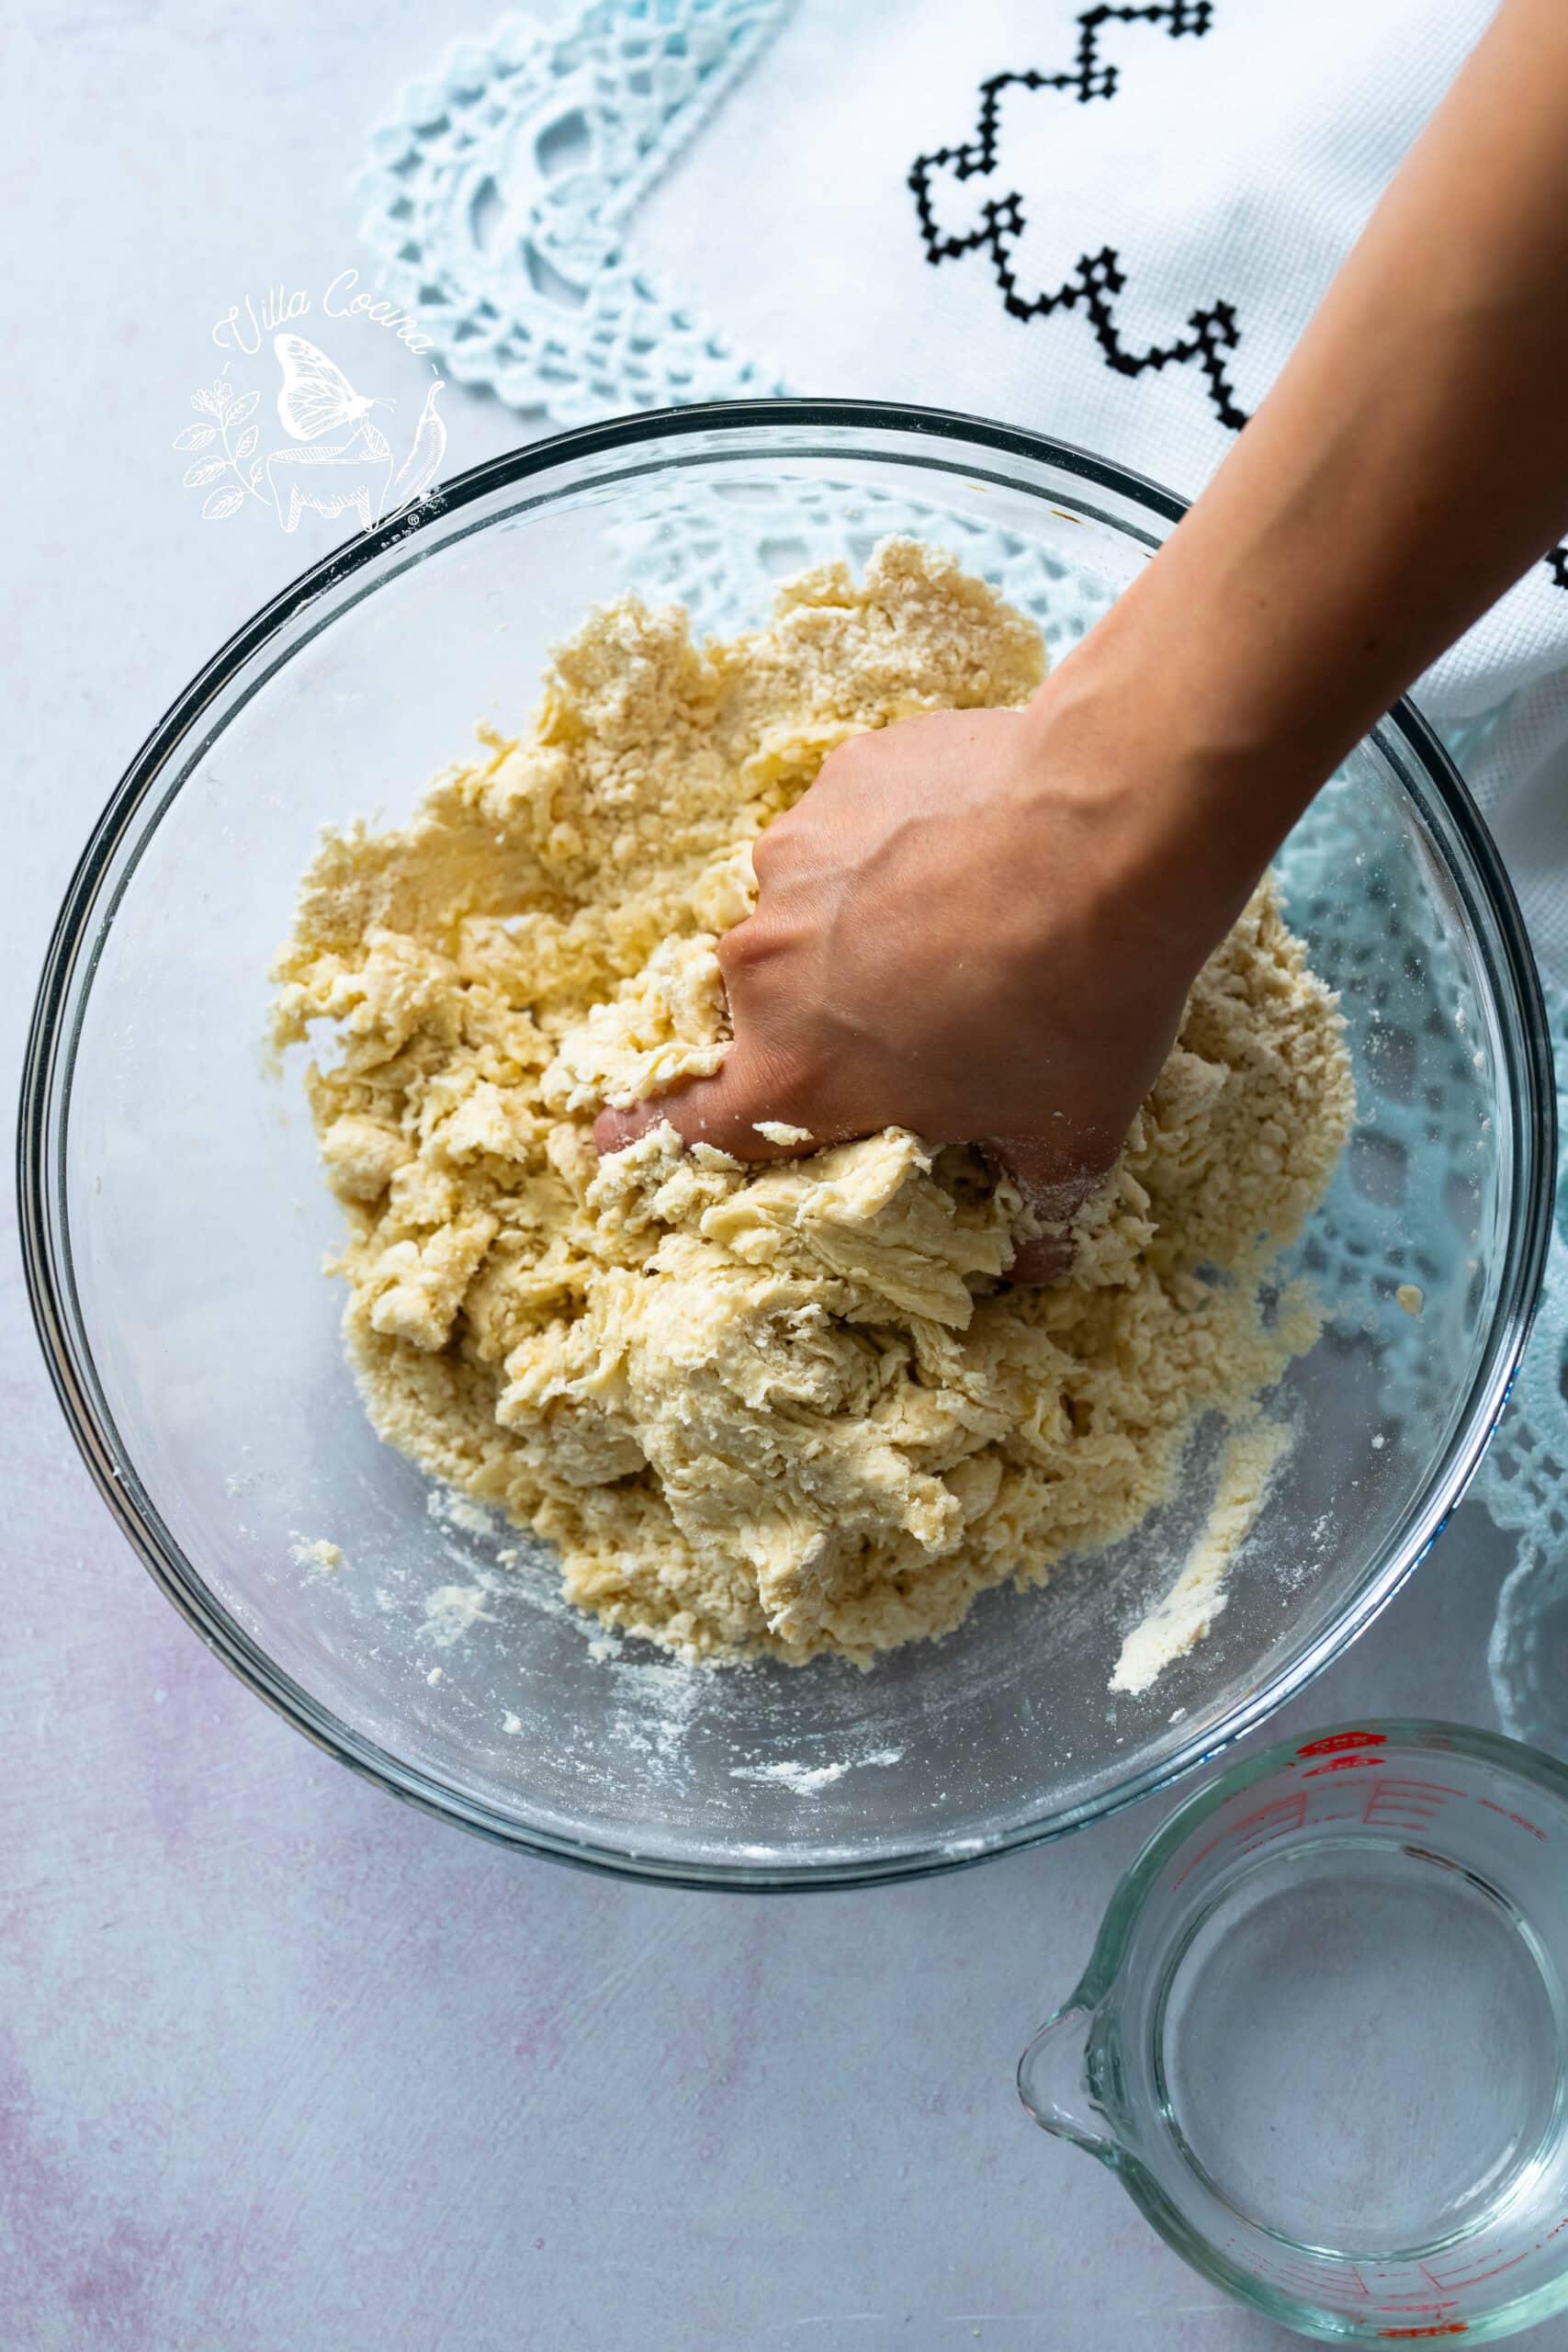
Mix the flour and salt, then work in the lard until the mixture resembles coarse crumbs. Gradually add the hot water and knead until a dough forms.
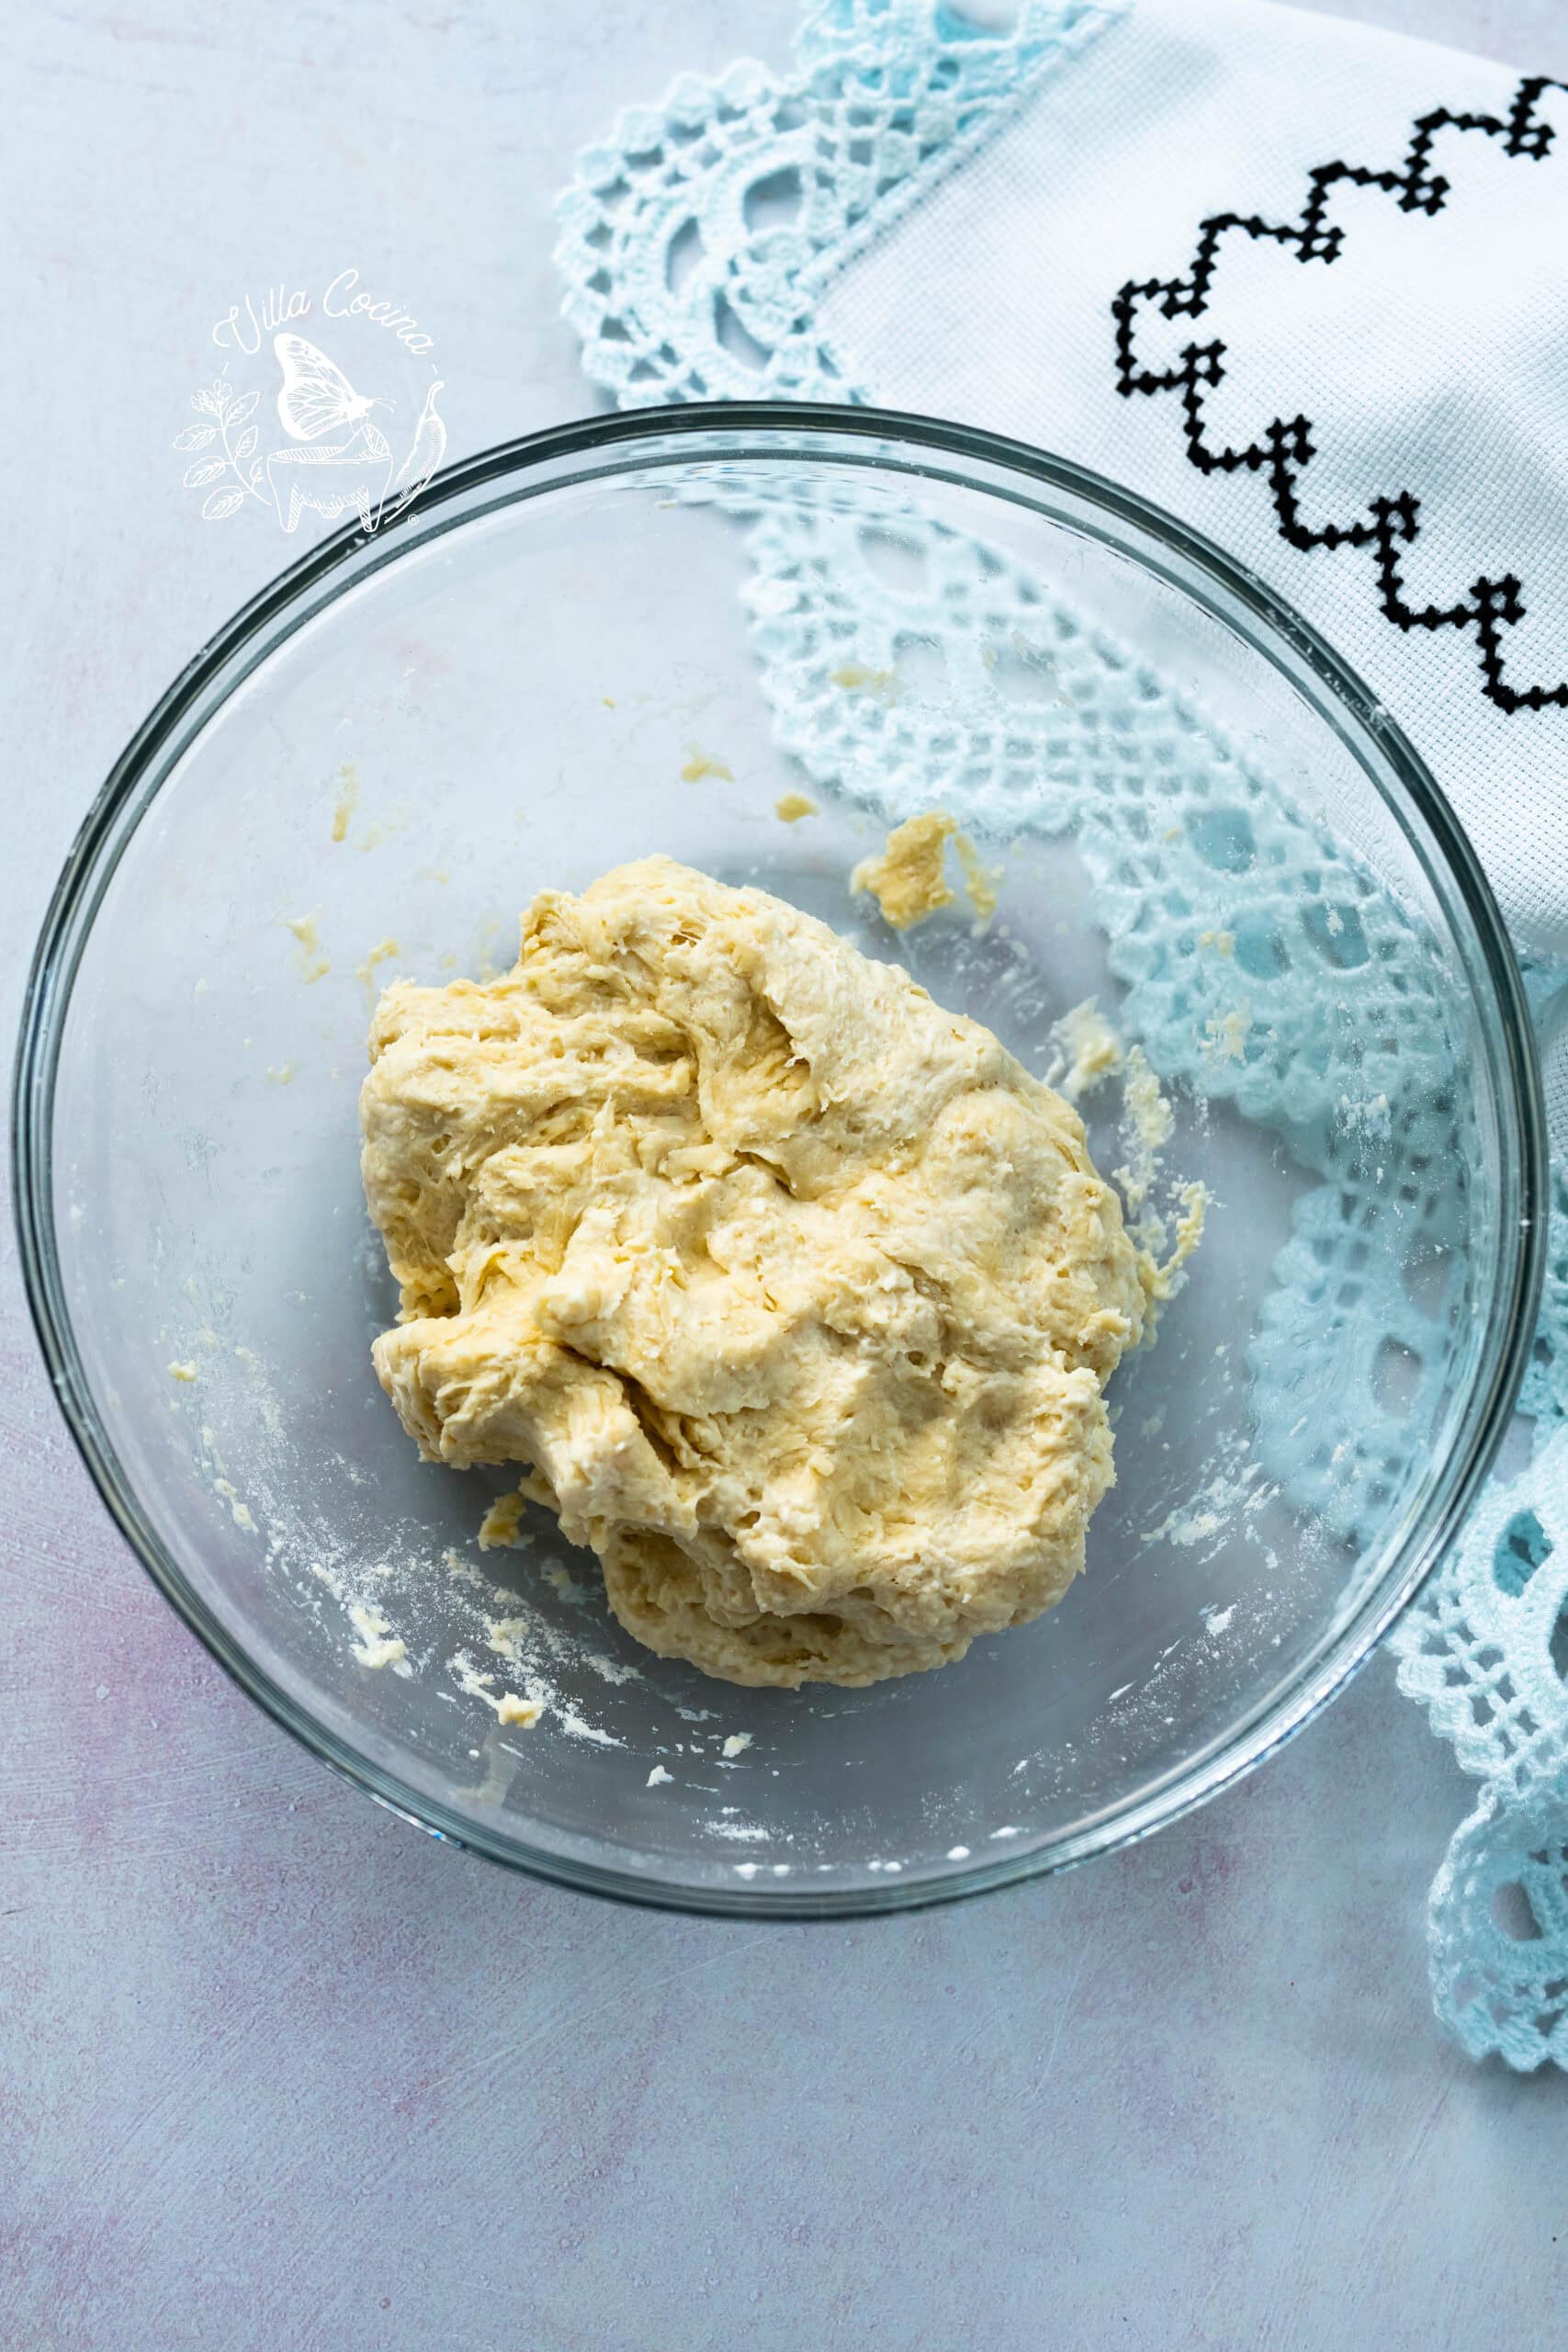
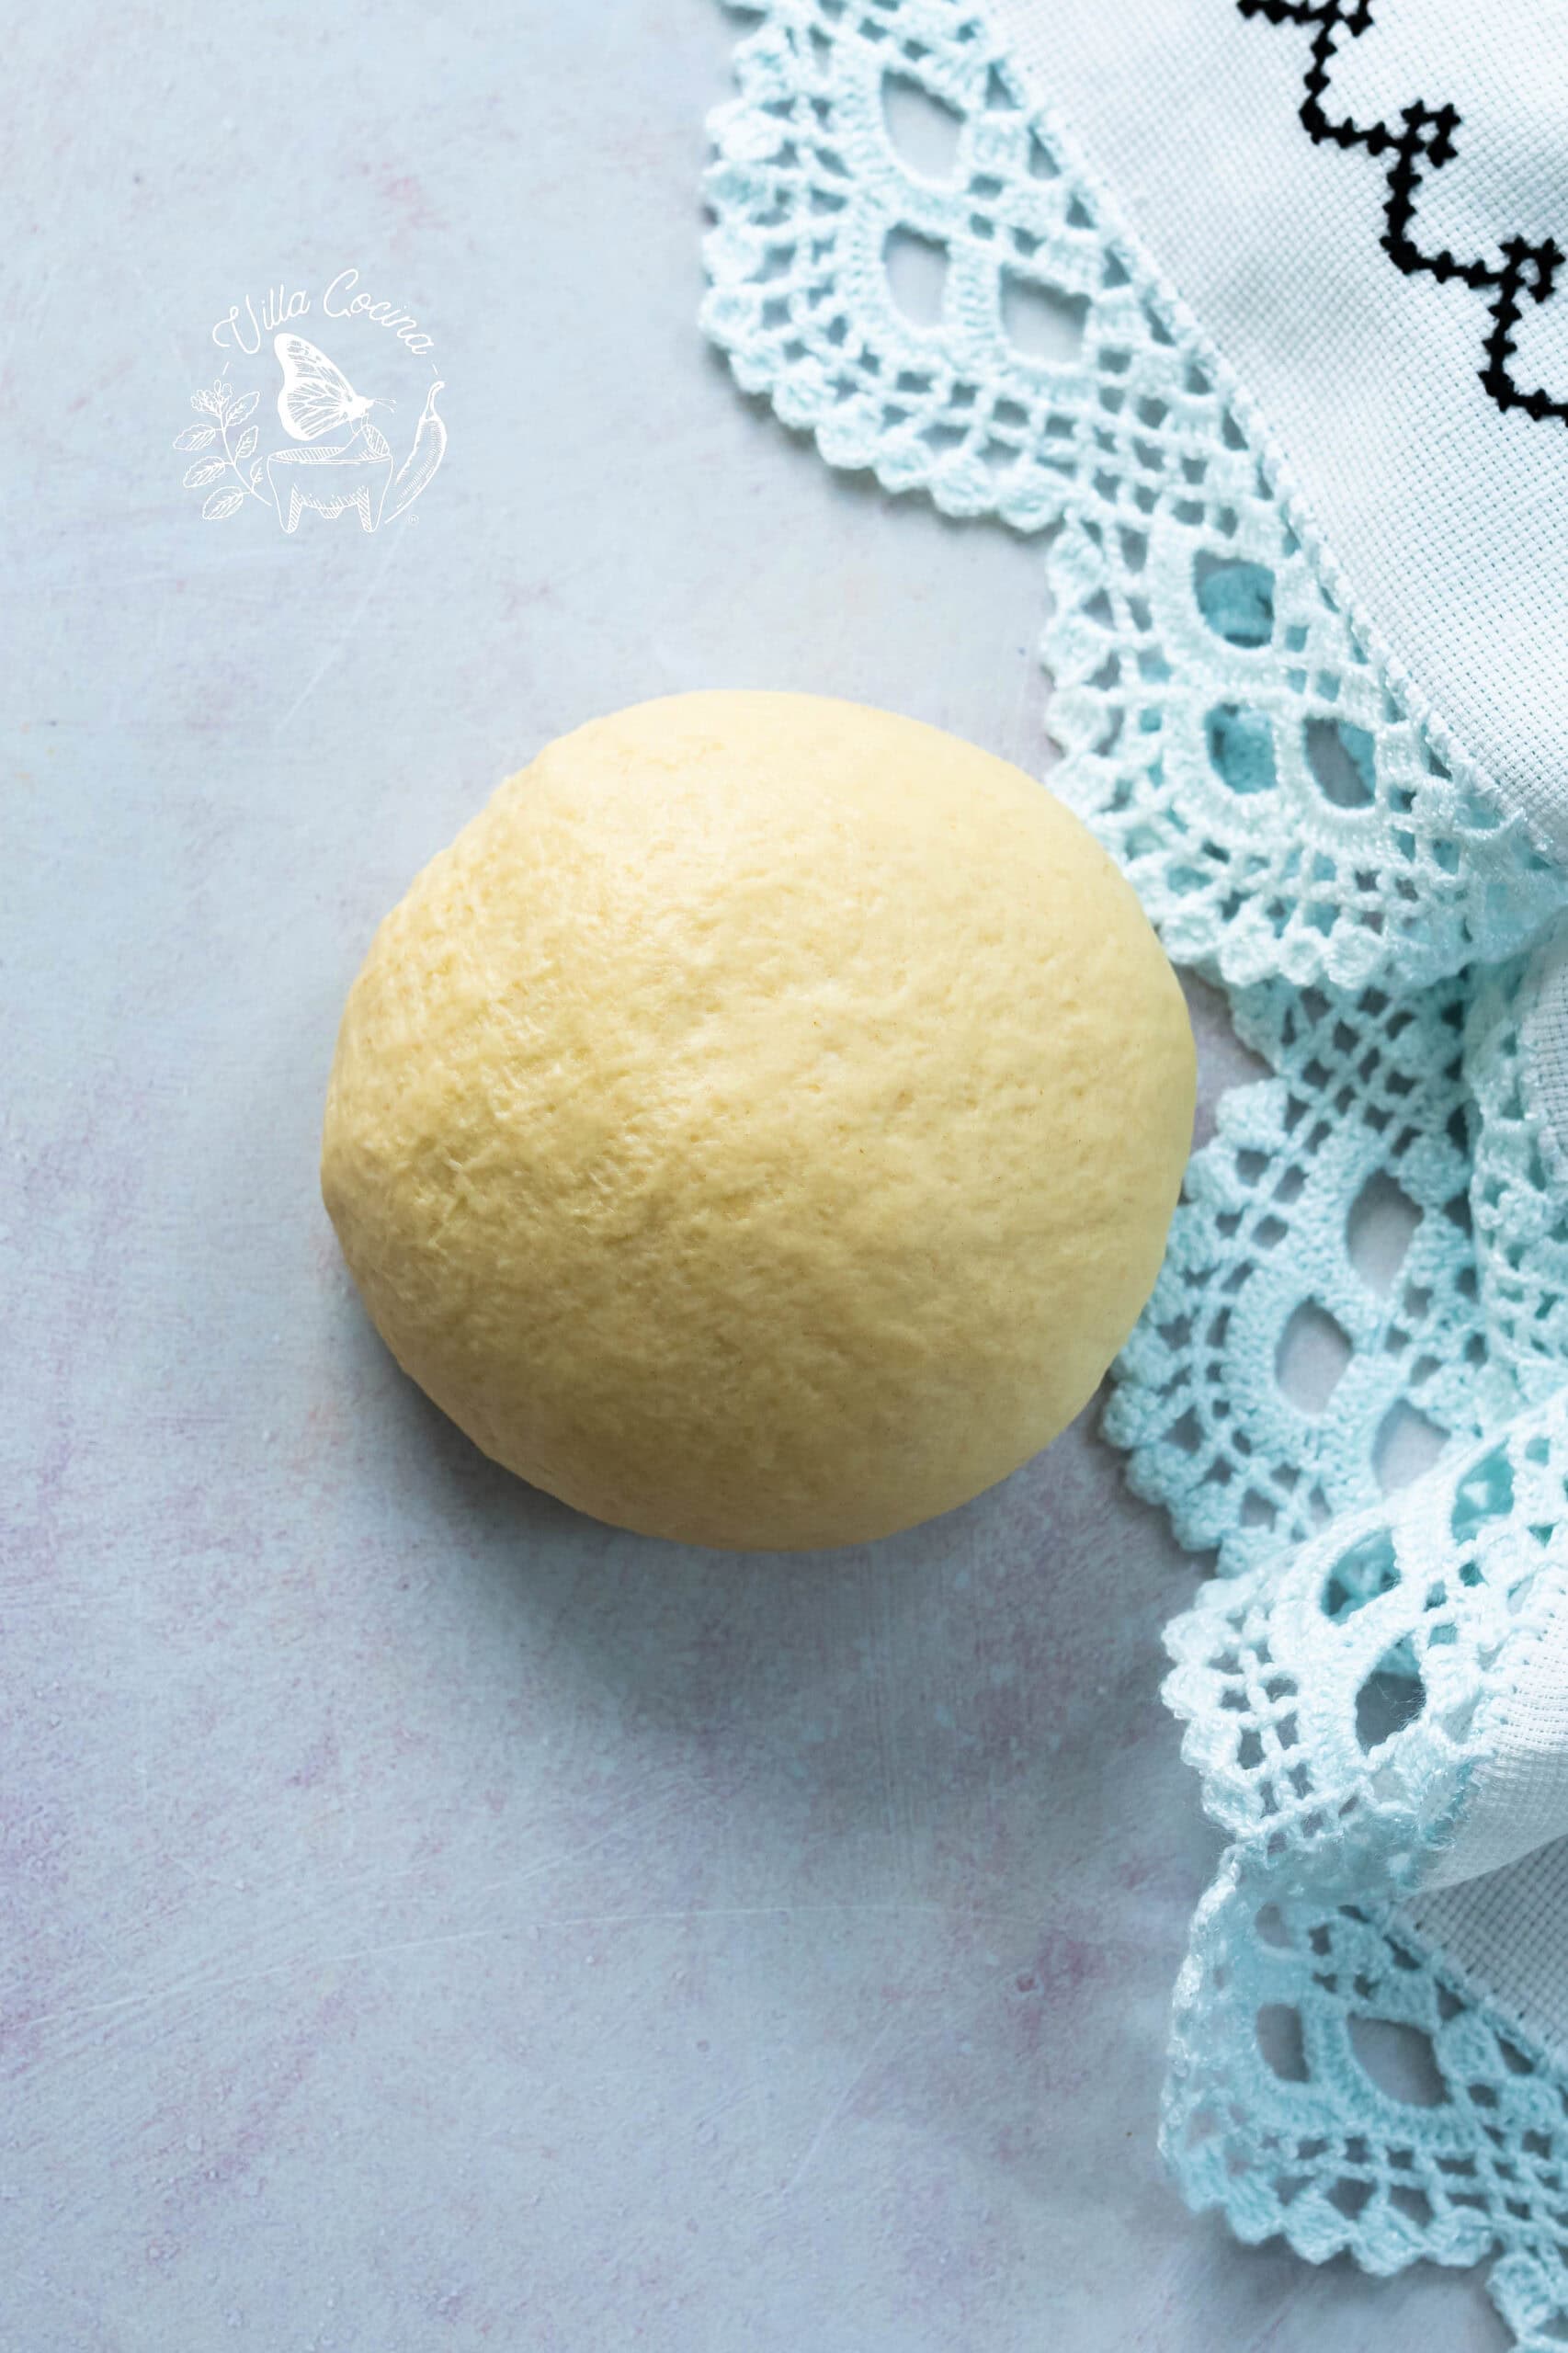
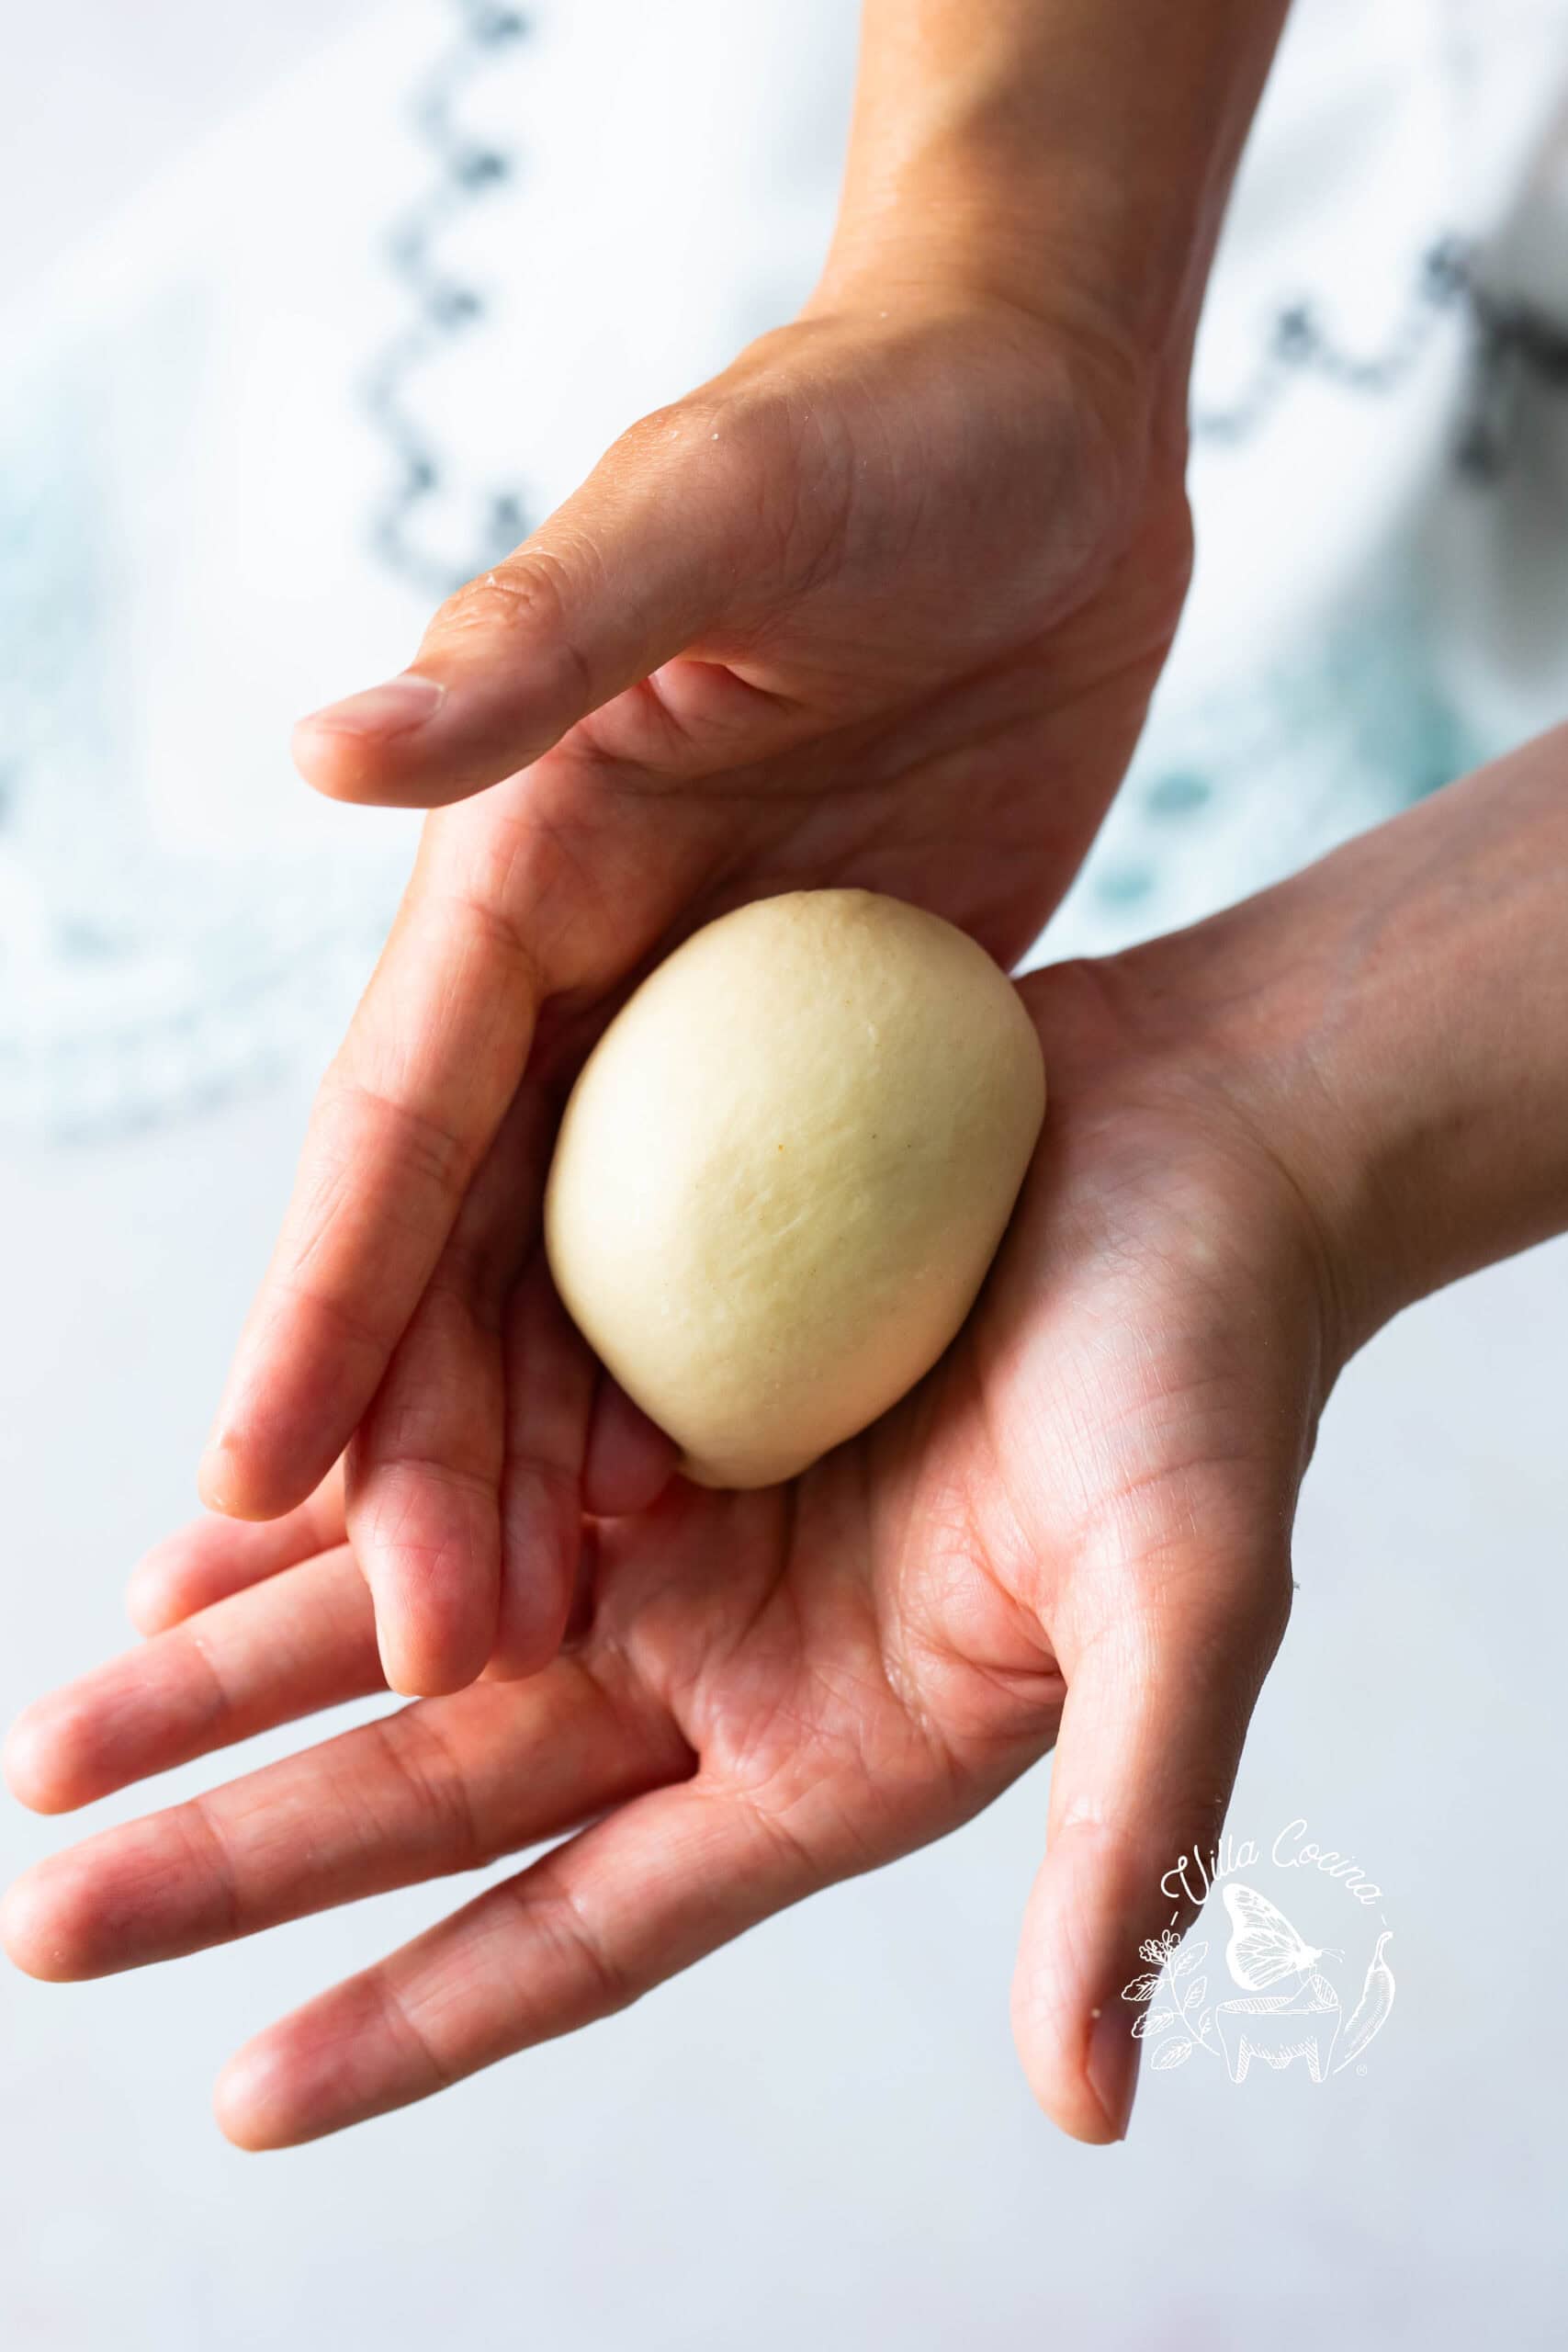
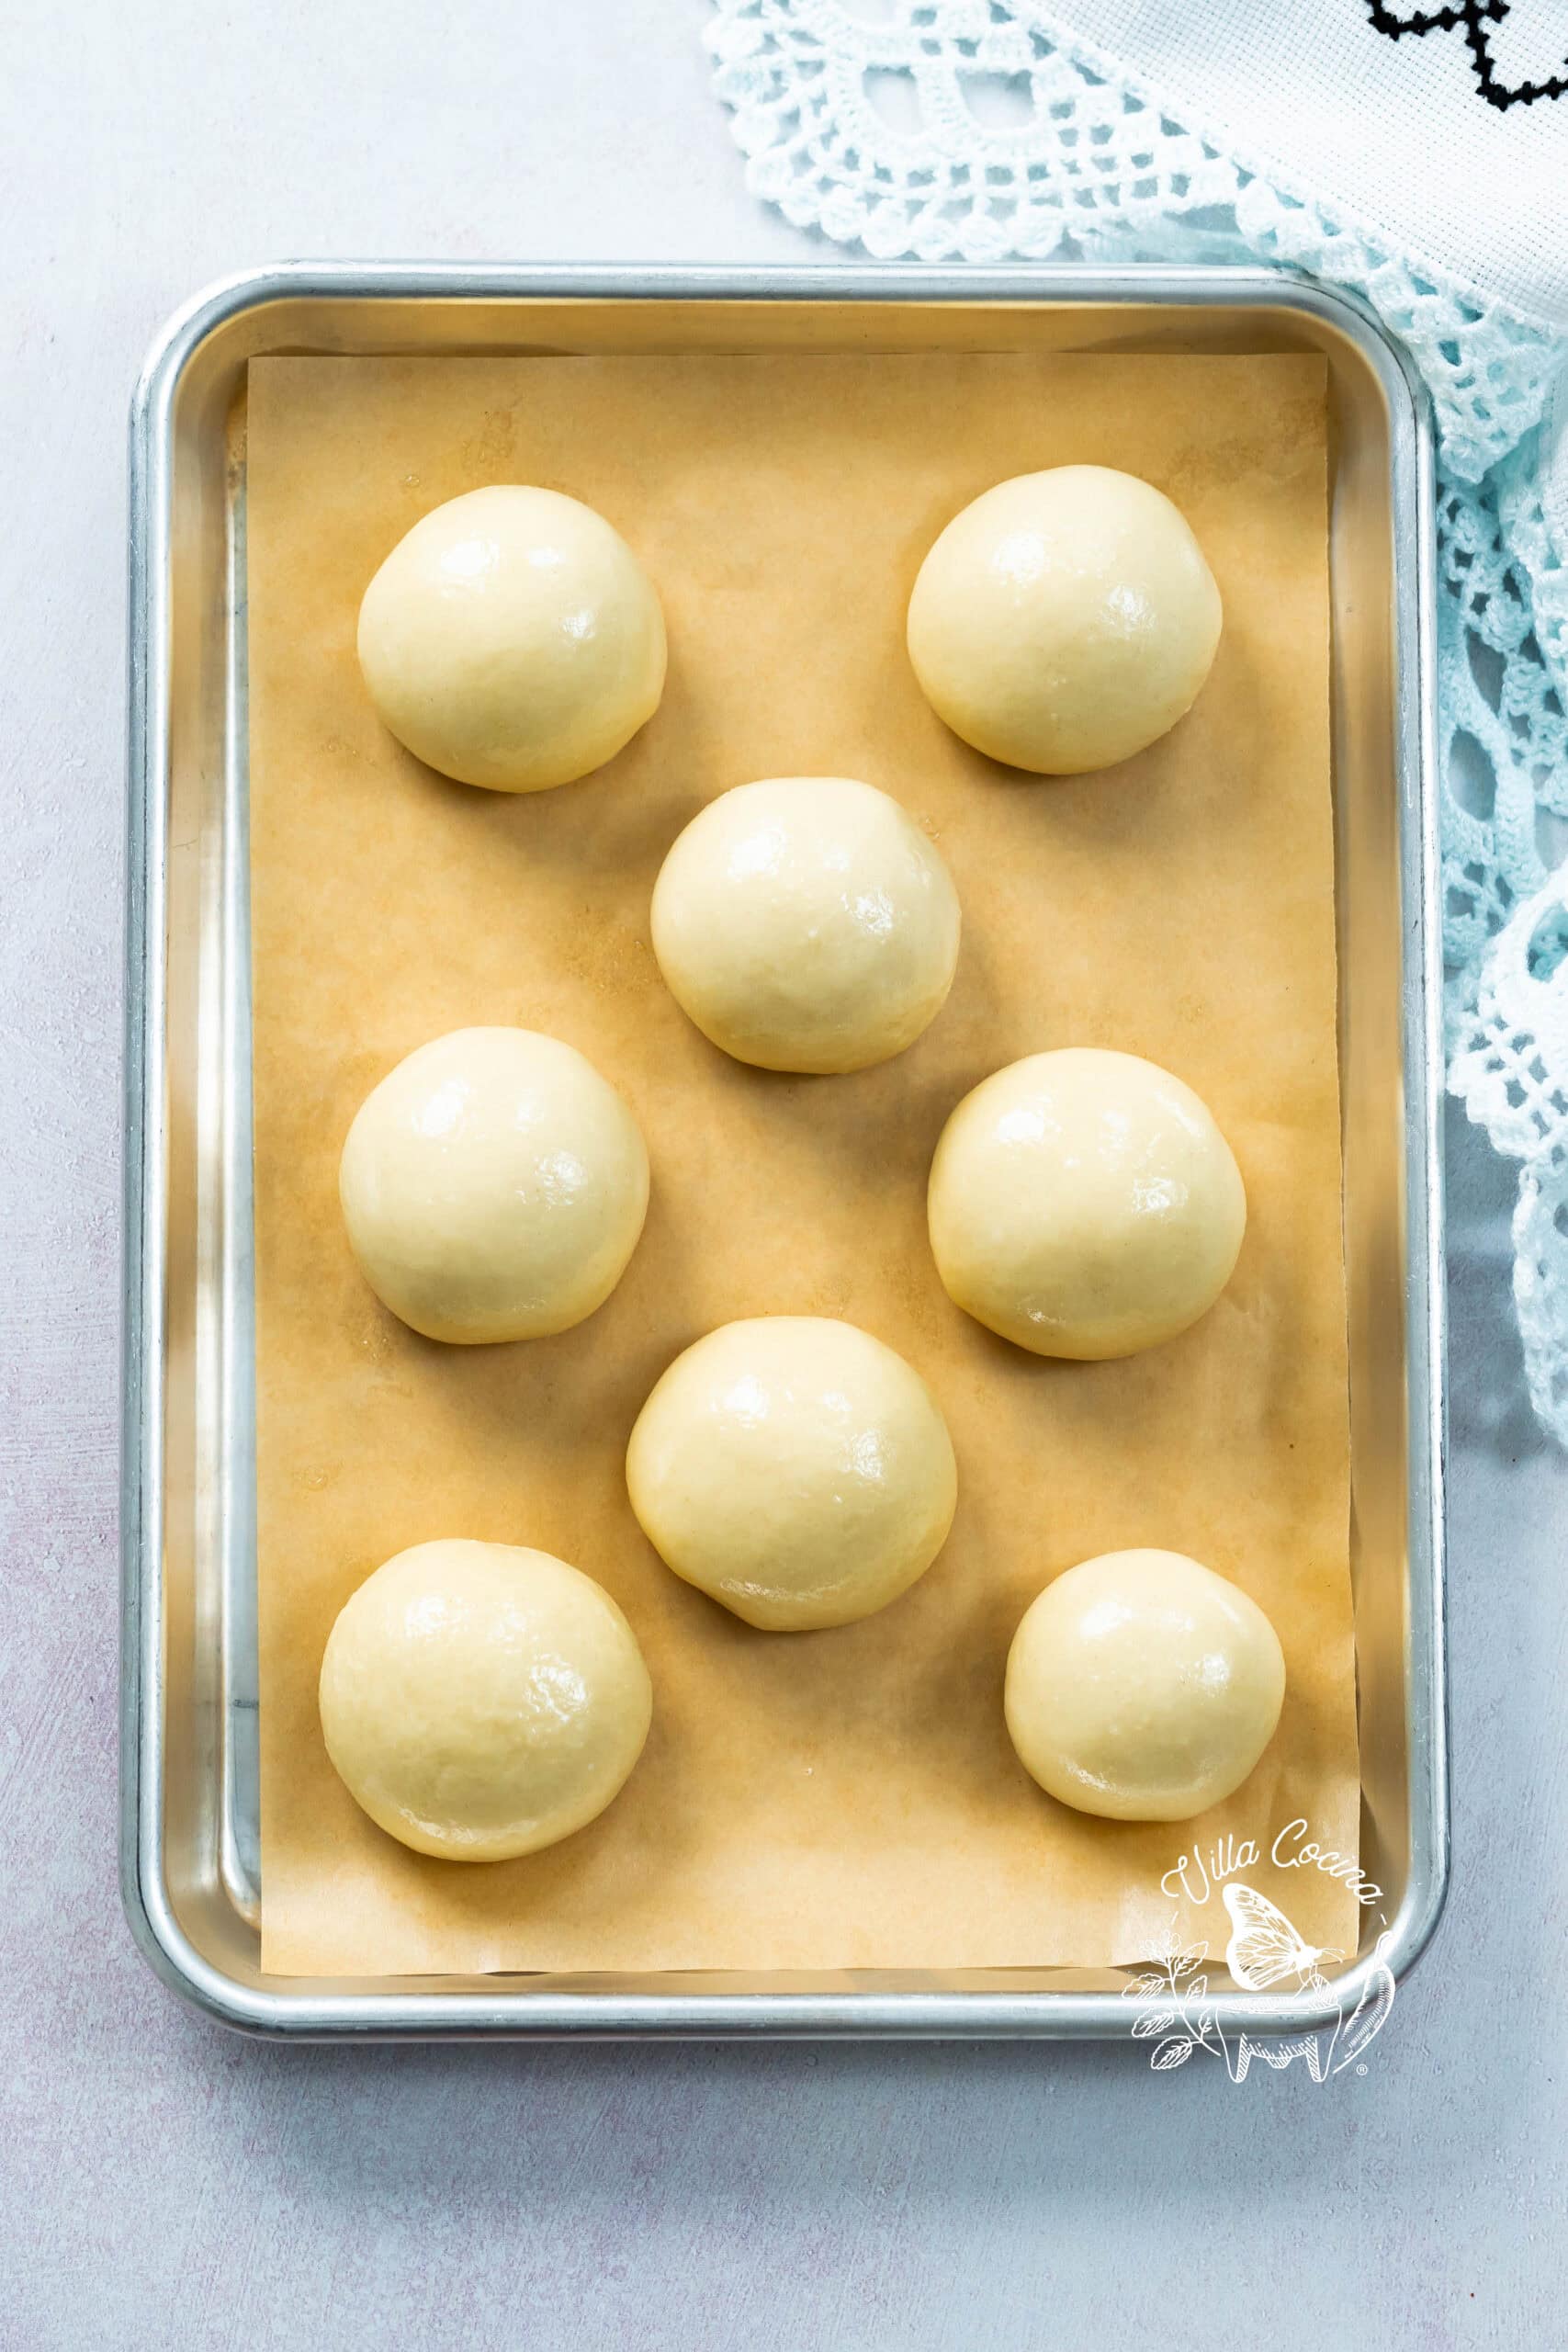
Continue kneading until smooth, soft, and elastic. Divide into portions, shape into smooth balls, lightly coat with lard, cover, and let rest until relaxed and easy to roll.
Step 2: Roll the Tortillas
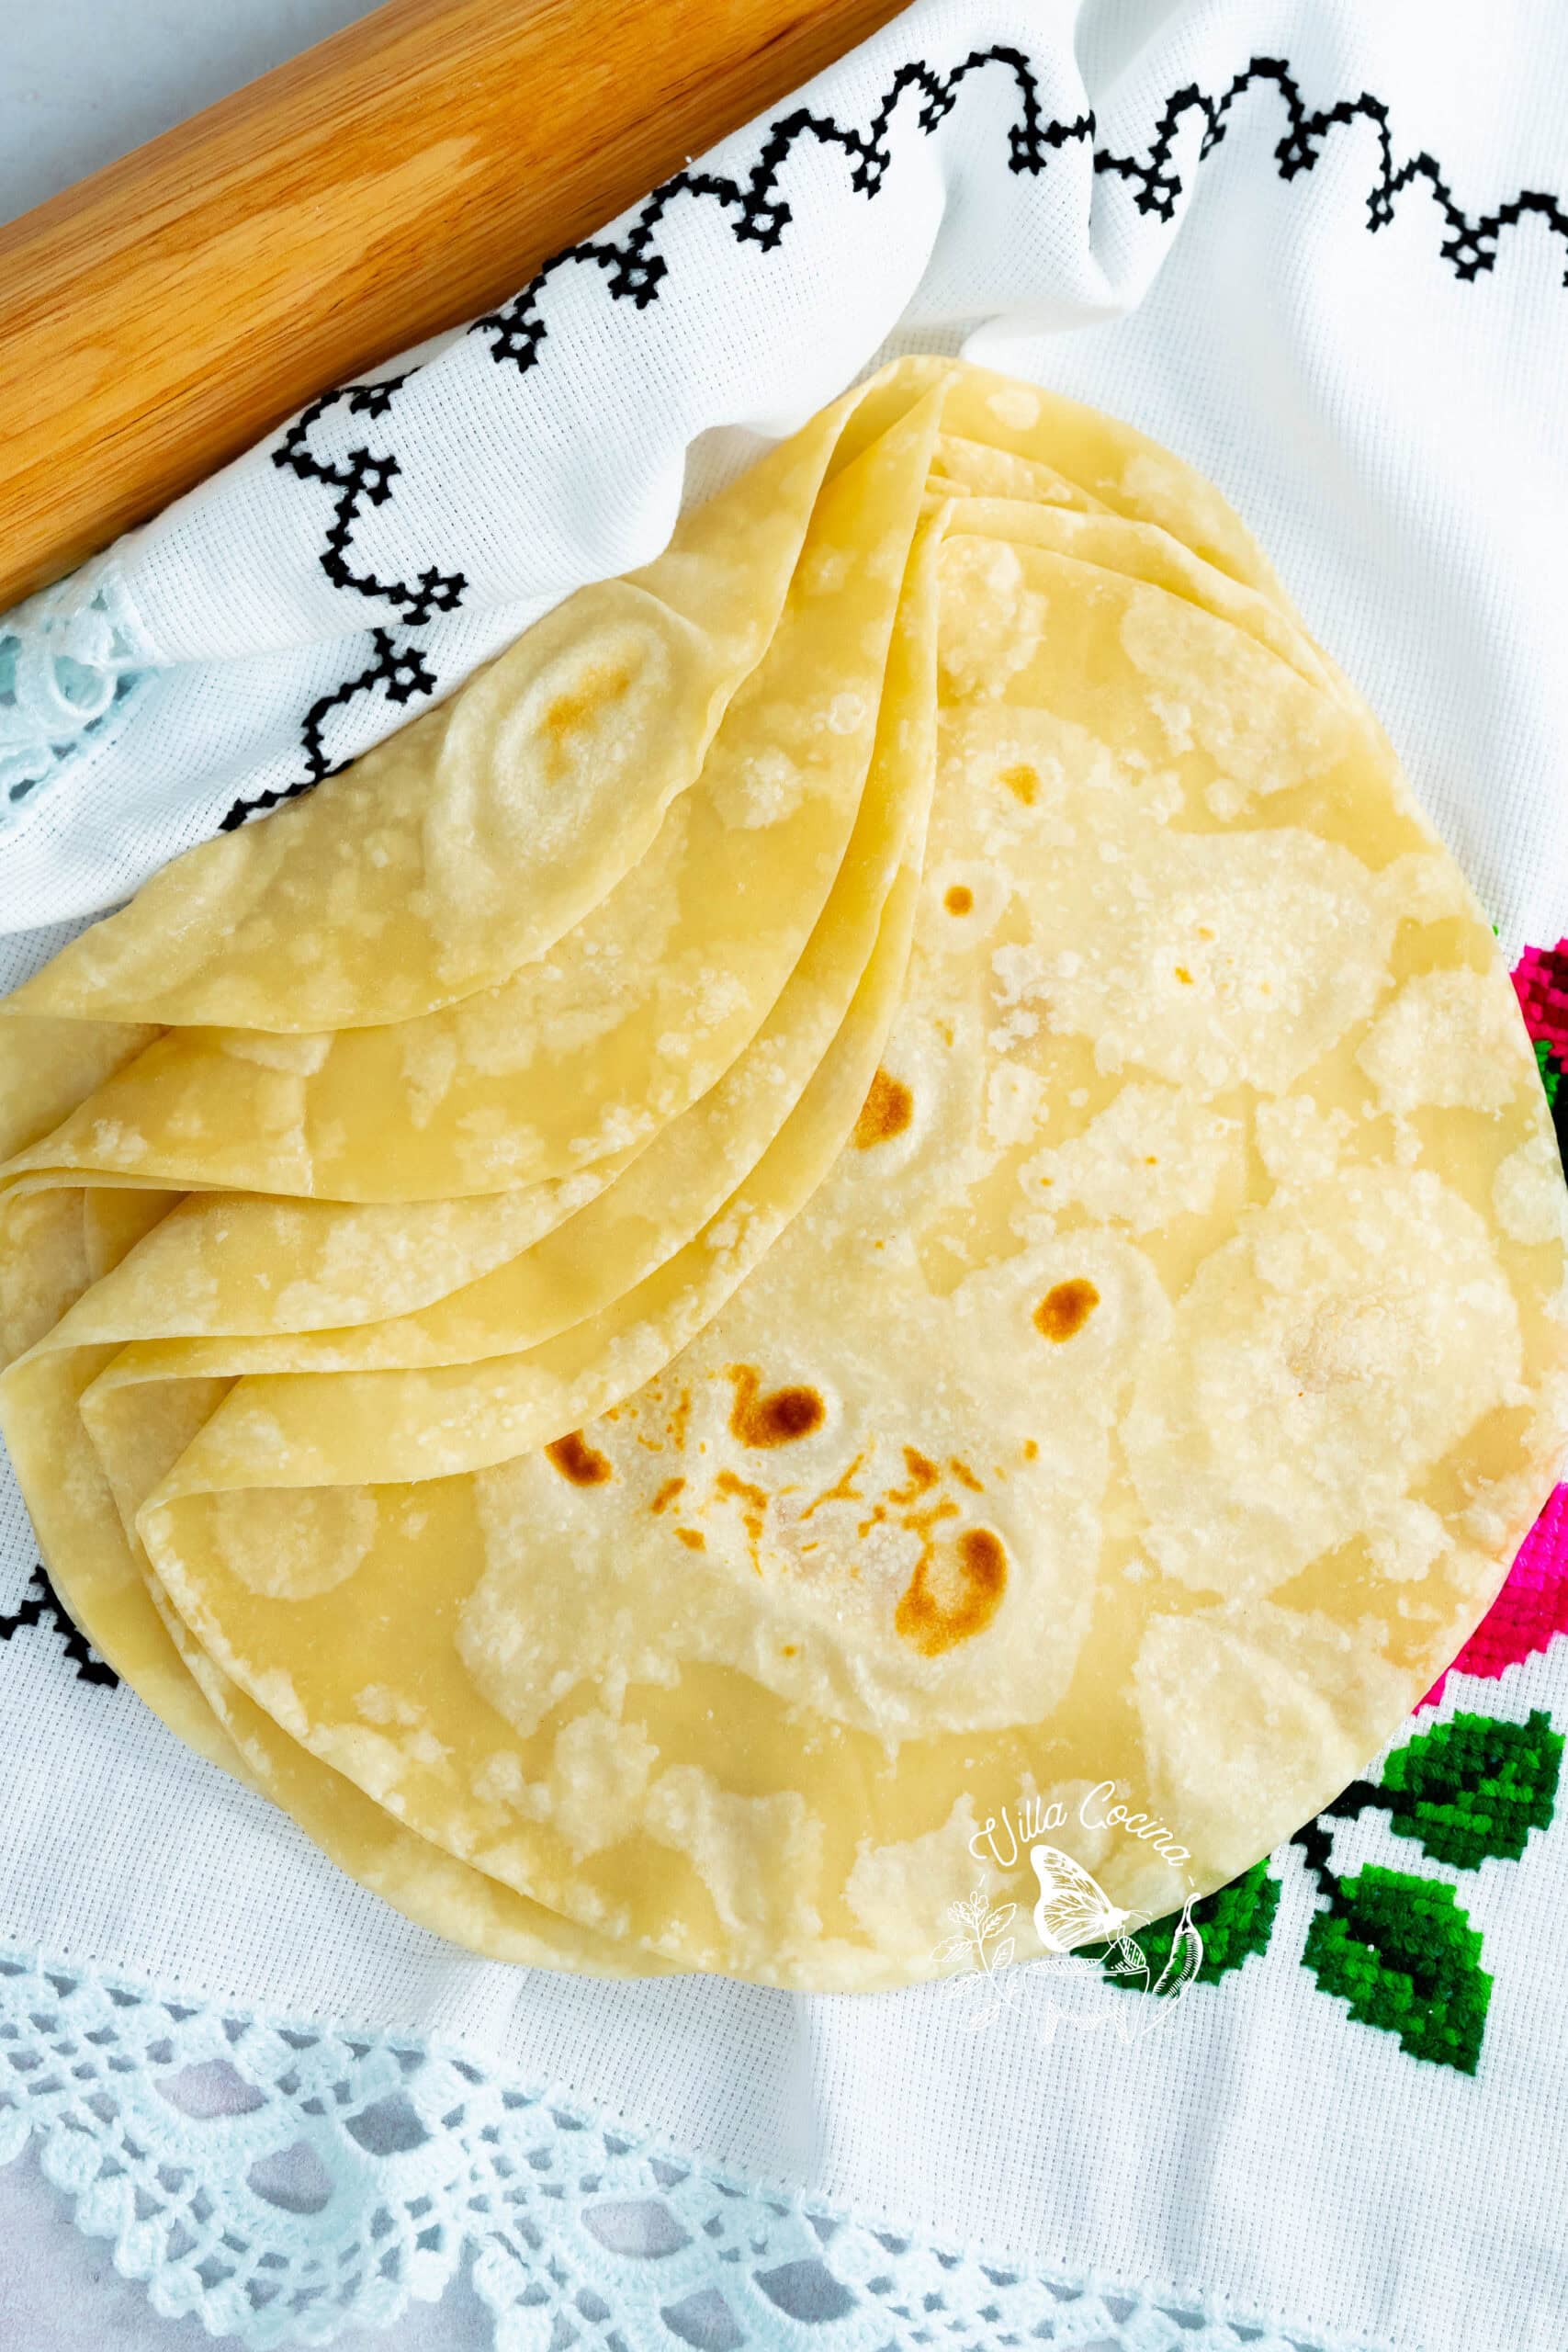
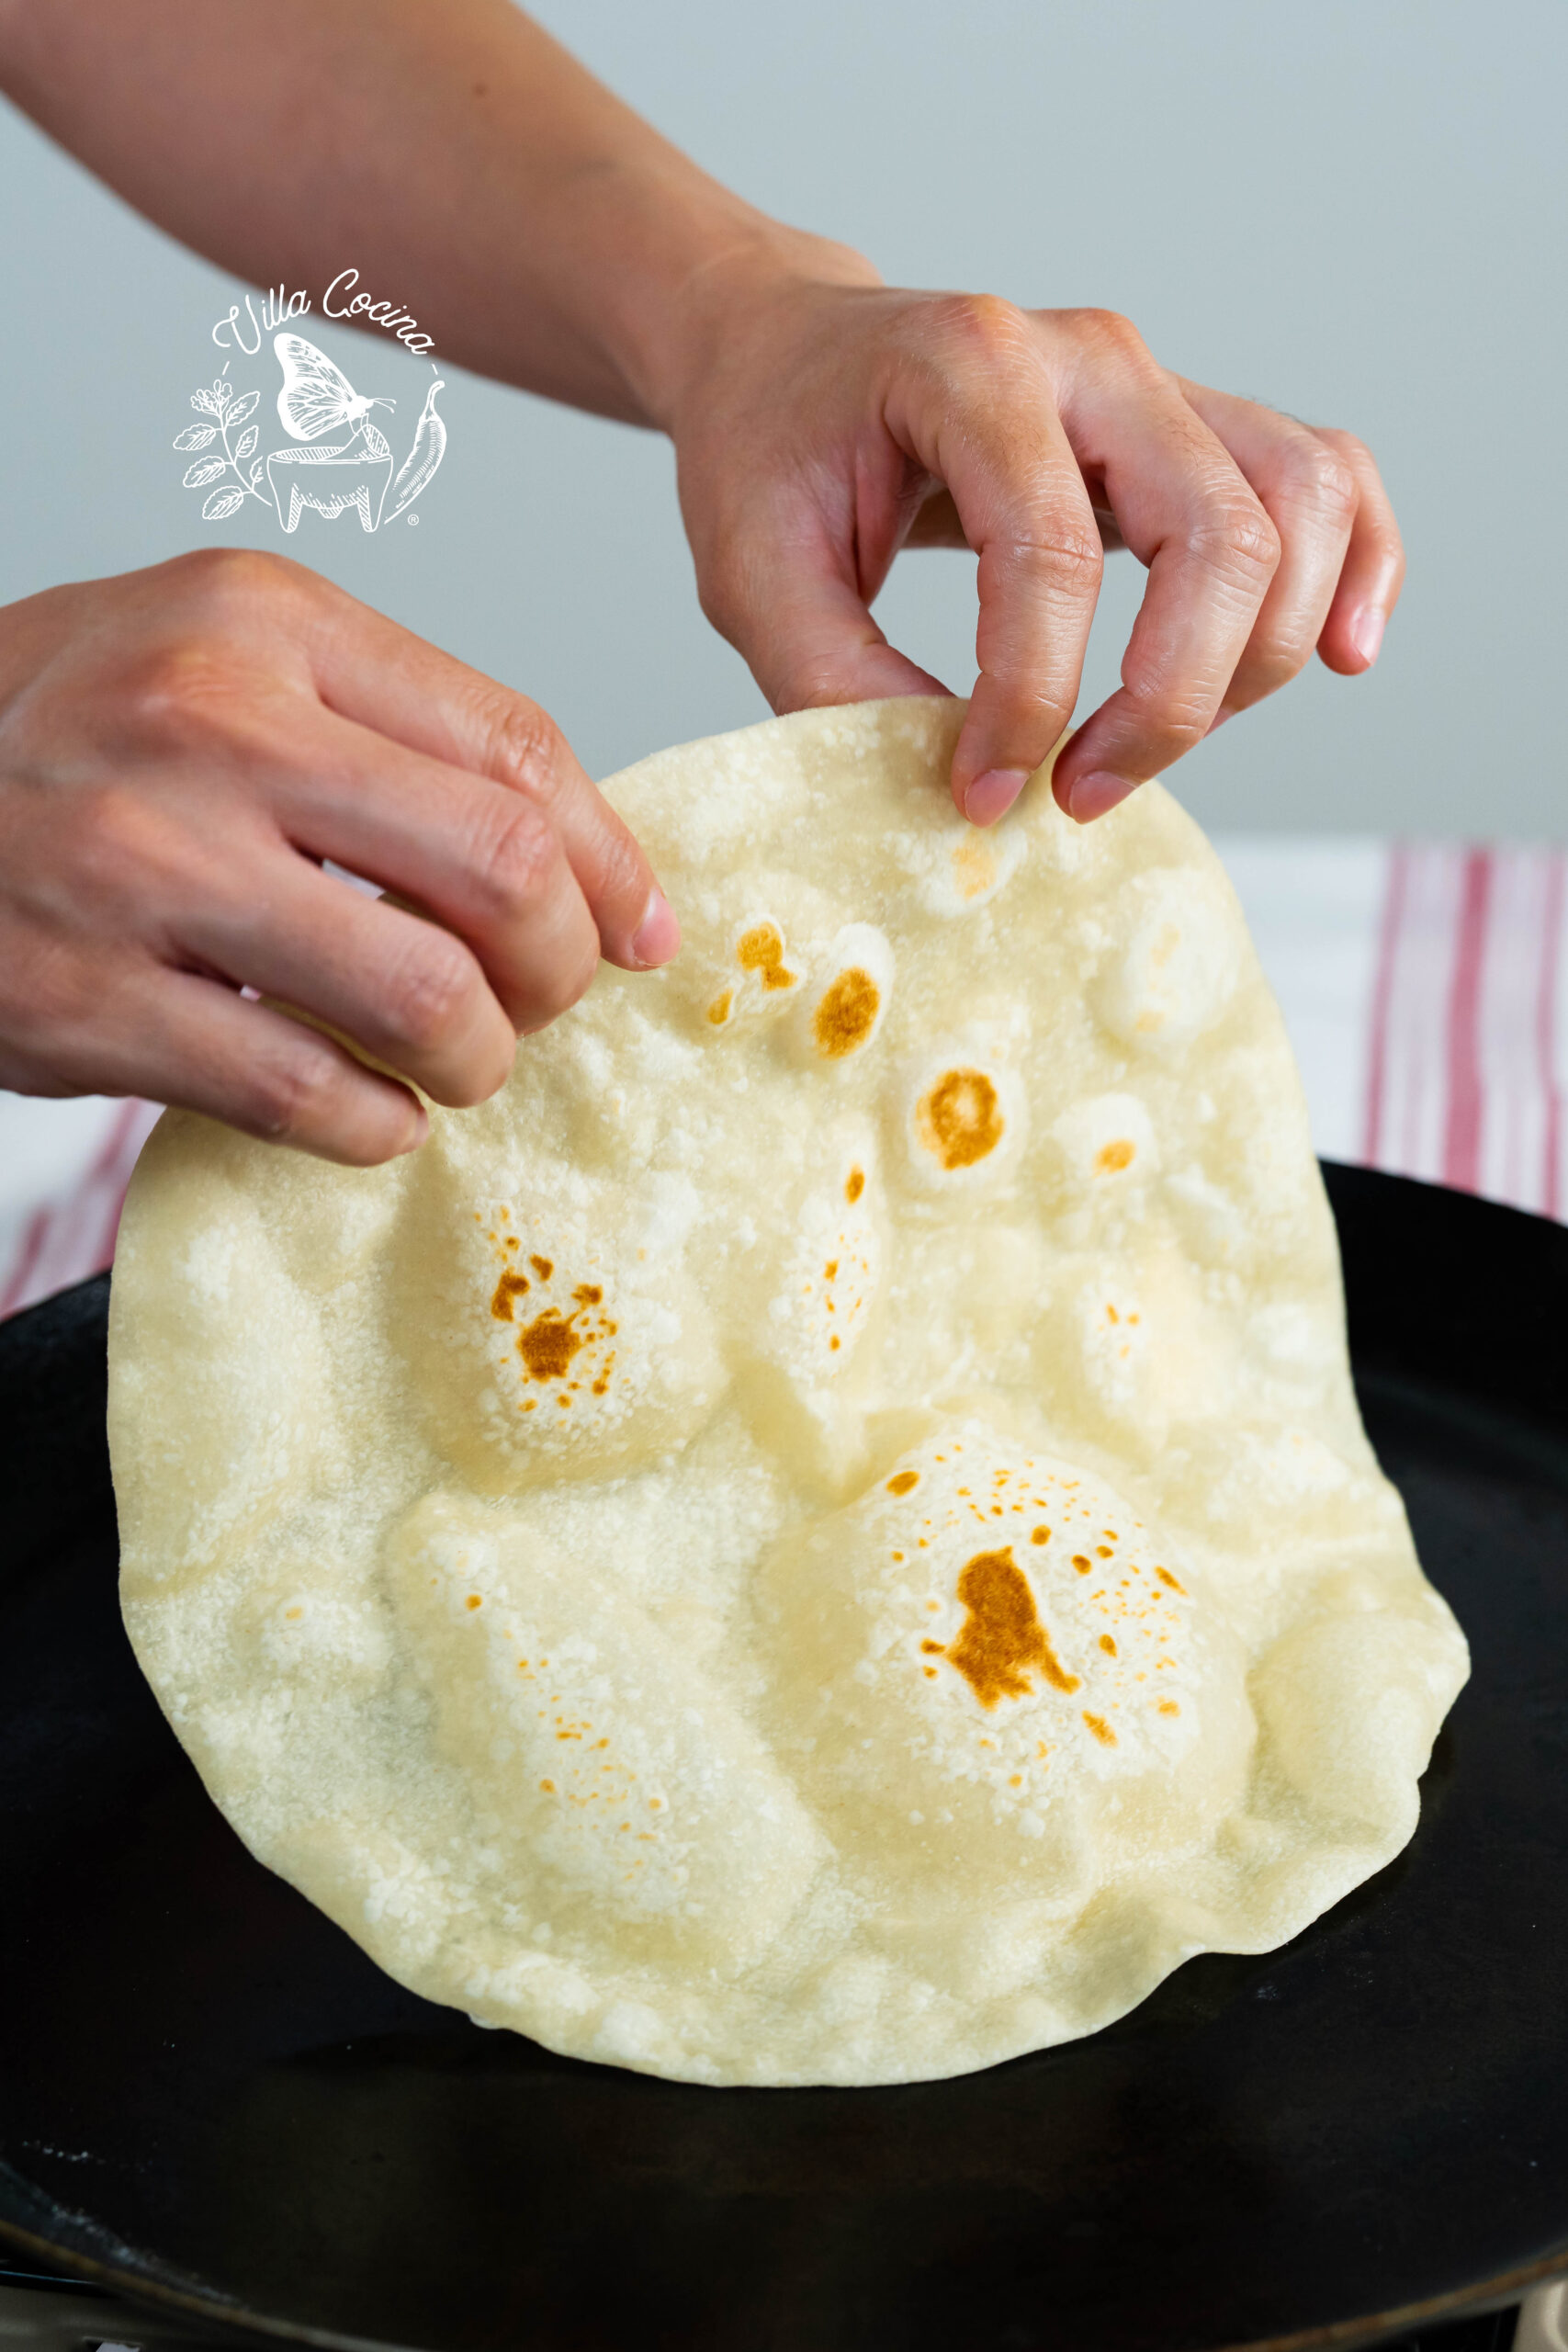
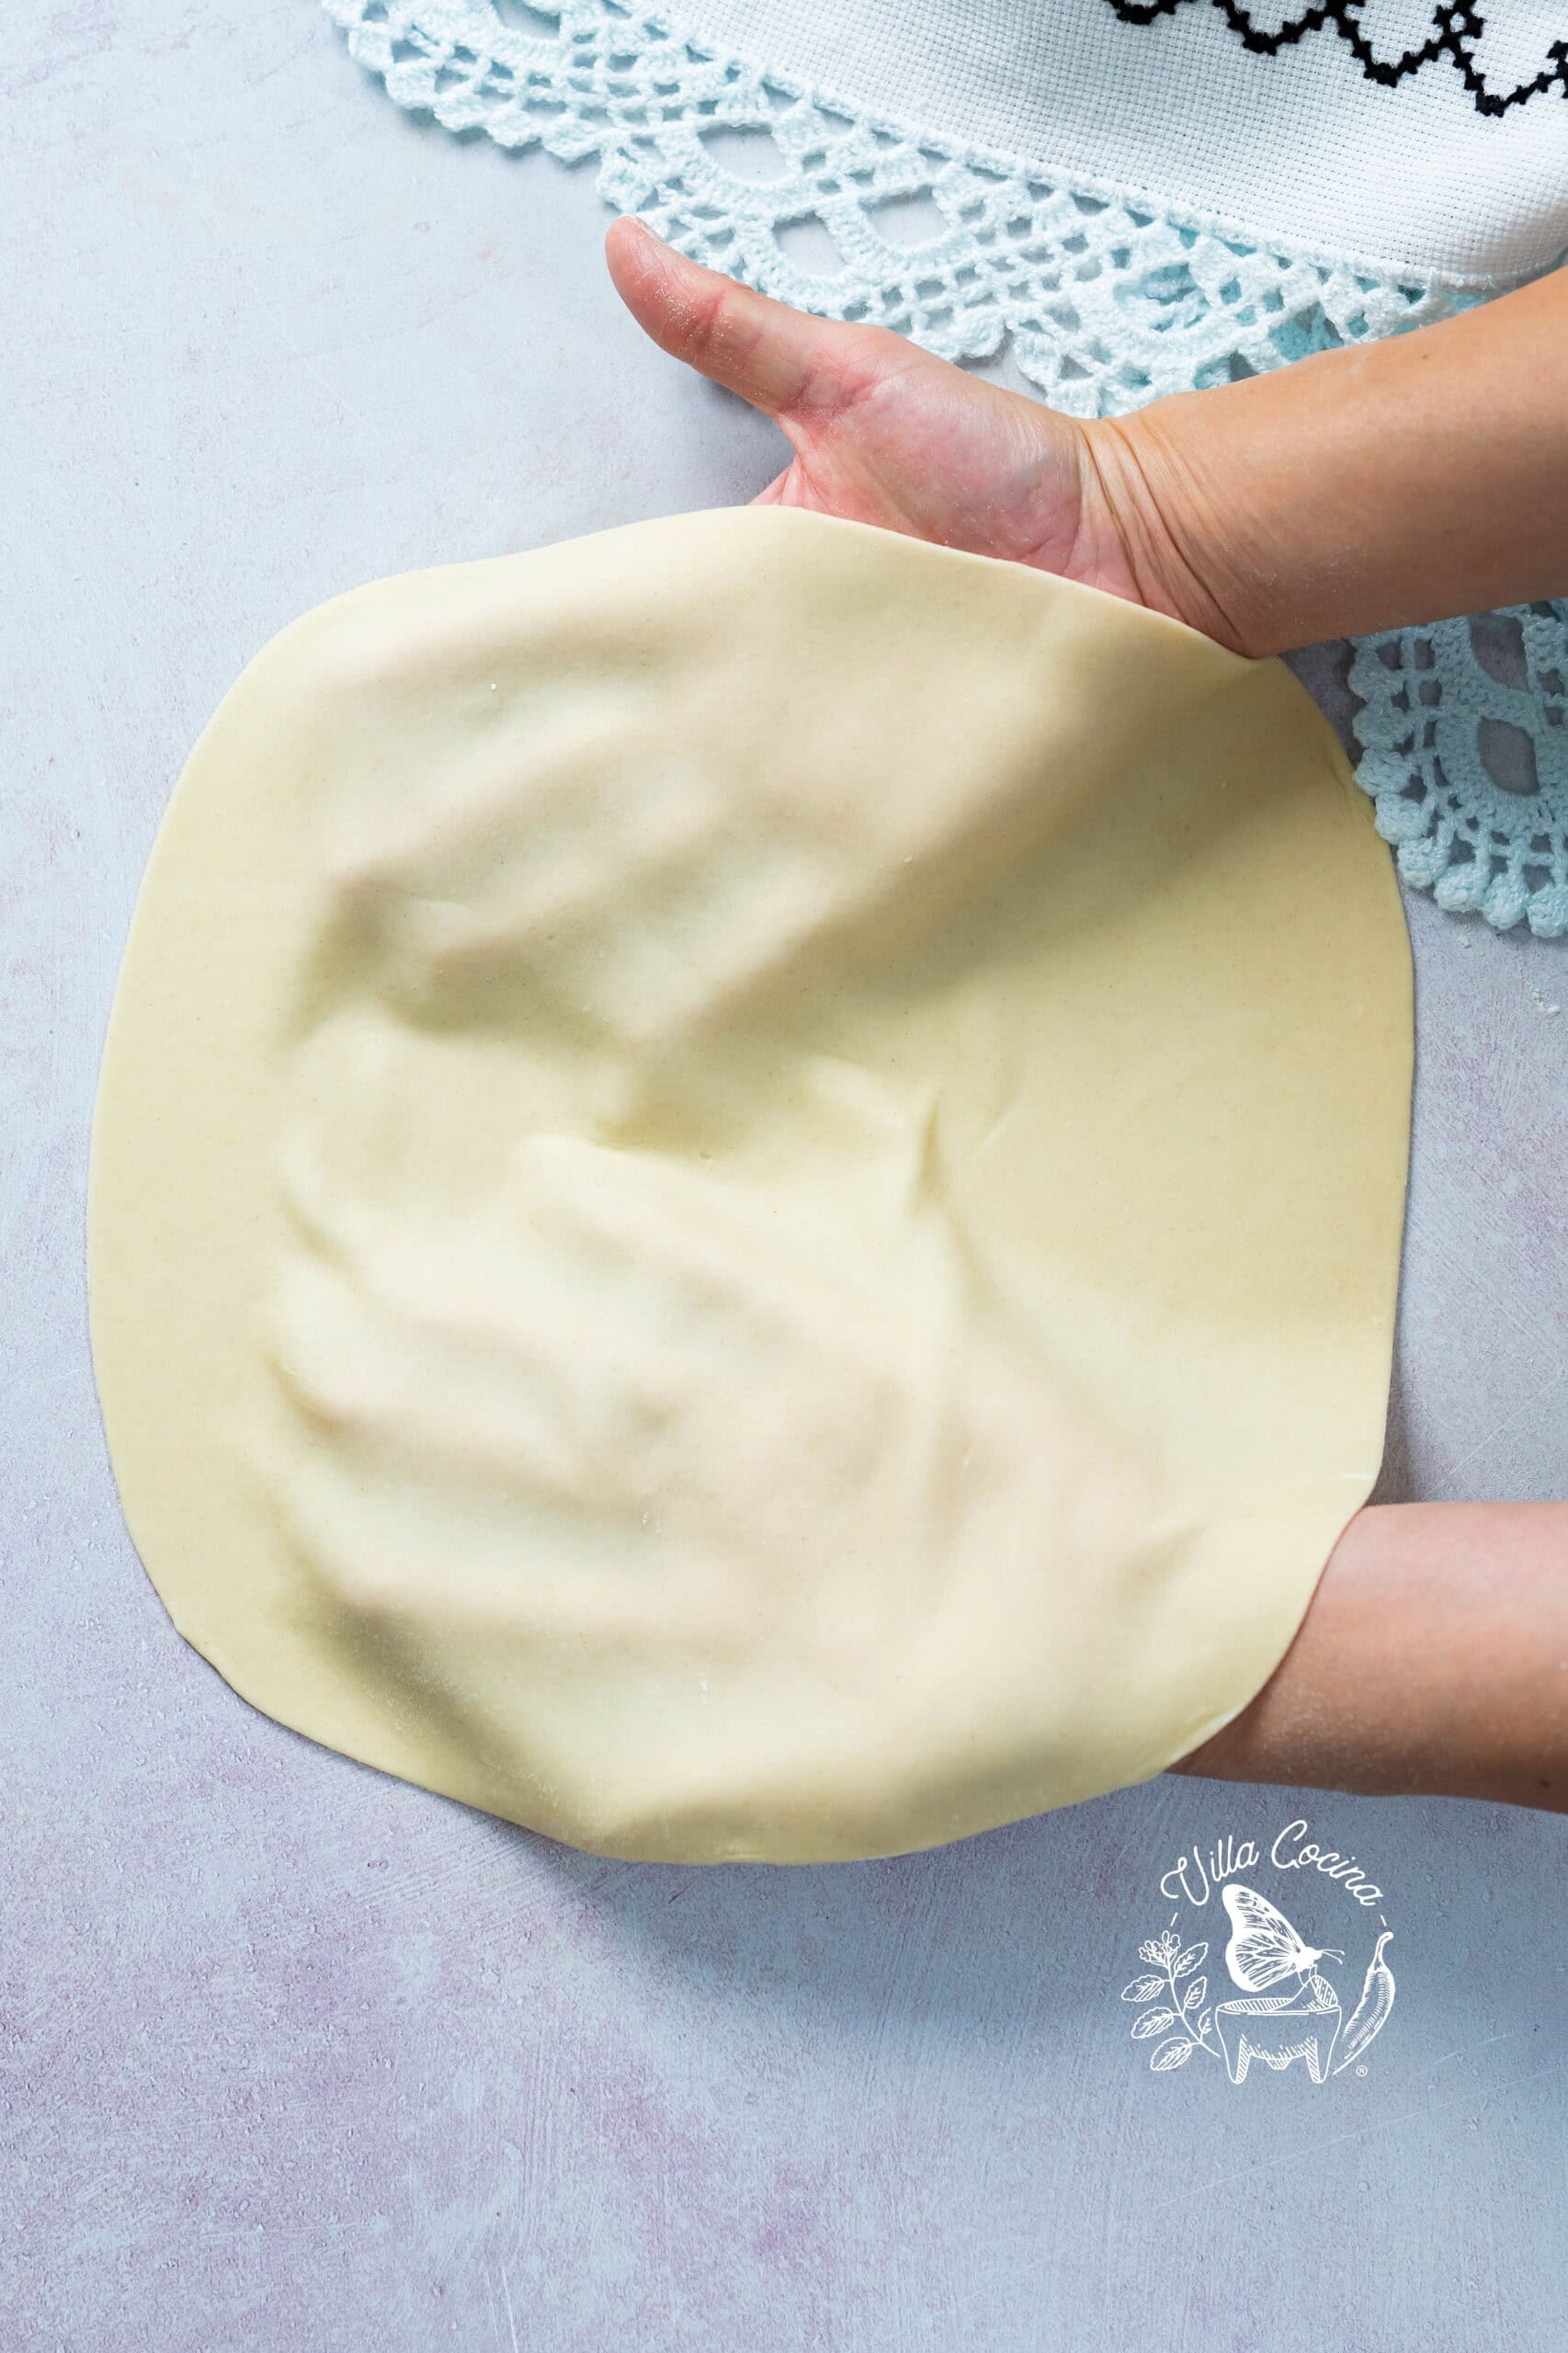
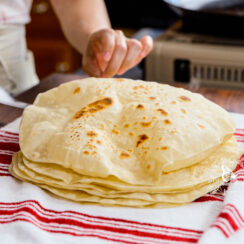
Working with one dough ball at a time, lightly flour the surface and dough. Roll into a very thin 10 to 11-inch round. The tortilla should be almost translucent, with no tears or folds.
Step 3: Hold and Organize
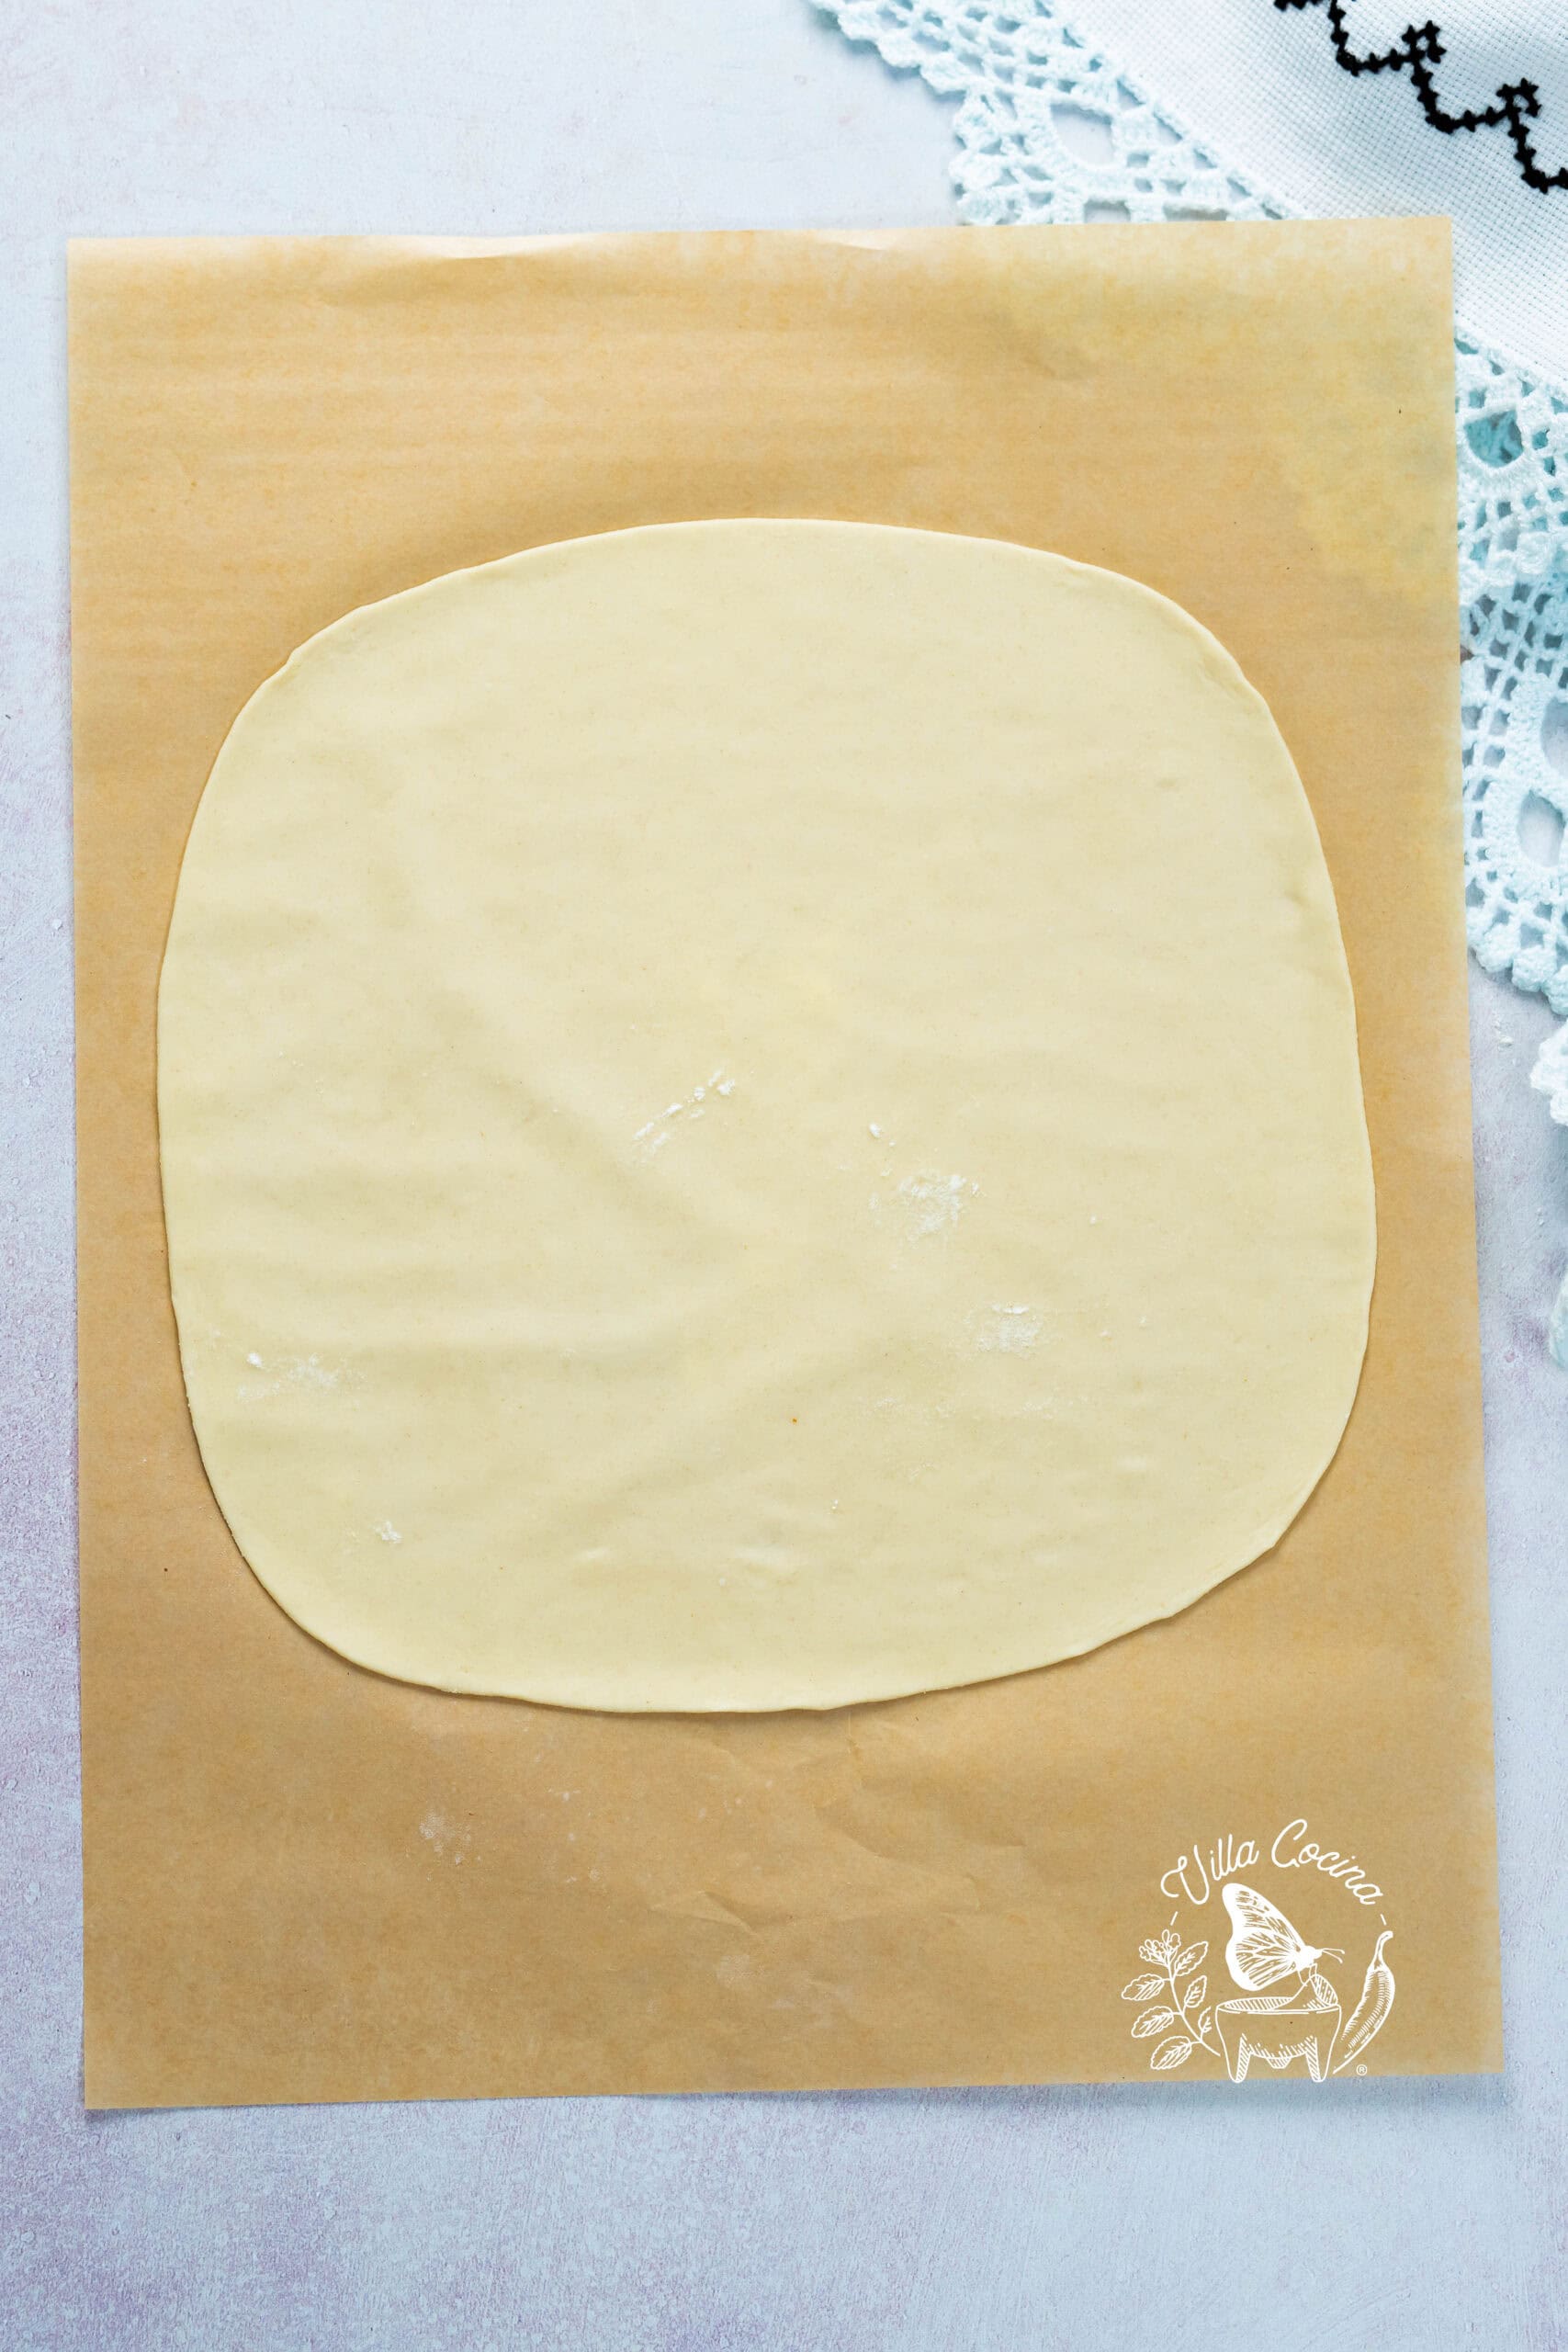
Place the rolled tortillas on a lightly floured surface or between lightly floured sheets of parchment paper. Keep them in the order they were rolled and cook the first one rolled first.
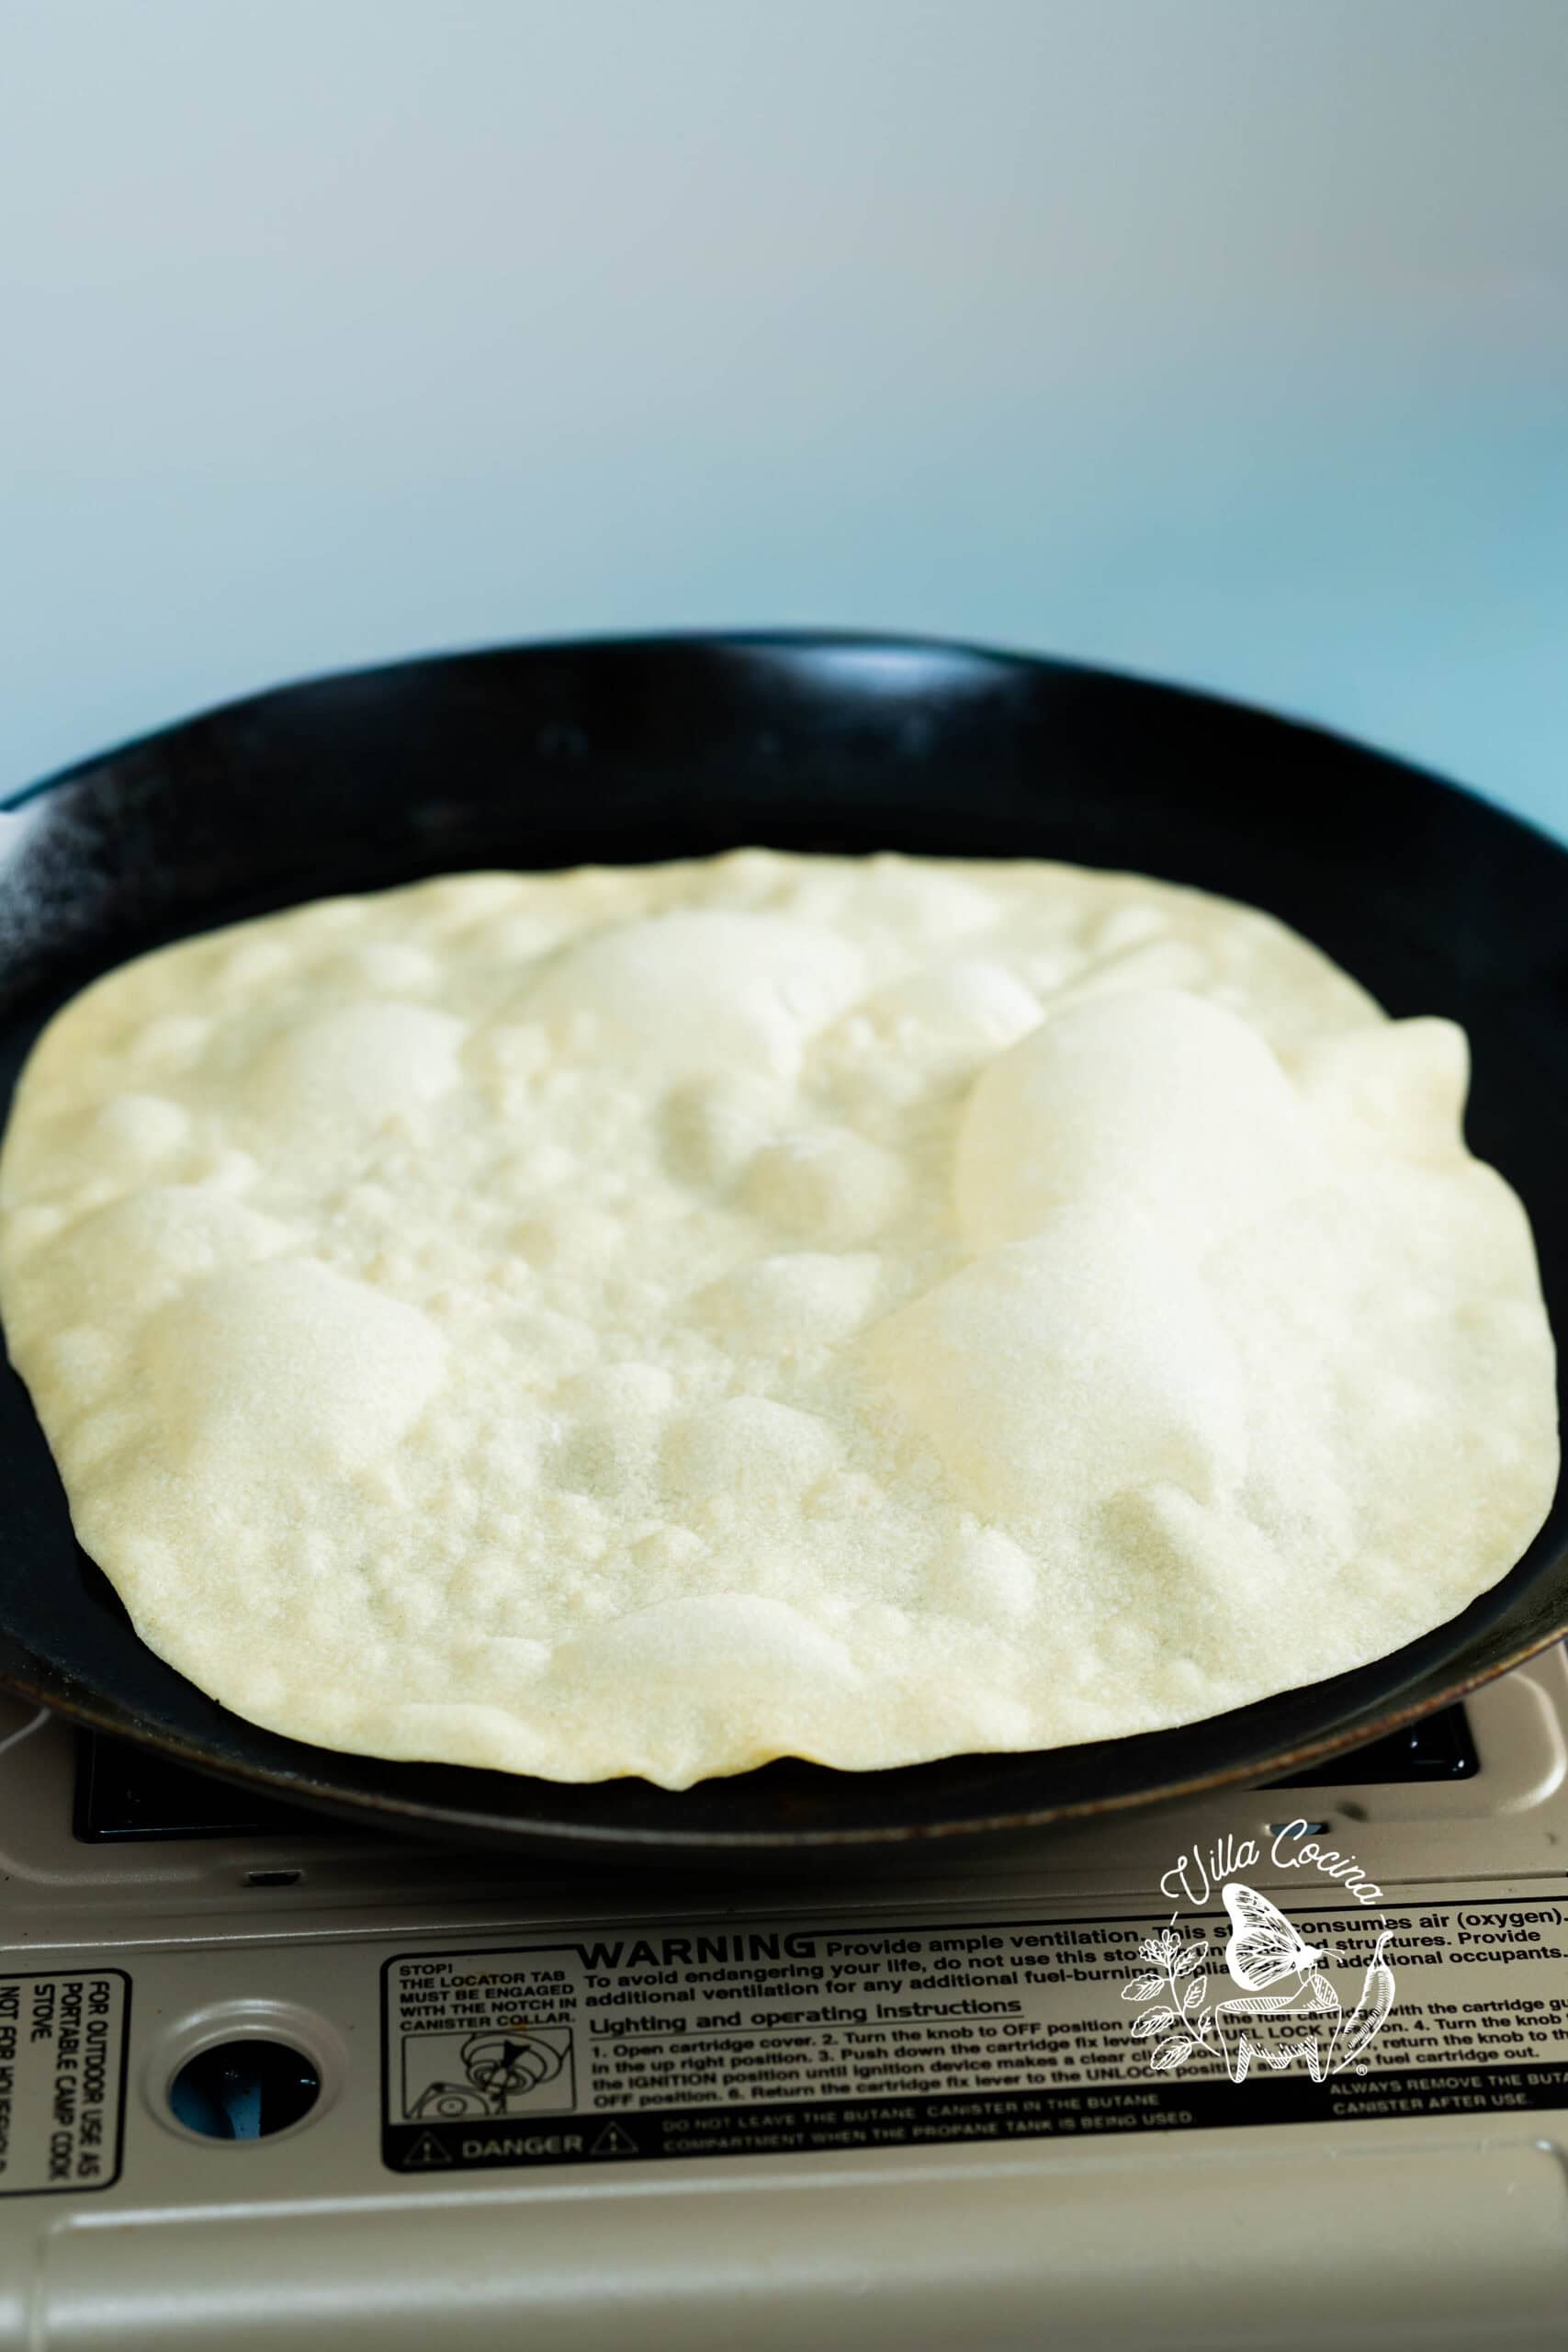
Step 4: Cook the Tortillas
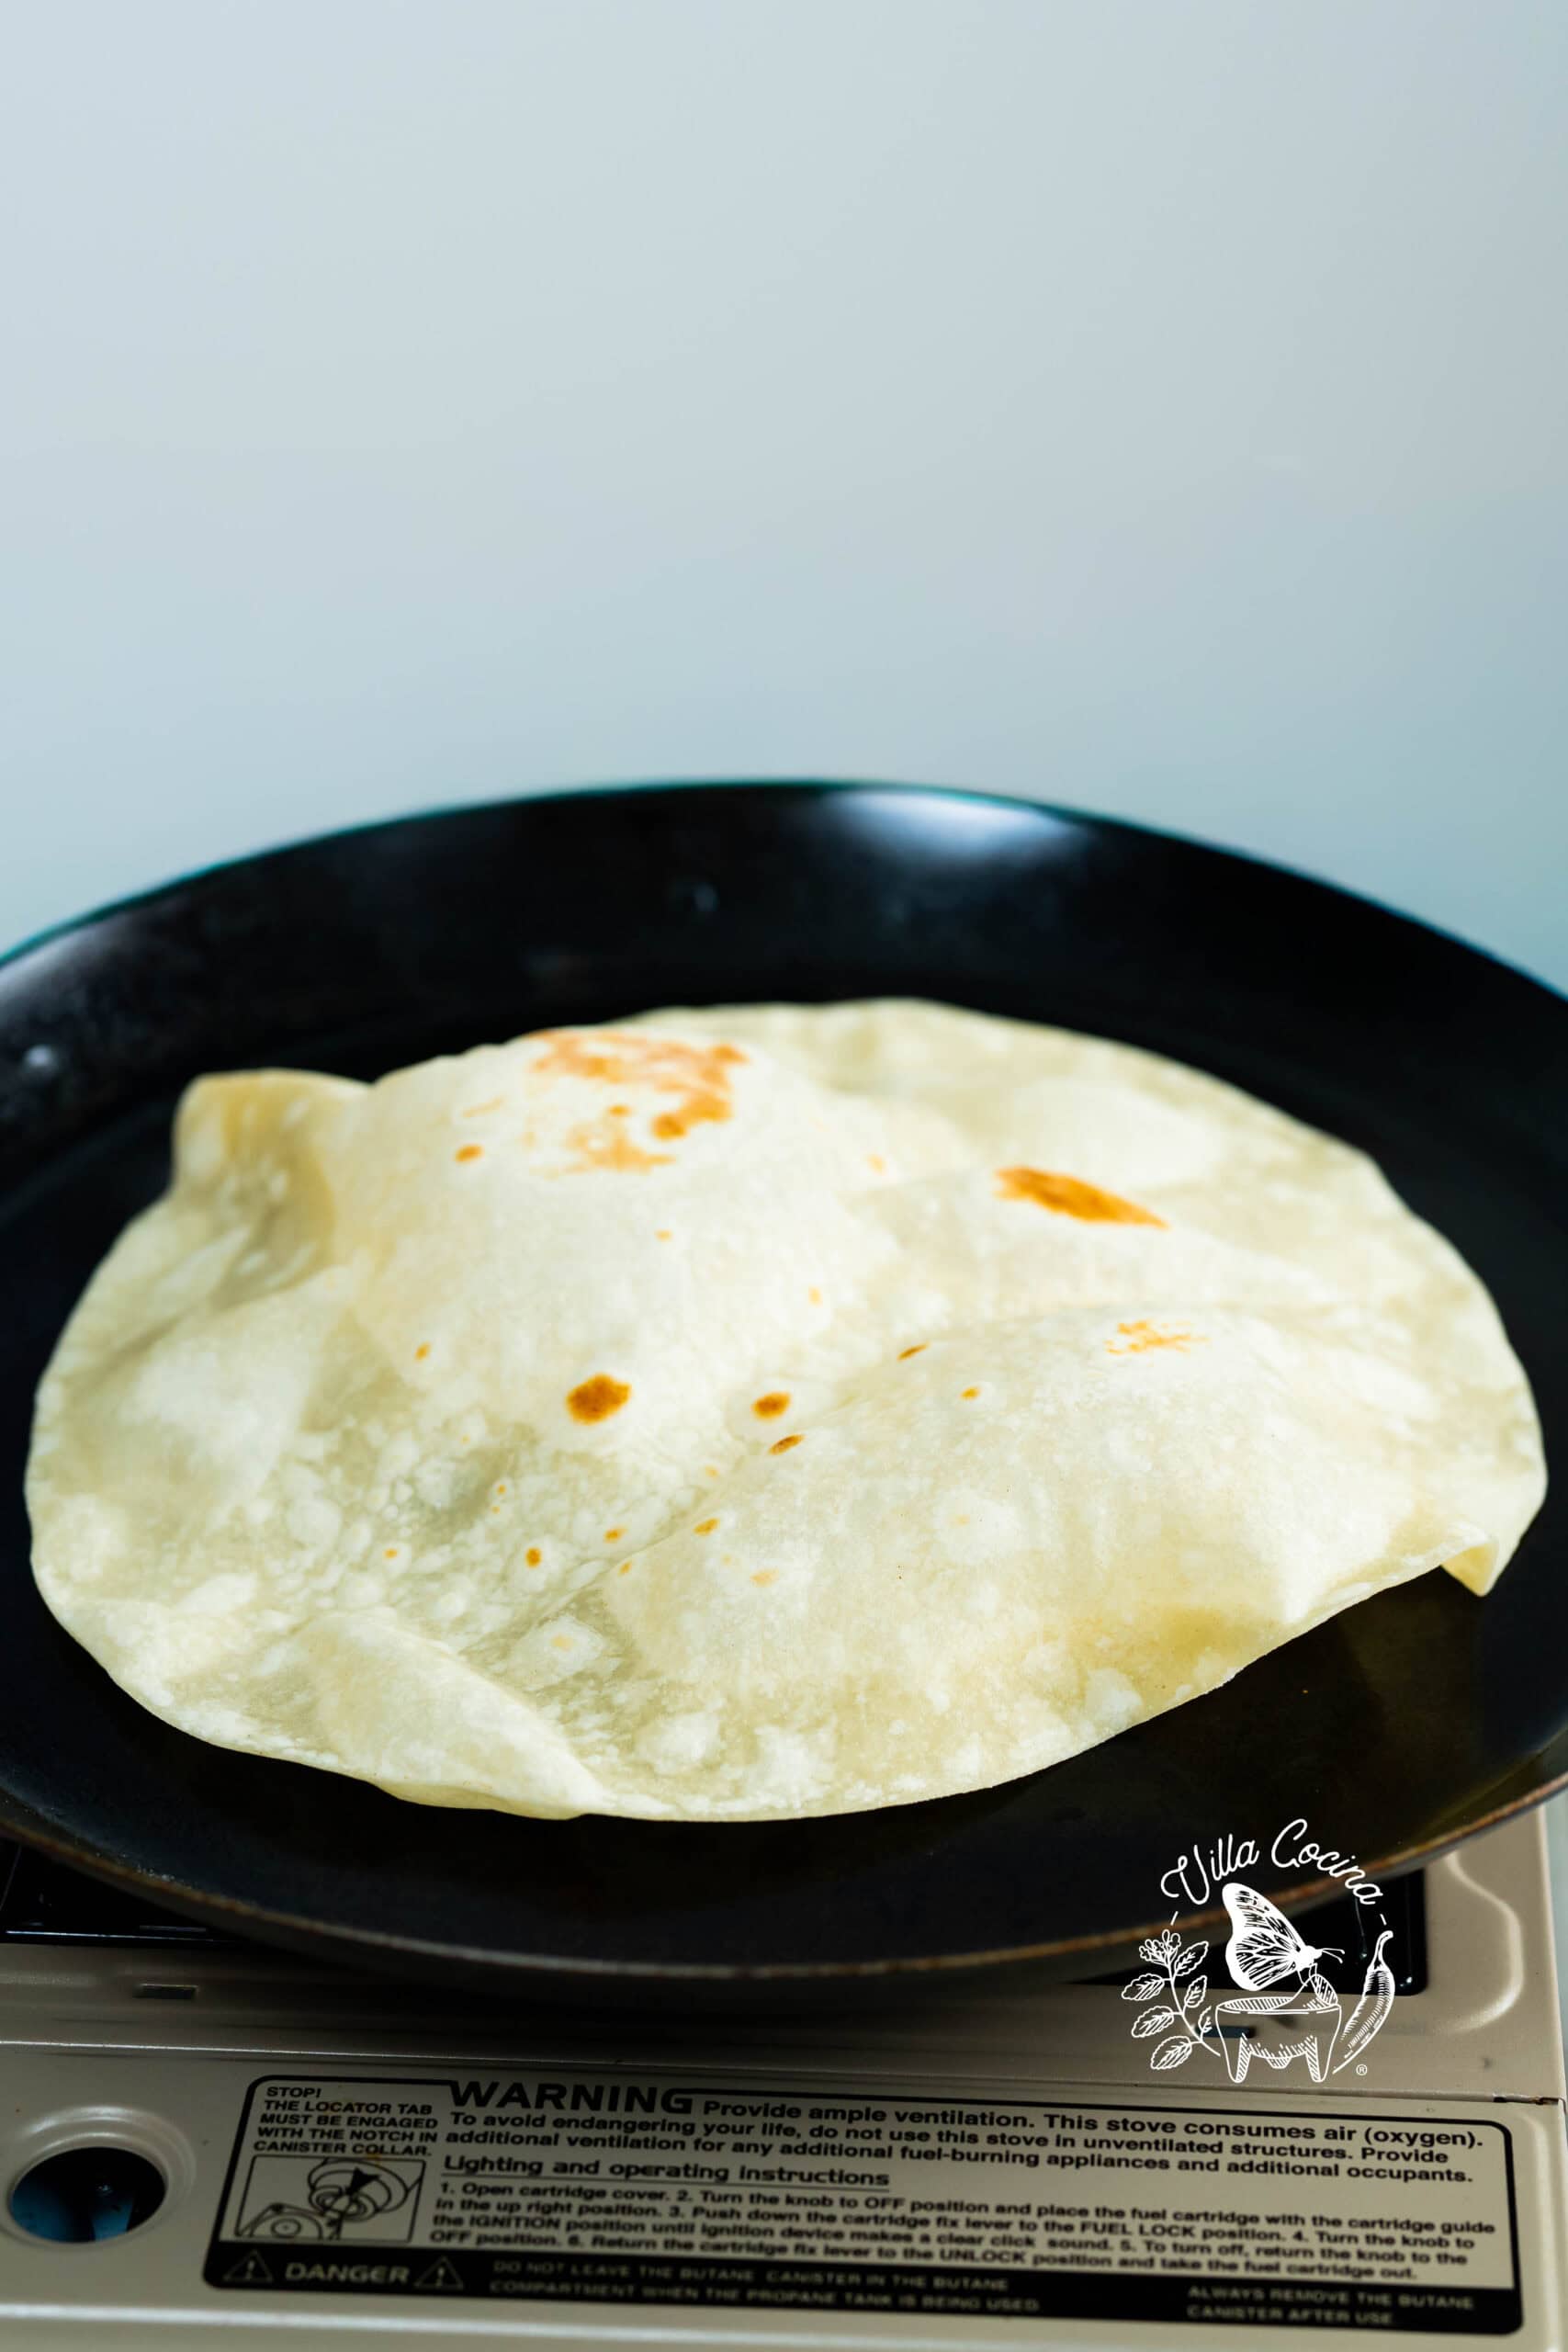
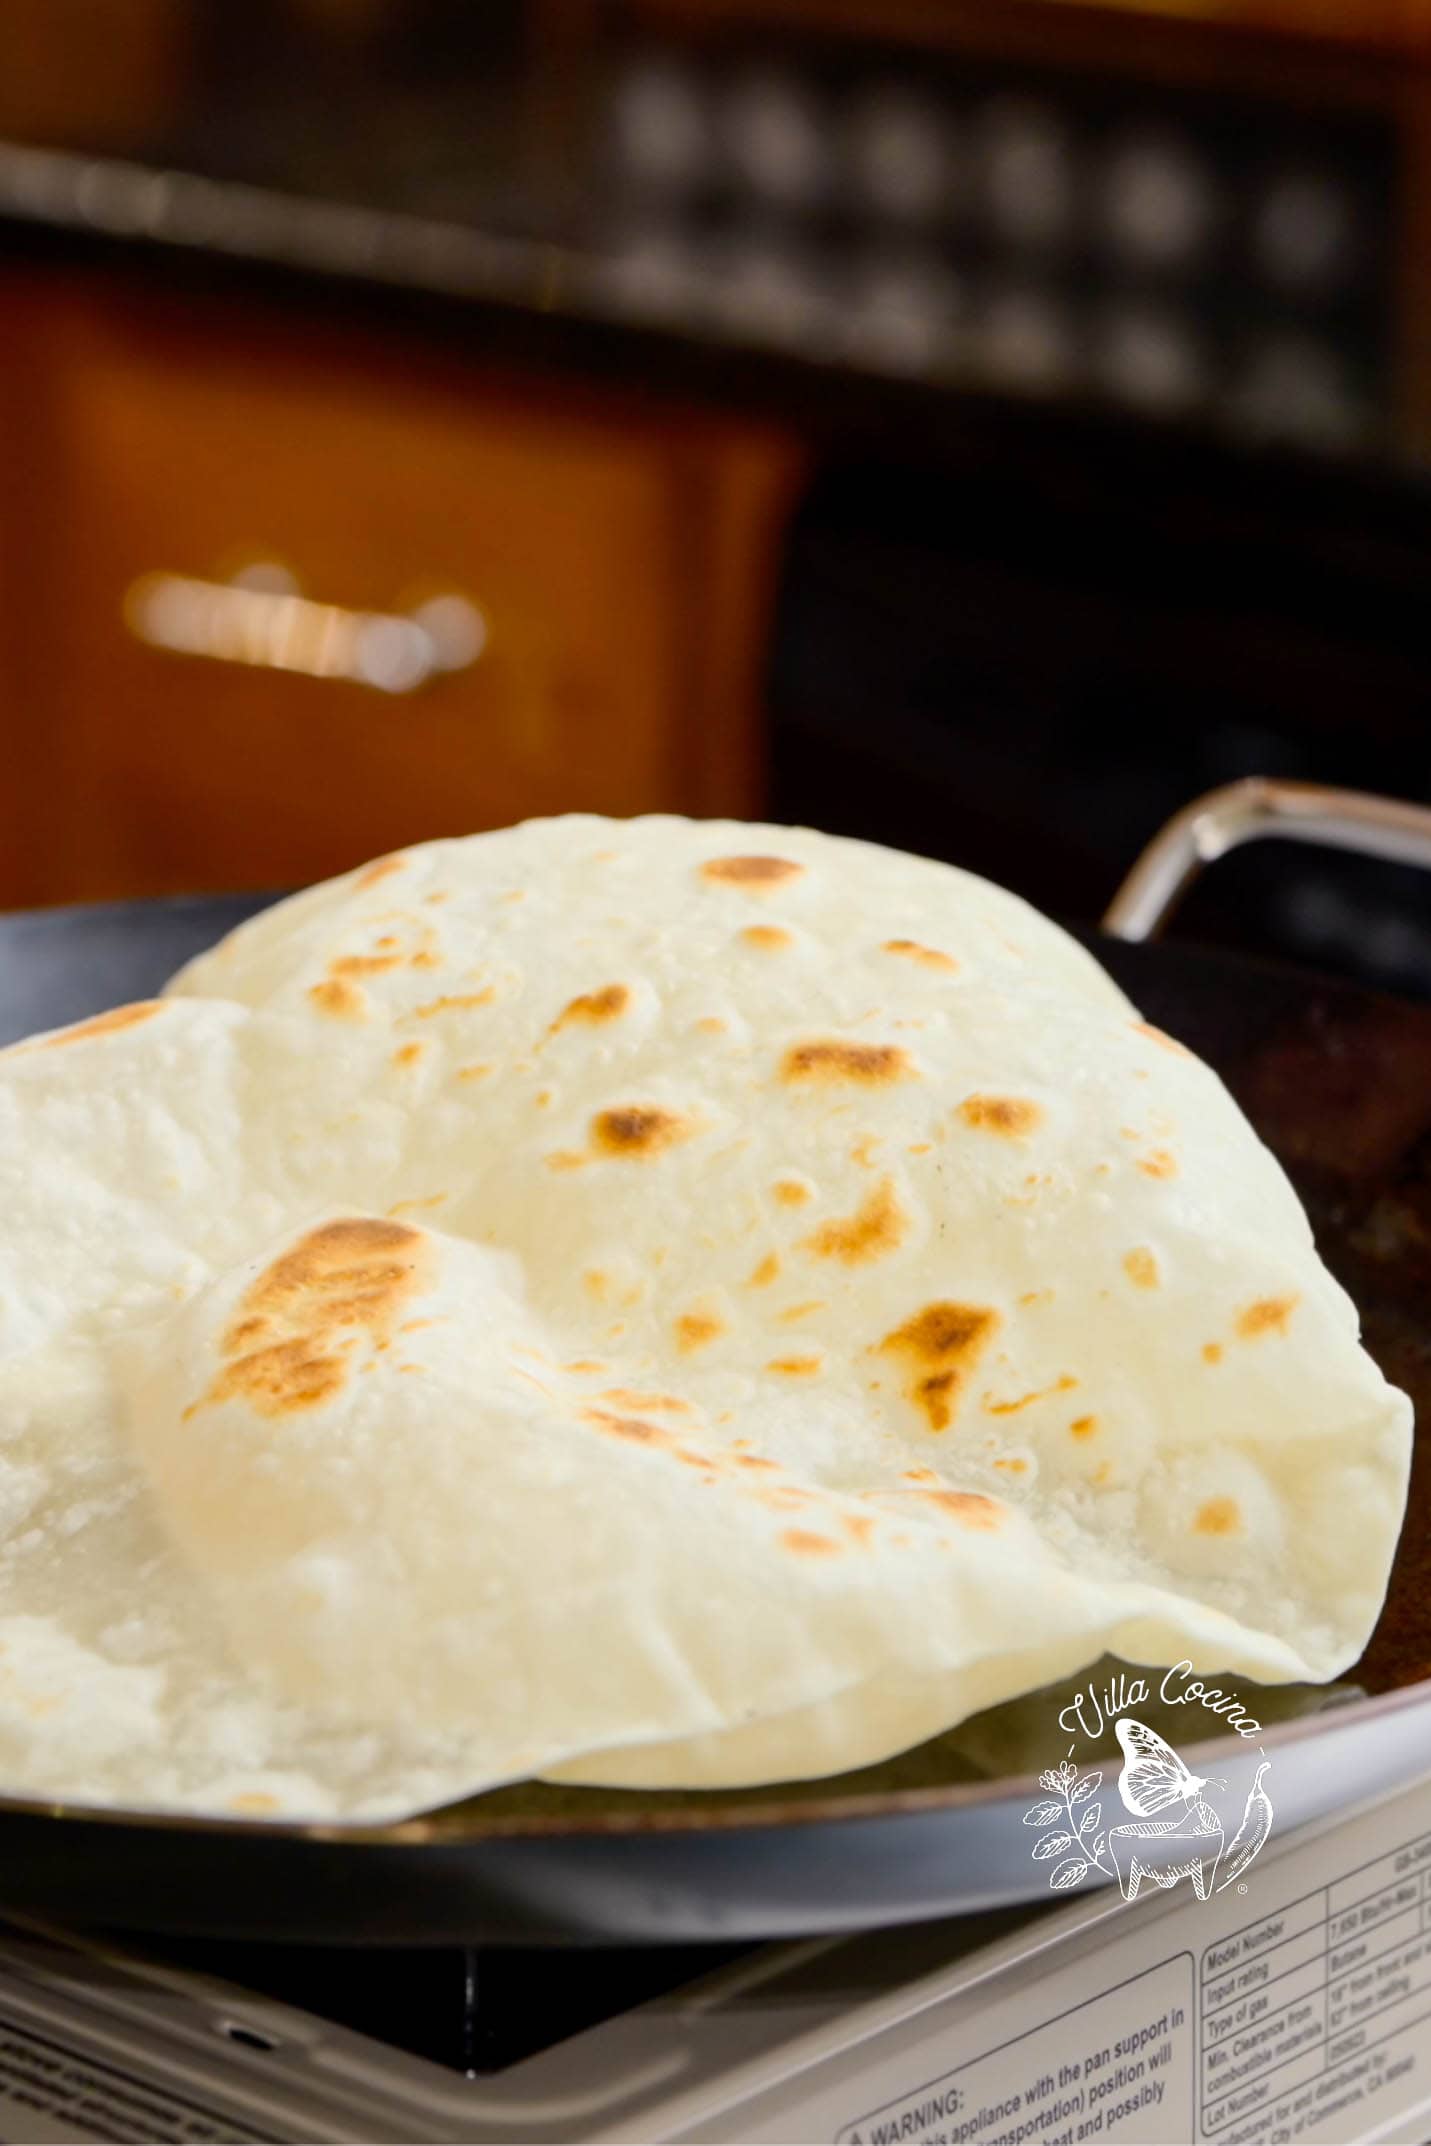
Place a tortilla on a thoroughly heated comal. Cook until bubbles form, the dough changes color, and a few golden brown spots appear. Flip and cook until larger bubbles develop and the tortilla begins to puff. Flip one final time and cook until fully cooked through.
Step 5: Keep Warm
Keep the tortillas covered in a clean kitchen towel or tortilla warmer as you cook the remaining batch. This helps keep them soft, tender, and flexible.

Recipe Video Tutorial
Watch my easy video tutorial for step-by-step visuals on making Traditional Flour Tortillas.
Enjoyed the video? Subscribe and tap the bell for updates on new recipes. Thank you for your support!
Dough Tips
- Use room-temperature lard. It blends into the flour more easily and creates a more even dough.
- Add the water gradually. The dough should feel smooth, hydrated, and soft after kneading. If it feels dry, add a little more water as needed.
- Give the dough enough rest. Resting relaxes the gluten, making the dough easier to roll and often encouraging a better puff.
Rolling and Cooking Tips
- Roll the tortillas very thin. You should be able to see your hands through the dough.
- Start with a hot comal. A fully preheated surface helps create bubbles, puffing, even browning, and a softer tortilla.
- Cook in the order they were rolled. The first tortilla rolled has the longest time to rest, which can help improve puffing.
- Learn to read the tortillas. Timing is helpful, but visual cues matter most. Watch for bubbles, color changes, and golden brown spots.
- Watch the heat. If a tortilla begins to burn before it has a chance to bubble and cook through, the comal is likely too hot.
- Handle with care. Puffed tortillas trap hot steam inside. A spatula can make flipping and removing them easier.
- Keep them covered. As the tortillas come off the comal, cover them to keep them soft, tender, and flexible.
Goals, Not Deal Breakers
- Even experienced cooks end up with the occasional round-squarish tortilla. Focus on rolling the dough thin and evenly, and the flavor will be just as good.
- Avoid tears and folds. They improve the chances of a full puff, but don’t worry if they happen. Keep going and try again on the next tortilla. Practice makes a big difference.
- A full puff is the goal. It often signals that the dough, rolling, and cooking process came together beautifully. That said, a tortilla doesn’t need a full puff to be great. When properly cooked and kept covered, it can still be soft, tender, and delicious.
- Many home cooks flip tortillas by hand, but safety comes first. Use a spatula whenever needed.
- A comal makes the experience feel even more traditional, but don’t let that stop you. A skillet or griddle works just as well.
Looking for a Butter Version?
Lard is the traditional fat used in flour tortillas, but butter is a wonderful alternative. If you’d like to try that variation, check out my popular butter flour tortilla recipe.
Storage
Refrigerator: Let the tortillas cool completely before storing. Place them in a resealable bag and refrigerate for up to 5 days.
Freezer: Once completely cooled, stack the tortillas with a sheet of parchment paper between each one. Store in a resealable freezer-safe bag for up to 2 months. Thaw in the refrigerator before reheating.
To Reheat: Warm on a hot comal, skillet, or griddle, flipping as needed until heated through, soft, and pliable.
More Mexican Recipes:
Frequently Asked Questions
Why is my dough dry?
The dough may need a little more water. Add it gradually until the dough feels soft, hydrated, and easy to knead.
Why is my dough sticky?
Try kneading it a little longer first. The dough often becomes smoother and less sticky as it develops.
If it still feels too wet, lightly flour your work surface and hands, but avoid adding too much flour to the dough itself.
Why are my tortillas tough?
Tough tortillas are often the result of insufficient hydration or a comal that isn’t fully preheated.
Do I need a comal to make flour tortillas?
No. A comal is traditional, but a cast-iron skillet, nonstick skillet, or griddle will also work well.
How can I measure the comal’s temperature?
A temperature gun is one of the easiest ways to check the surface temperature of your comal before cooking.
Traditional Flour Tortillas
Ingredients
- 3 cups all-purpose flour, plus more for dusting
- 1½ tsp kosher salt
- 5 tbsp softened pork lard, plus more for coating
- ¾ cup plus 1–2 tbsp hot water, comfortable to the touch
Instructions
Make the Dough
- In a large mixing bowl, mix the all-purpose flour and salt until evenly combined.
- Add the softened lard and work it into the flour with your fingertips until the mixture resembles coarse crumbs and no large pieces of lard remain.
- Gradually add the hot water, kneading between additions. Stop adding water once the dough comes together and all the flour is fully incorporated.
- Transfer the dough to a clean, non-stick work surface and knead for 5 to 8 minutes, or until smooth, soft, and elastic. The dough should feel hydrated, hold its shape, and no longer stick to your hands.
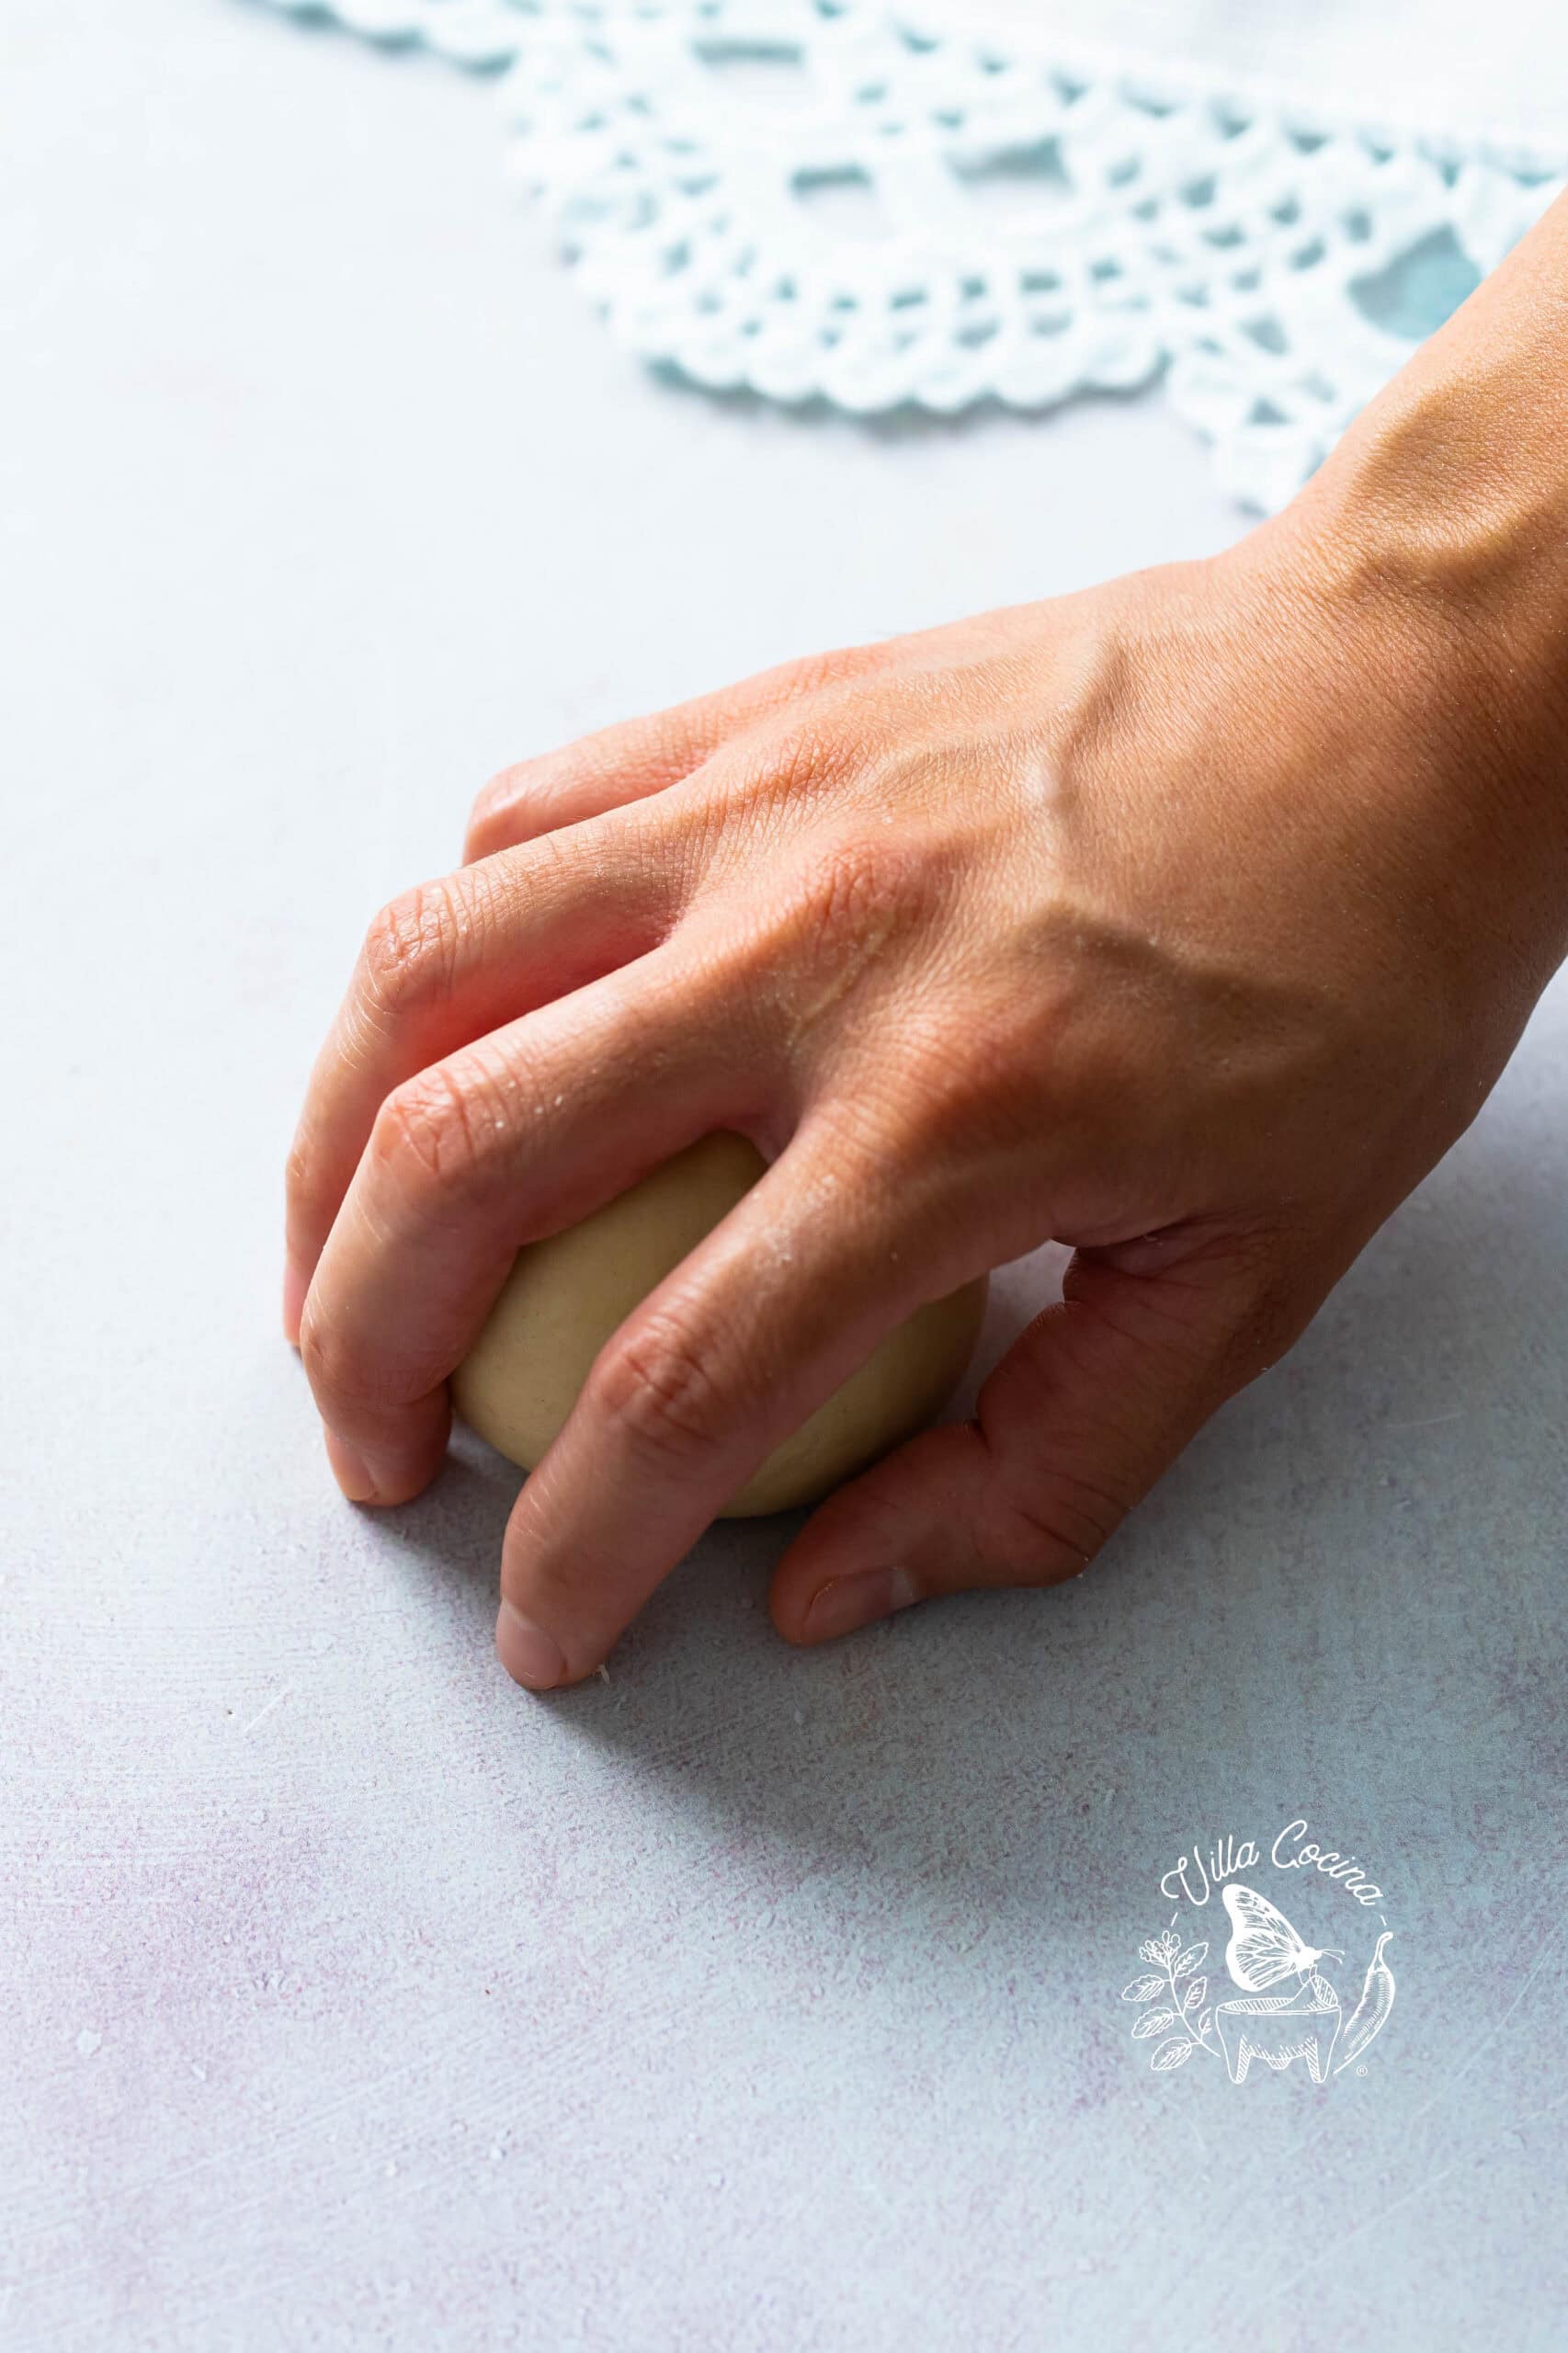
- Shape the dough into a tight ball and divide it into 3-ounce portions. Form each portion into a smooth ball by tucking the edges underneath or gently rolling it against the work surface under the palm of your hand.
- Arrange the dough balls on a parchment-lined sheet pan. Lightly coat each one with softened lard to prevent drying. Cover with plastic wrap and let rest at room temperature for 30 minutes to 1 hour.
Roll the Tortillas
- Work with one dough ball at a time. Lightly flour a clean work surface and the top of the dough ball. Using a rolling pin, roll the dough into a 10 to 11-inch round.
- The tortillas should be very thin, almost translucent—you should be able to see your hands through them.
- Avoid tears and folds, as they can prevent the tortillas from puffing properly.
Hold the Rolled Tortillas
- Option 1: Countertop Method- Place each rolled tortilla on a lightly floured, non-stick work surface, leaving space between them.
- Option 2: Parchment Paper Method- Place the rolled tortillas between lightly floured sheets of parchment paper.
- In my experience, the tortillas stay easy to handle for about 25 to 30 minutes when stored between parchment sheets.
- After that, they become softer and more delicate, so I recommend working in batches if you need more time.
Let the Tortillas Rest
- Keep the tortillas in the order they were rolled, with the first tortilla rolled remaining at the top of the stack or at the beginning of the row. Cook it first, as the additional resting time often encourages a better puff.
Cook the Tortillas
- Heat a cast-iron, nonstick, or carbon steel comal until thoroughly heated. On my carbon steel comal, the sweet spot is around 490–500°F.
- Place a tortilla on the hot comal. Cook until small bubbles form, the dough changes color, and a few golden brown spots appear on the underside, about 45 to 50 seconds.
- Flip and cook the second side until larger bubbles develop and more golden brown spots appear, about 25 to 30 seconds. This is often when the tortilla begins to fully puff.
- Flip one final time and cook for 10 to 15 seconds, or until cooked through. Use caution when handling puffed tortillas, as they trap hot steam inside. A spatula can make handling easier.
- Transfer the tortilla to a clean kitchen towel or tortilla warmer and keep covered. Repeat with the remaining tortillas.
- Not every tortilla will fully puff, but they should still be soft and tender when kept covered.
Notes
Nutrition
Did you make this recipe?
Show some love! Tag @villacocinaofficial on Instagram and drop a 5-star review. Your support means everything—thanks!