Pastel Azteca Recipe
Pastel Azteca is similar to lasagna in its layered structure but features corn tortillas, shredded chicken, roasted poblanos (rajas), and cheese. This traditional Mexican casserole offers smoky, creamy flavors that make it perfect for family meals or gatherings.

Pastel Azteca can be served as a main dish on its own, but it pairs well with a side salad or can be topped with additional crema, salsa, avocado or fresh cilantro for extra flavor. This dish is often referred to as a Mexican lasagna due to its layered composition.
While ingredients vary by region, the combination of salsa verde, poblanos, and cheese is a cherished variation. It’s a complete meal on its own, though pairing it with a cup of Café de Olla or your favorite beverage adds a nice touch.
Roasting the Peppers and Tomatillos
In Mexican cuisine, roasting is synonymous with flavor. For the most authentic taste, ingredients are often roasted directly over wood charcoal, a cherished practice among traditional Mexican cooks.
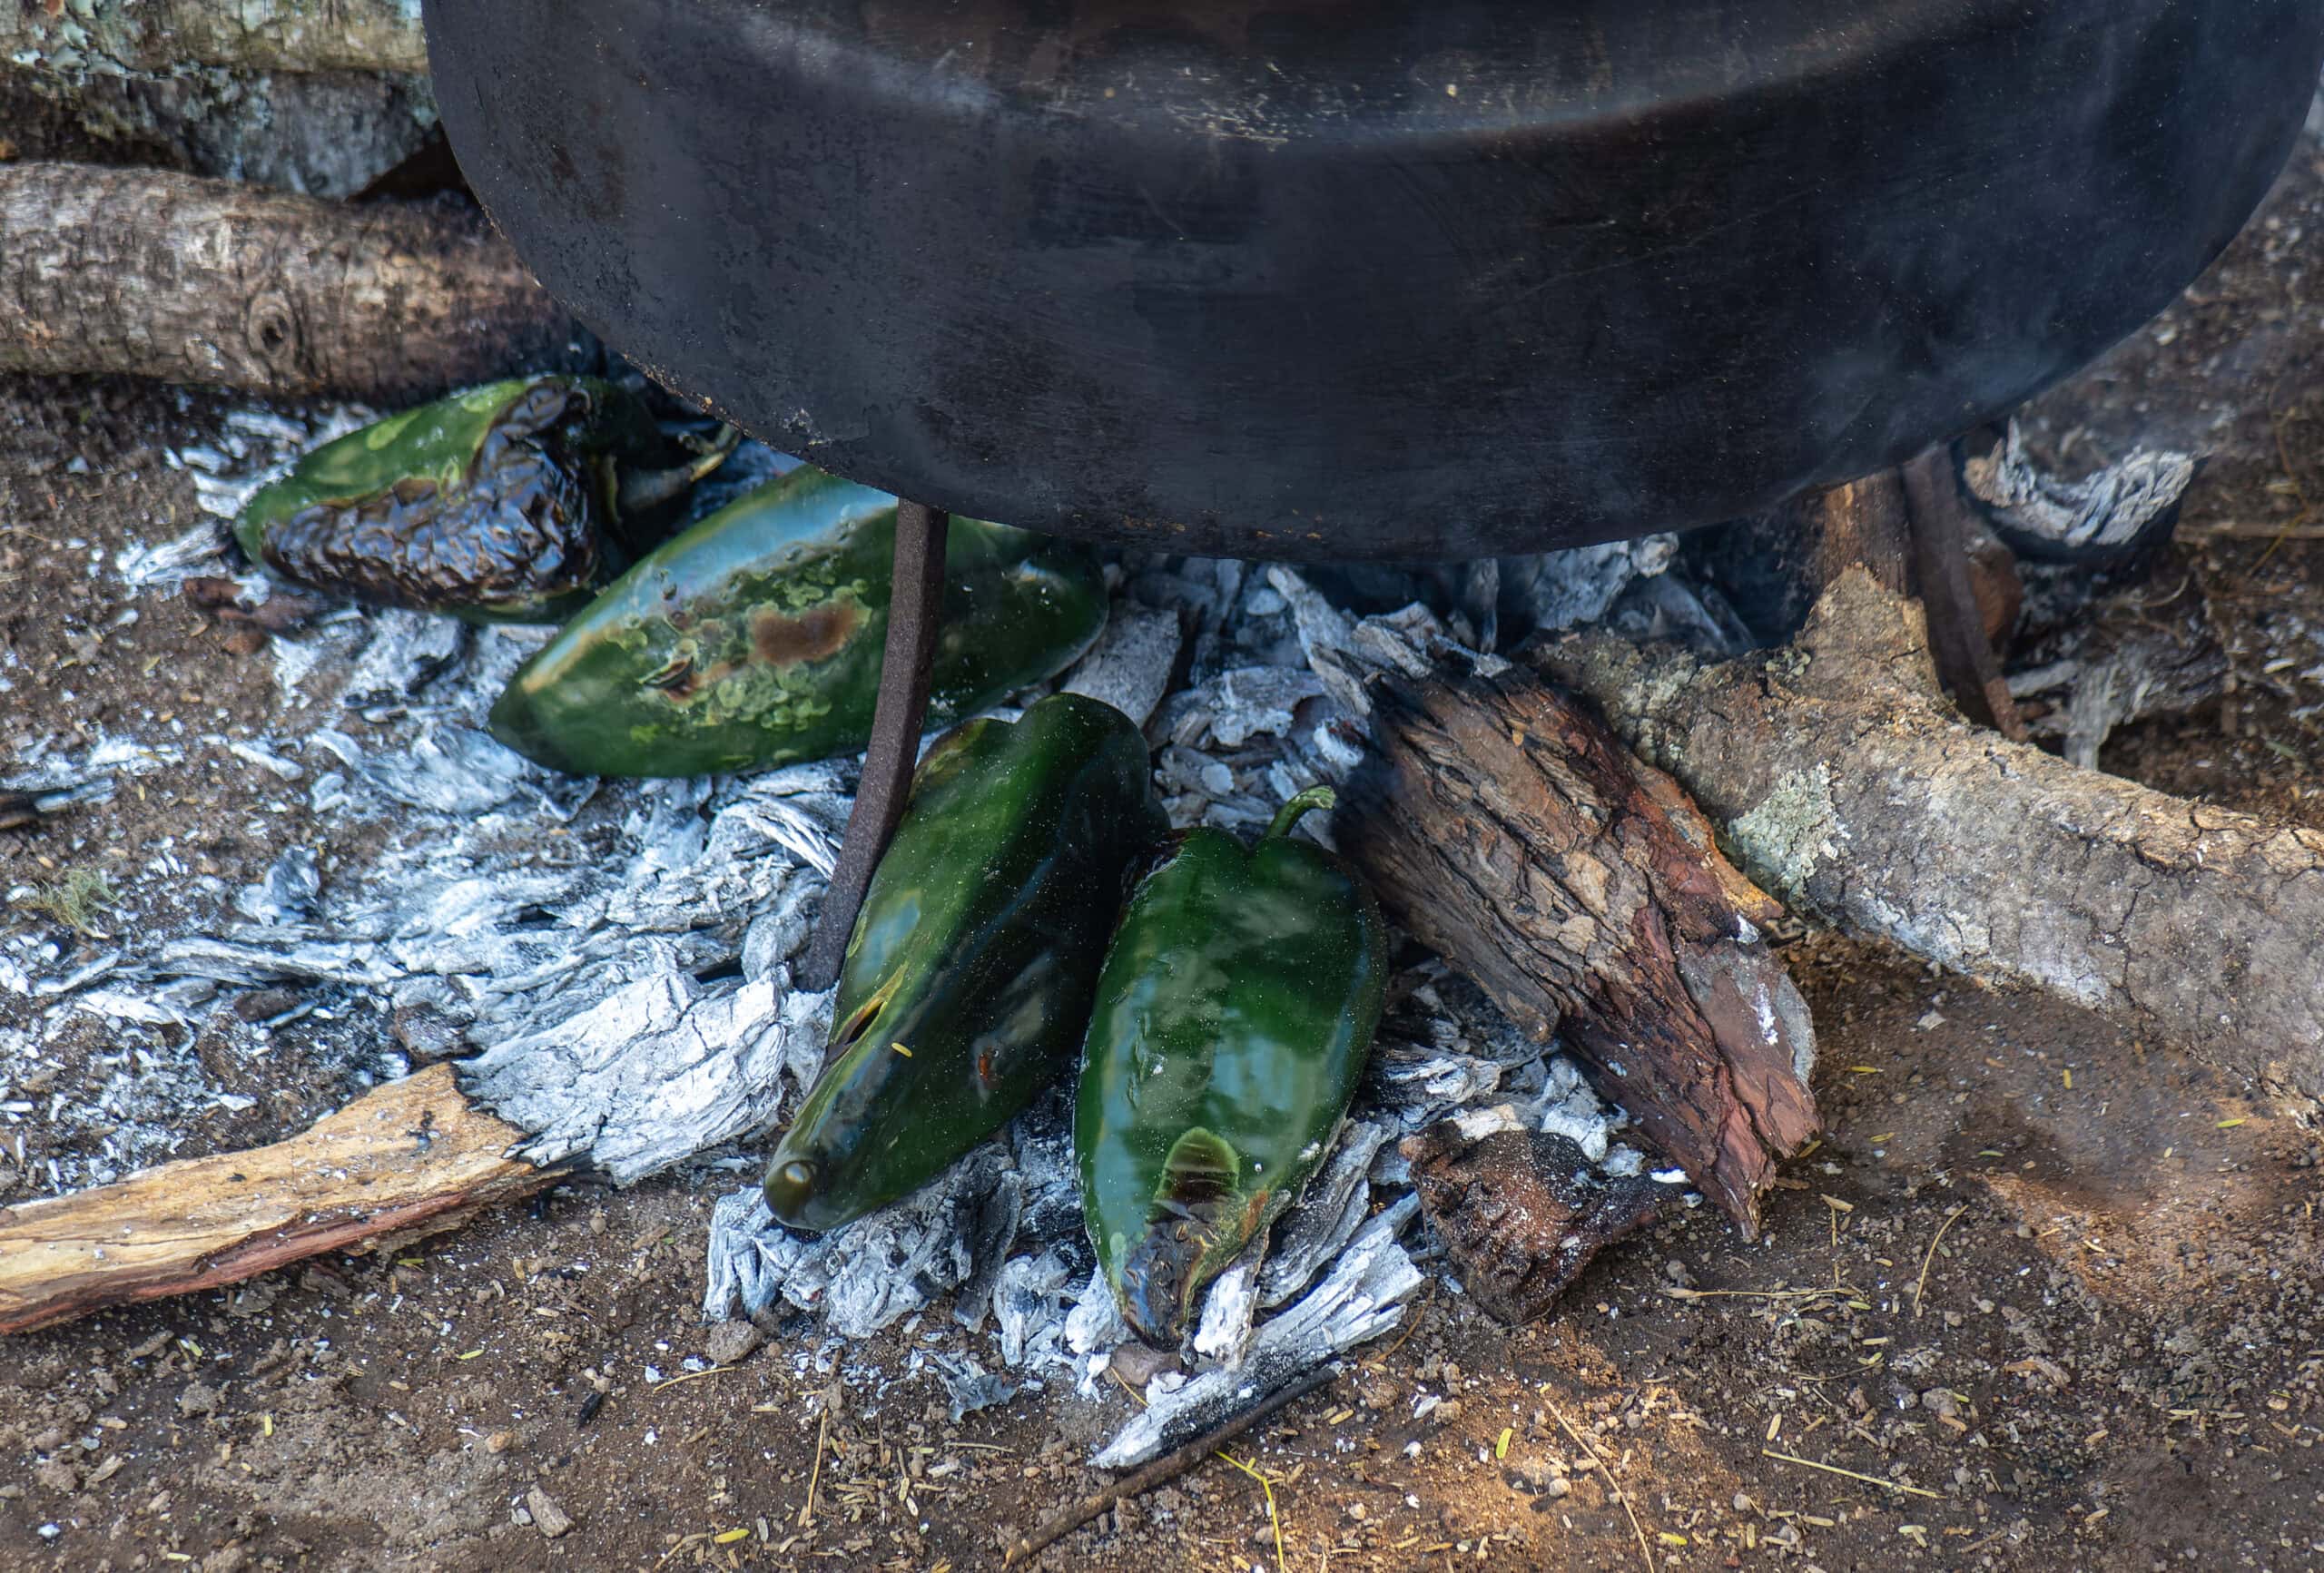
In this instance, we will be using a carbon steel comal over medium to medium-high heat to roast the poblanos and tomatillos until they are evenly charred (blackened) all around.
The peppers are placed in a heatproof bowl and covered with plastic wrap to sweat, which loosens the skin—this takes about 5 minutes. Afterward, peel off the skin, open the peppers to remove the seeds and stems, and slice them into rajas, the term for sliced roasted poblanos.
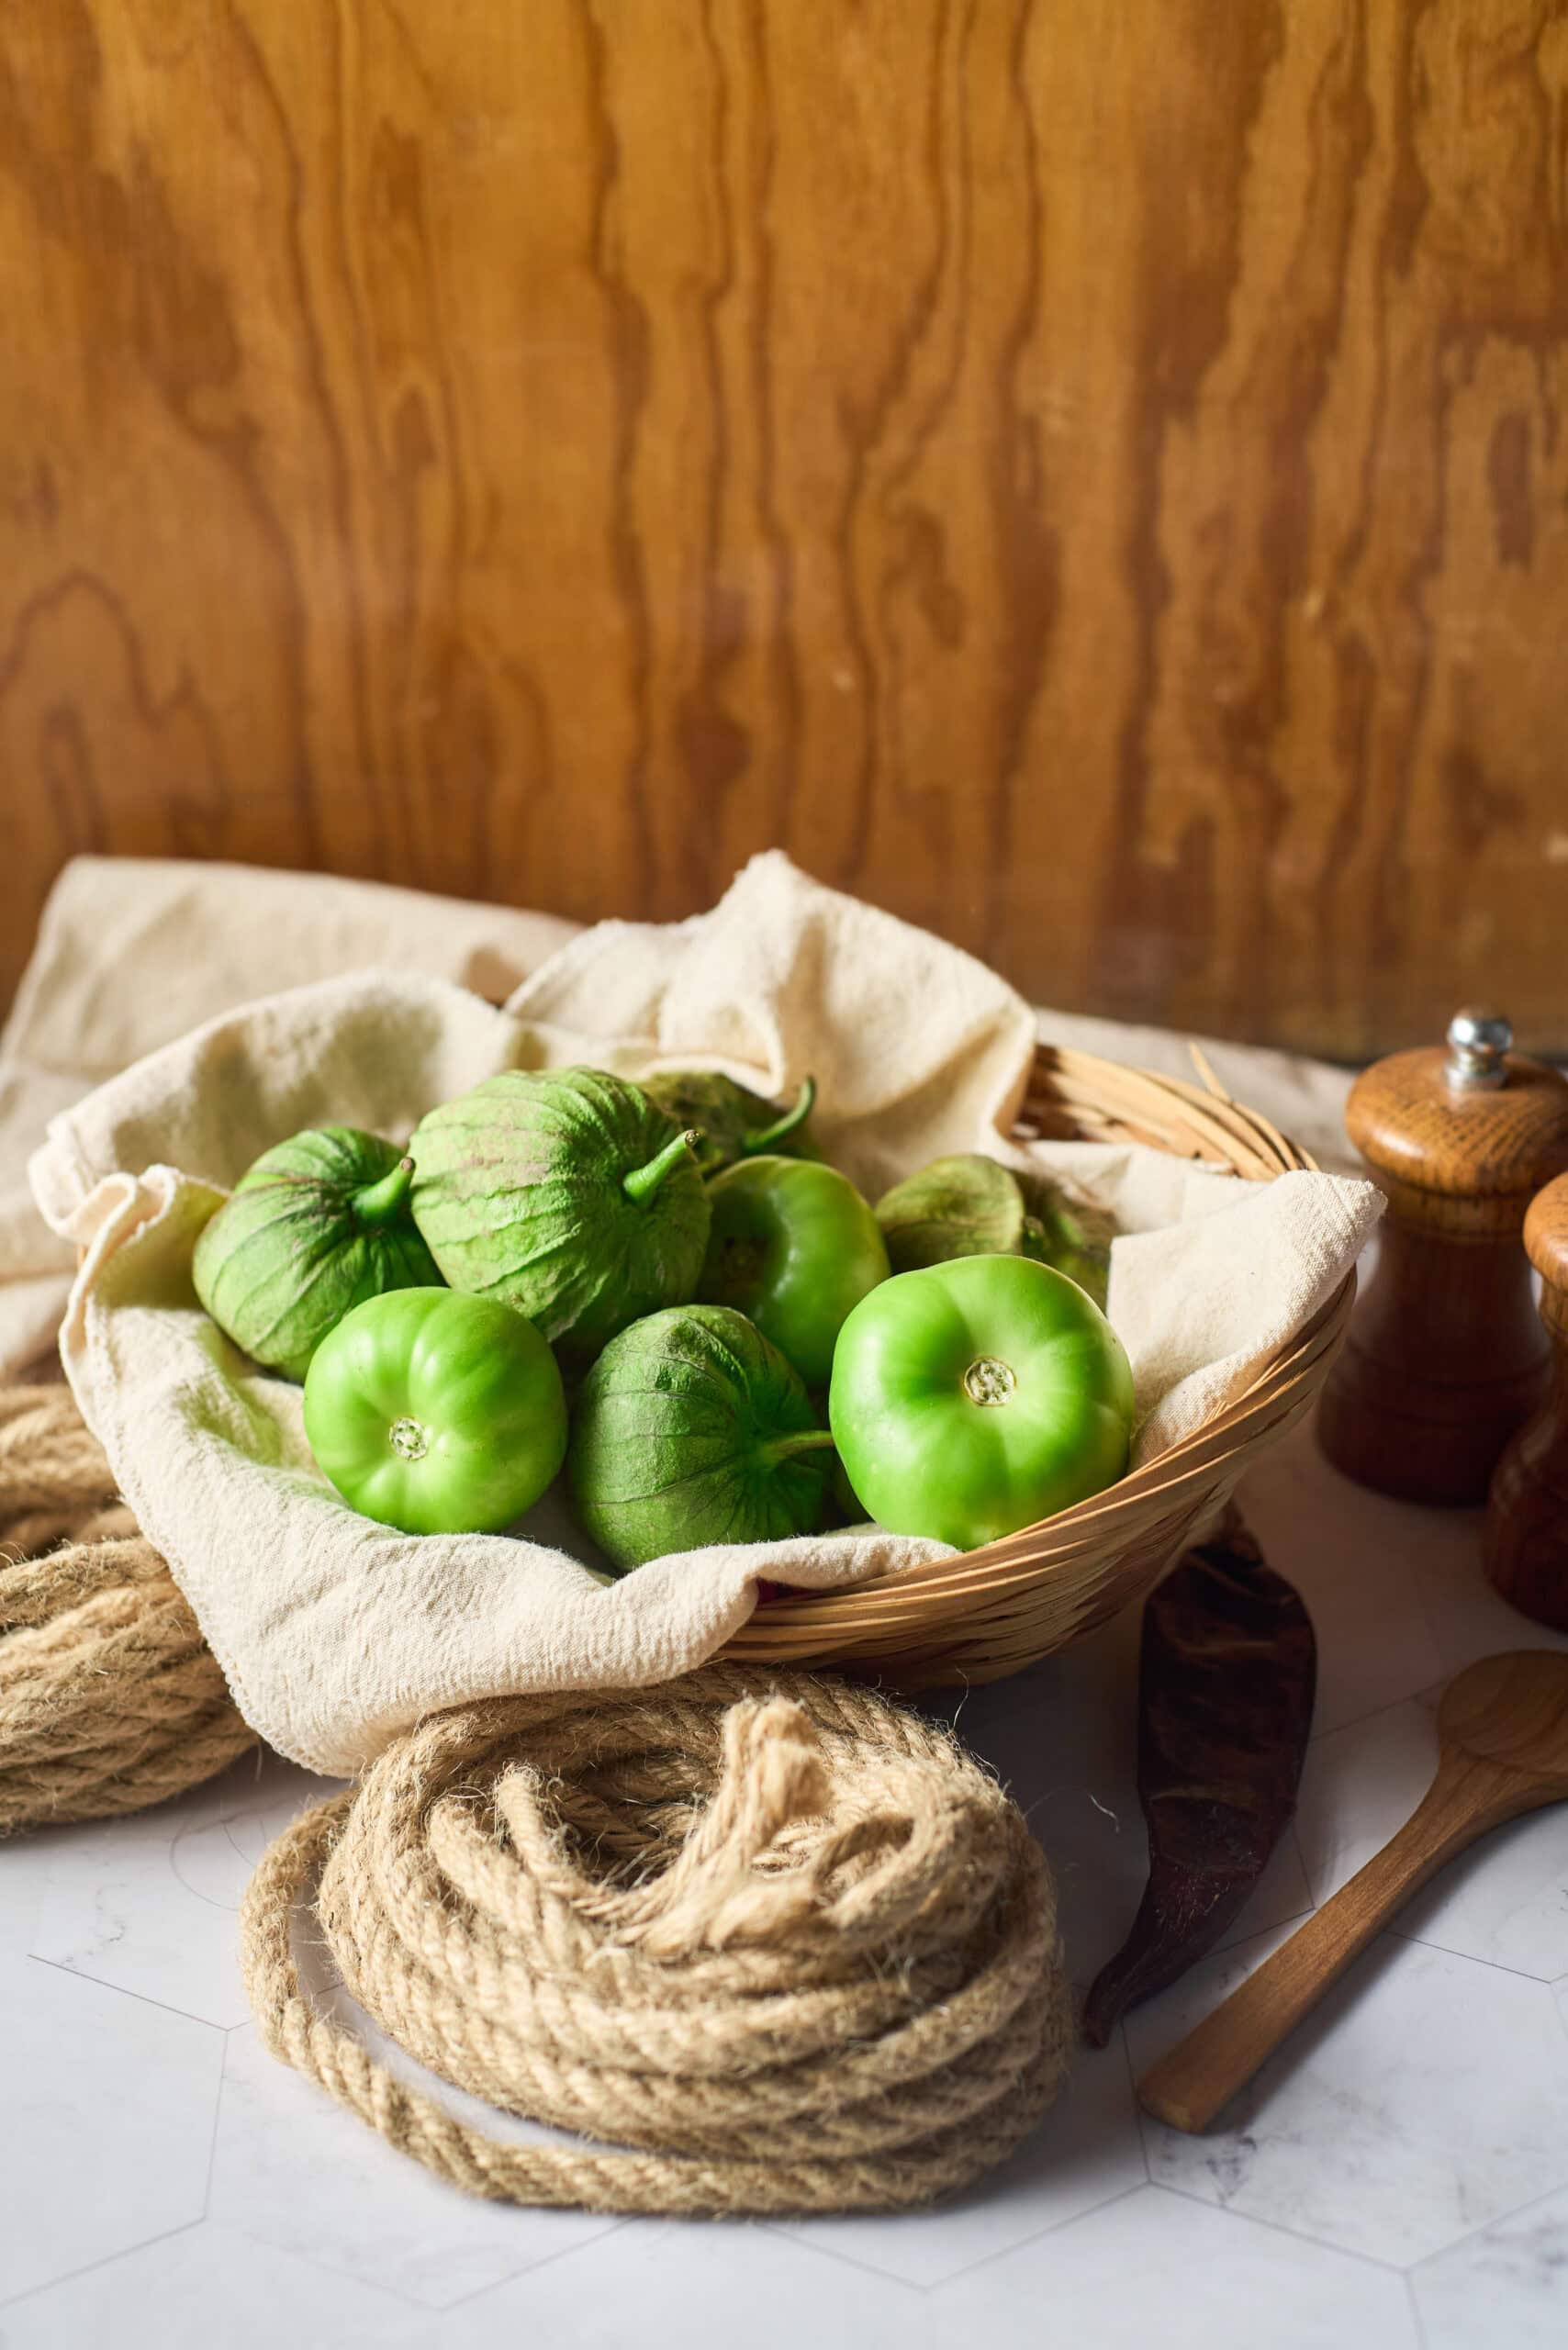
The process for the tomatillos is much simpler. Focus on charring the top, bottom, and as many sides as possible to achieve a well-rounded color and flavor. They can be removed when they are three-quarters cooked, as they will continue to turn pale green from the residual heat.
Layering and Assembly
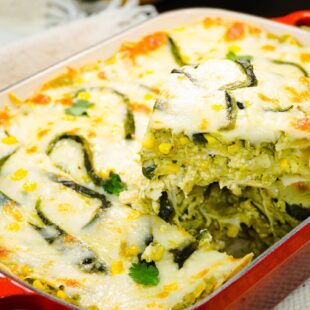
The layers in this tortilla casserole create a flavorful dish that benefits from a three-dimensional effect through varied textures. You divide all components—tortillas, crema mixture, chicken filling, rajas (sliced poblanos), and Oaxaca cheese—into three equal portions for perfectly distributed layers.
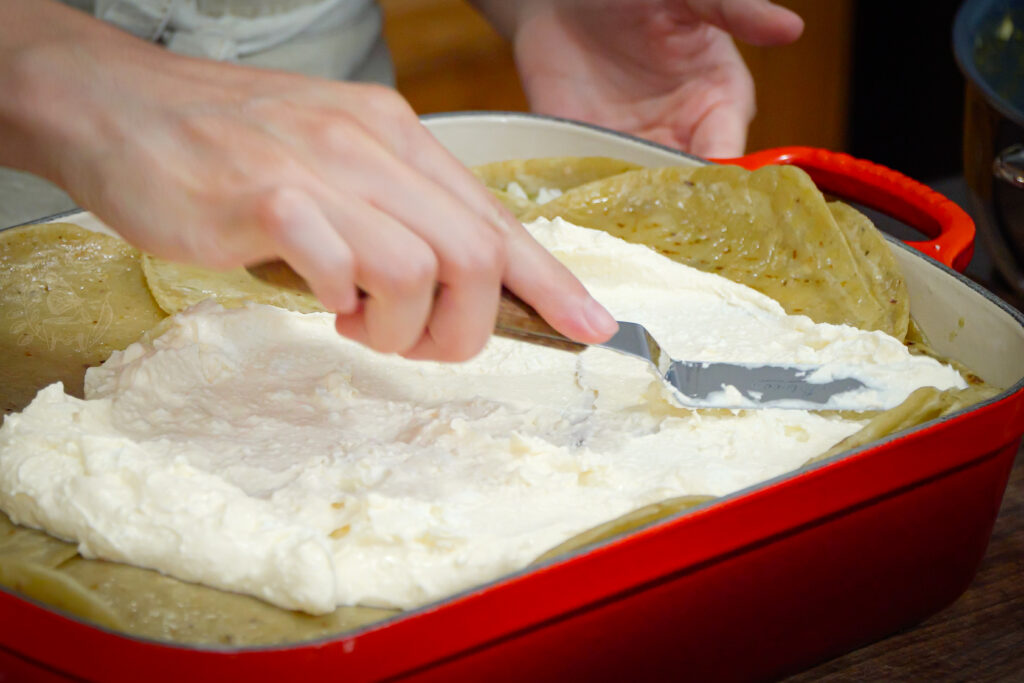
Spray a 10×13-inch baking dish (not including the handles) with non-stick spray. Begin by layering the corn tortillas to cover the entire bottom of the casserole.
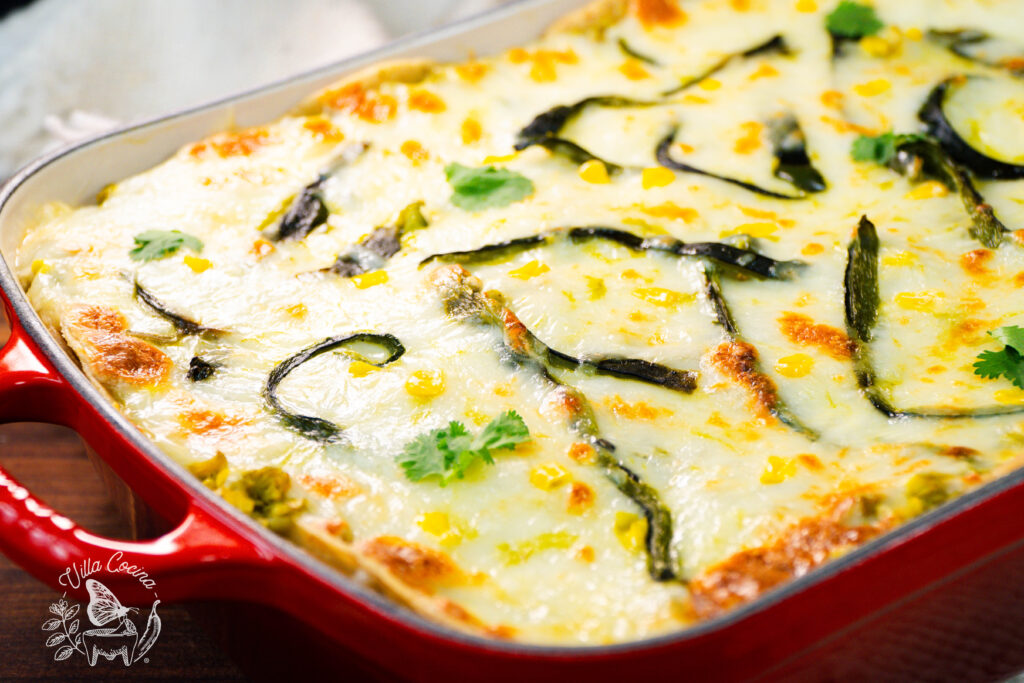
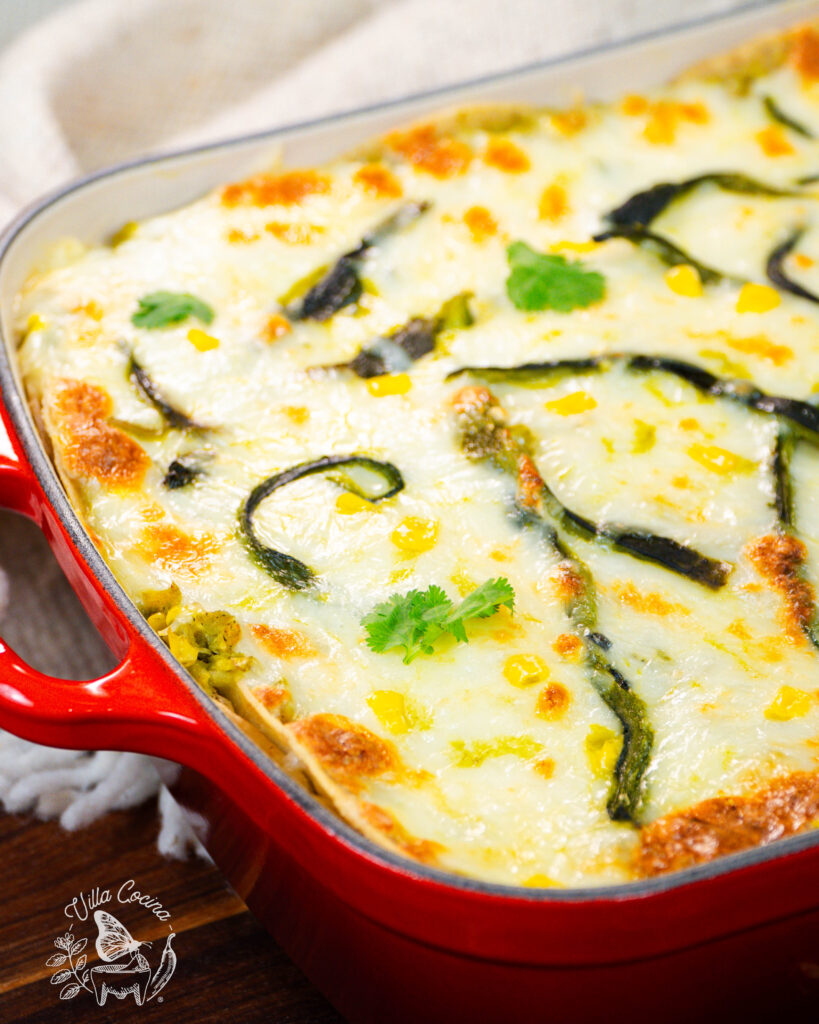
Spread some of the crema/requesón mixture over the tortillas, ensuring you cover every surface for a well-balanced bite. Next, add the chicken poblano filling, followed by the rajas, and top with a generous portion of Oaxaca cheese, known as “quesillo” in Oaxaca.
As you assemble your Pastel Azteca, first spread each layer evenly to cover the one below. This ensures that every piece showcases the full flavor of its ingredients—we definitely don’t want to miss out! Next, repeat this process three times, and that’s it!
Easy to Follow Recipe Video
Below is my easy to follow video tutorial on how to make this Pastel Azteca.
If you enjoyed the video, subscribe to my YouTube channel and click the bell icon to receive notifications whenever we post a brand new video. Thank you for your support!
Substitutions
This dish is definitely one you can make variations of. You can use a tomato-based salsa if that’s what you prefer, or switch out the protein, cheese, and even peppers. Here are some options to experiment with:
- Poblano Salsa – Tomato-based salsa
- Requesón – Ricotta cheese
- Crema Mexicana – Crème fraîche or sour cream (sour cream will add a thicker consistency and tangier flavor; you can thin it out with a little heavy cream or milk)
- Chicken – Shredded pork or beef
- Poblanos – Hatch chili
- Corn – Mushrooms or frozen veggies
- Oaxaca Cheese – Mozzarella, Chihuahua, or Manchego
I advise against using flour tortillas, as they can become soggy more quickly and alter the dish’s texture. Traditionally, corn tortillas are the preferred choice.
Explore More Recipes:
Store
If you have leftovers, you can store them in an airtight container in the refrigerator for up to 3-4 days.
FAQs – Answered
Q: Can I use flour tortillas instead of corn tortillas?
A: While you can use flour tortillas, they tend to become soggy more quickly and may alter the dish’s texture and flavor. Corn tortillas are the traditional choice and yield the best results.
Q: How spicy is Pastel Azteca?
A: The spice level of Pastel Azteca can vary based on the type of salsa and peppers used. Poblano and jalapeño peppers are generally mild, though you may occasionally encounter a spicier one.
Removing the seeds and membranes can help reduce the heat. Overall, this dish is typically mild, but the spice level can fluctuate depending on the specific ingredients and batch variations in the peppers.
Pastel Azteca Recipe
Ingredients
Poblano Salsa
- 1 lb whole tomatillos
- 3 jalapeño peppers
- 8 poblano peppers
- 1/2 bunch cilantro
- 1 1/2 cups chicken broth, low-sodium
Chicken Filling
- 2 tbsp avocado oil
- 3 ears fresh corn
- 1 white onion, diced
- 4 garlic cloves, minced
- 1/4 tsp ground cumin
- 1 tsp dried Mexican oregano
- 4 cups cooked chicken, shredded
- To taste salt
Requesón Mixture
- 1 1/2 cups Mexican cream
- 2 cups requesón
- 24 oz Oaxaca cheese, grated
Additional Ingredients
- 28 corn tortillas
- Avocado oil for pan-frying
- Non-stick baking spray
Instructions
Poblano Chicken Filling
- Poblano Salsa: Heat a comal or cast iron skillet over medium to medium-high heat. Roast the poblano peppers, jalapeños, and tomatillos until charred (blackened) all around.
- Transfer the peppers to a bowl, cover with plastic wrap, and let them sweat for 10-15 minutes. Allow the tomatillos to cool on a dish.
- Once the skin of the peppers has loosened, peel it off and cut the peppers open to remove the seeds and stems.
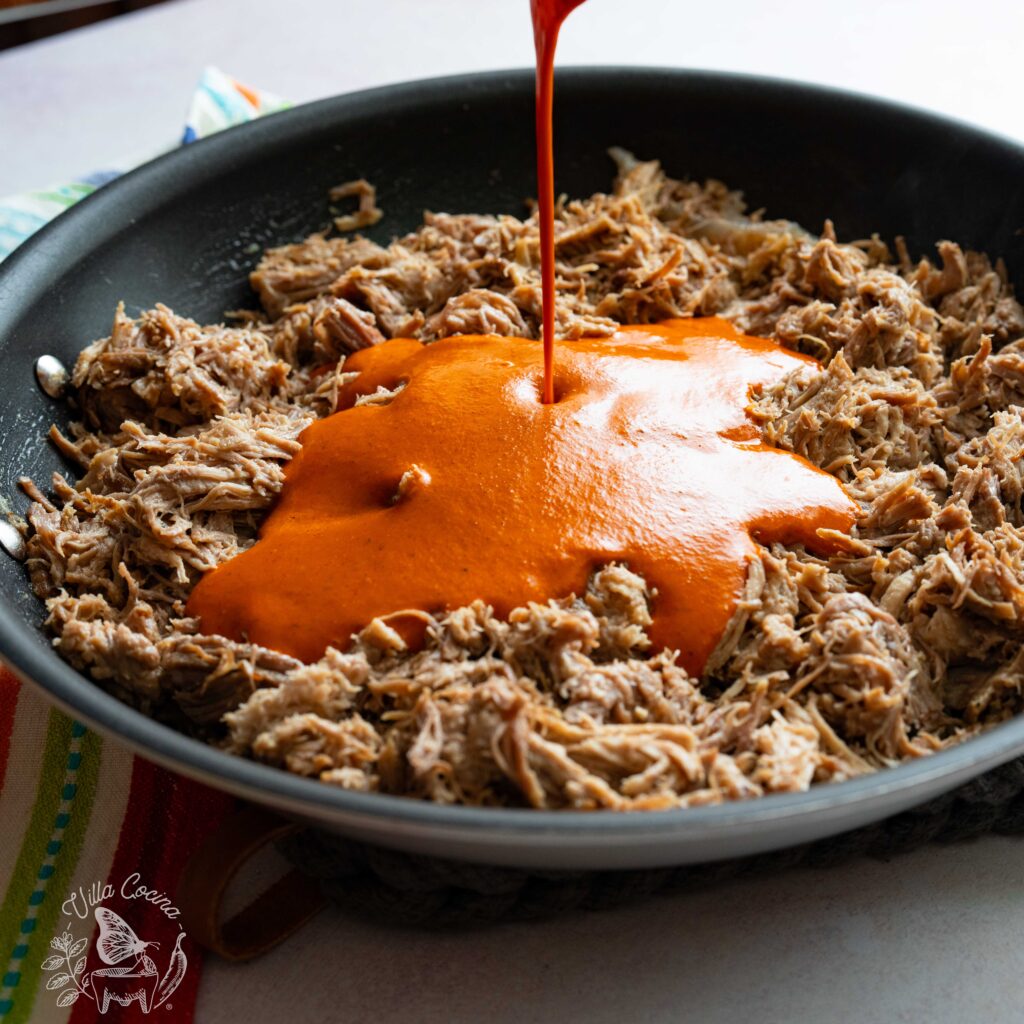
- Slice six poblanos into strips (rajas) and set aside. Blend the remaining two poblanos with the jalapeños, tomatillos, cilantro, and broth until smooth. Set aside until needed.
- Stir in the garlic, cumin, and oregano, and cook for one minute. Pour in the green salsa, bring to a boil, then reduce to a gentle simmer and cook until slightly thickened, about 8 minutes. Mix in the salt and chicken, then turn off the heat and set aside to cool slightly.
Prep
- Heat avocado oil. Lightly pan fry each tortilla until pliable, just a few seconds per side. Transfer to a dish and continue frying the rest.
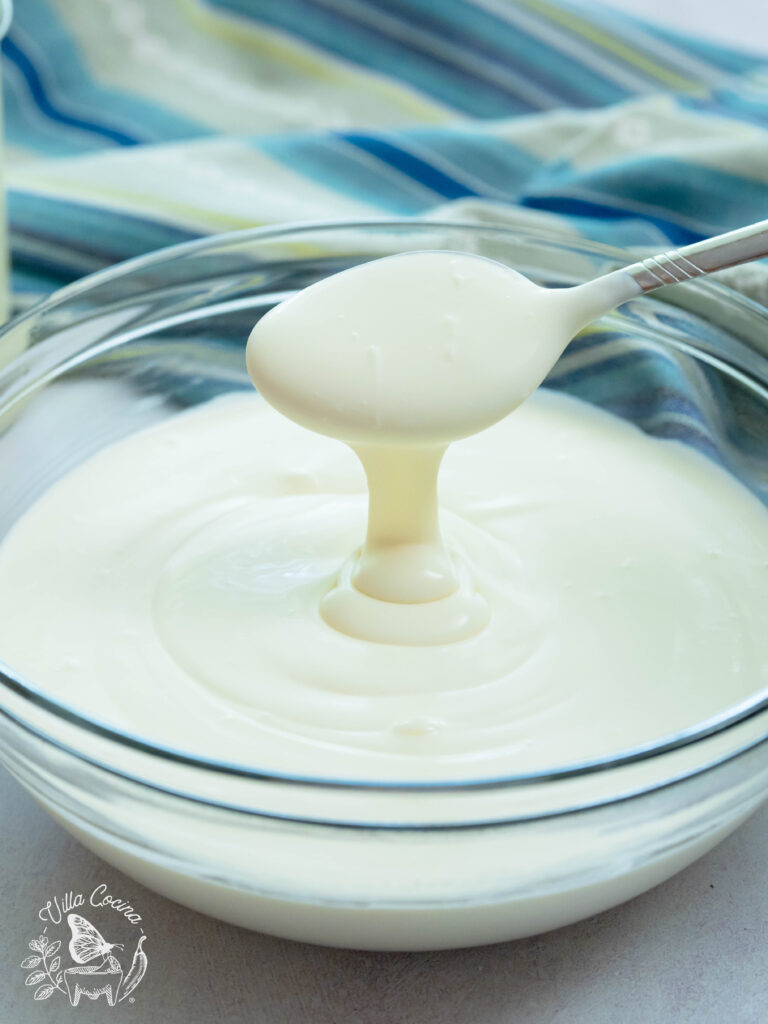
- In a medium bowl, combine requesón cheese and Mexican cream. Use a spatula to stir and fold them together, leaving a few lumps.
- Preheat the oven to 350°F.
Assemble the Pastel Azteca
- Grab a 10×13 baking dish (handles not included) and spray the bottom with non-stick baking spray.
- While assembling your Pastel Azteca, spread each layer evenly to cover the one below. Repeat this process three times for a total of three layers.
- First, pat dry excess oil from the tortillas with a paper towel. Arrange 8-9 of them to cover the bottom of the dish. Spread the requesón mixture, followed by the chicken filling and sliced poblanos. Finally, sprinkle with Oaxaca cheese. Repeat for the remaining two layers.
- Bake for 20 minutes until the cheese is melted, then switch to broil to achieve a golden top. Allow it to rest for 15 minutes before slicing and serving.
Nutrition
Did you make this recipe?
Show some love! Tag @villacocinaofficial on Instagram and drop a 5-star review. Your support means everything—thanks!


Ellen
Can you tell us the weight of 1/2 a bunch of cilantro? The size of a bunch of cilantro has shrunk significantly in the past year at my supermarket in NE Connecticut…
Villa Cocina
Typically, a full bunch weighs 2 to 3 oz, so 1/2 a bunch is about 1 to 1.5 oz.
Olivia
I made this last night and it did take me far longer than expected (learning curve with the peppers for the salsa) but it was so worth it to make the salsa from scratch! I cut it in half cause I only have an 8×8 baking dish and cooking time was all the same. One of the best things I have cooked in a while :))
Villa Cocina
I’m so glad you made it and enjoyed it! Thanks so much for the 5 stars — feeling the love!